Introduction
Welcome,
This is the official documentation for the Adventure'Z theme. You'll find all the steps you need to install and configure your theme in this documentation.
Demo link: Click here

Welcome,
This is the official documentation for the Adventure'Z theme. You'll find all the steps you need to install and configure your theme in this documentation.
Demo link: Click here
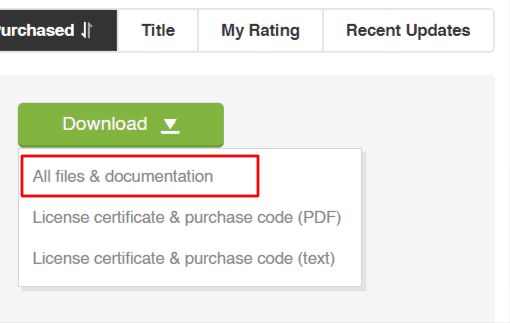
After purchasing our theme from Themeforest, you will need to download the theme package for your use. To download the package, please login to your Themeforest account, navigate to "Downloads", click the "Download" button in the left of the theme, choose "All files & documentation" to download our theme package to your computer.
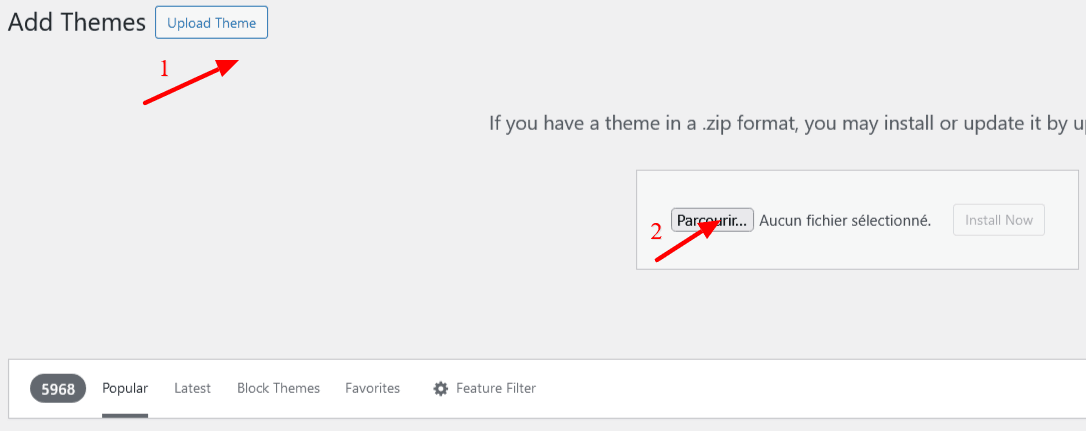
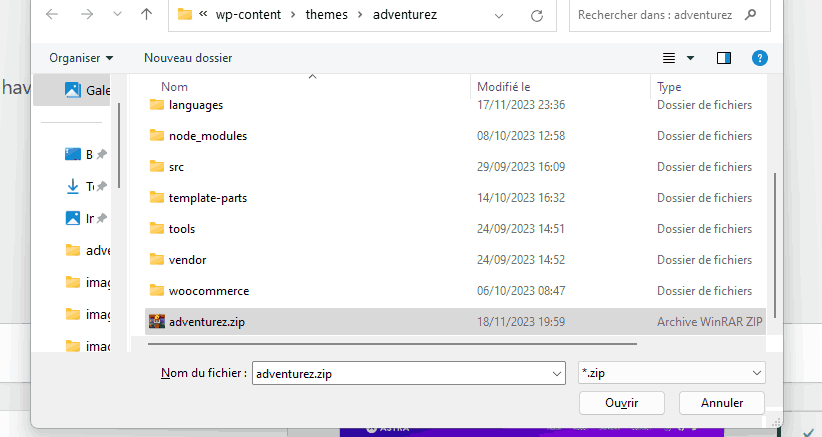
After downloading, you need to UNZIP package file
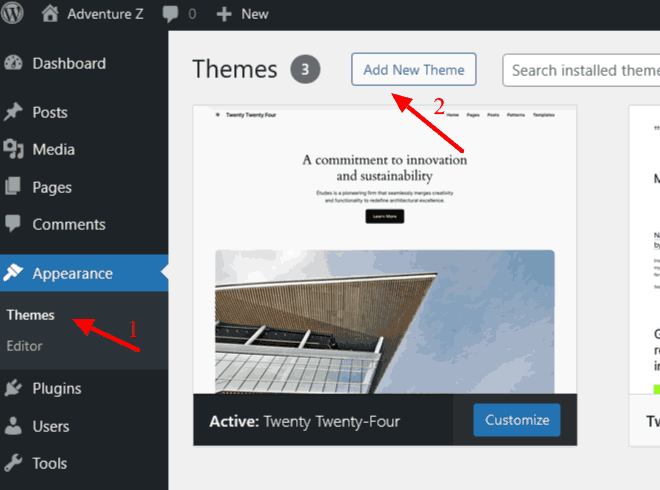
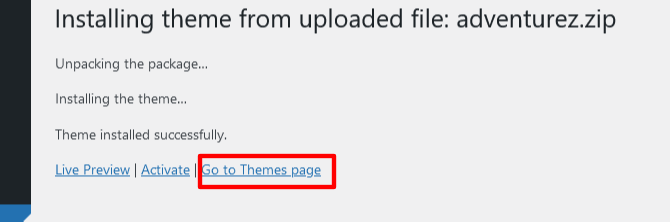
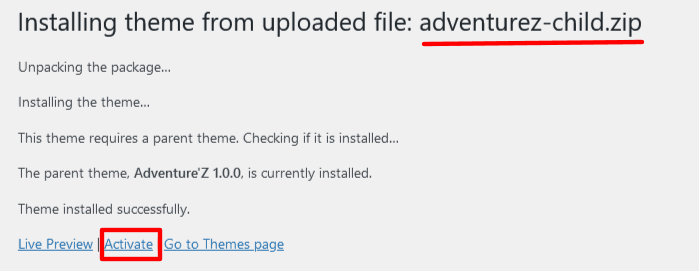
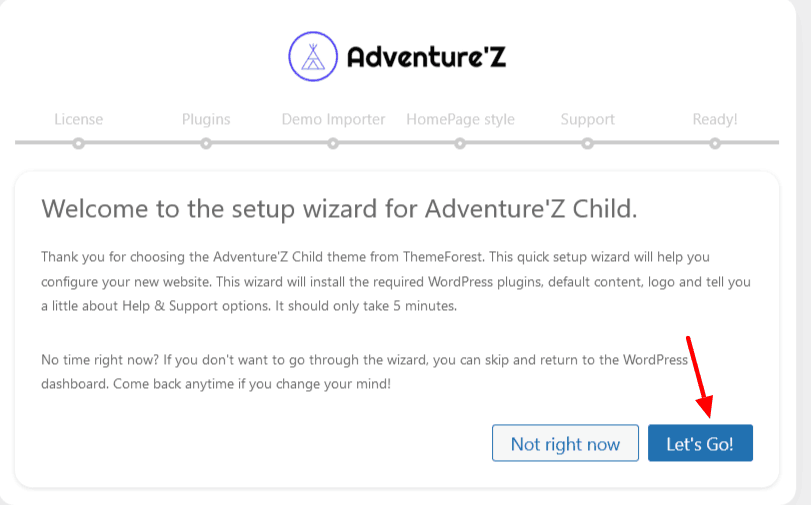
After activating the theme, you will be automatically redirected to the setup page.
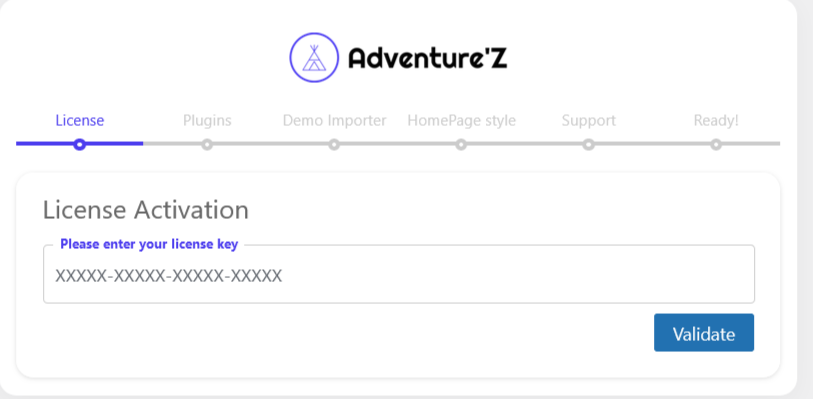
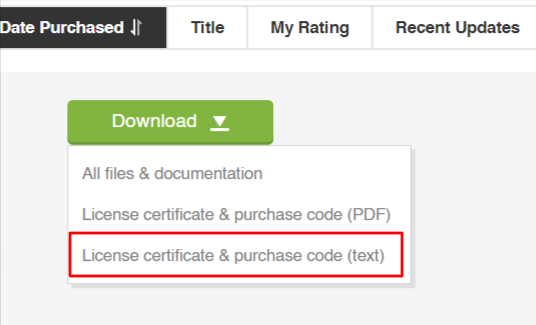
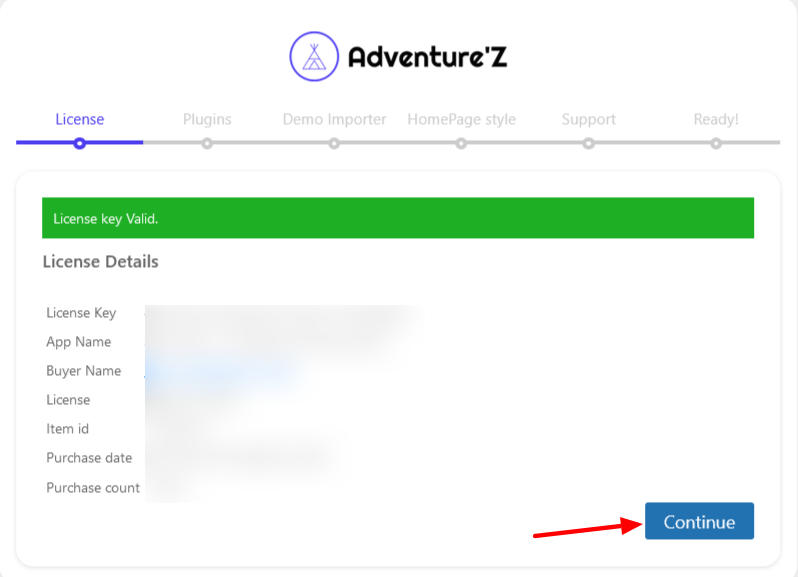
For the first step, you need to activate your license. To do this, go to your ThemeForest account and access the downloads section. click the "Download" button in the left of the theme, choose "License certificate & purchase code (text)" to download your license key
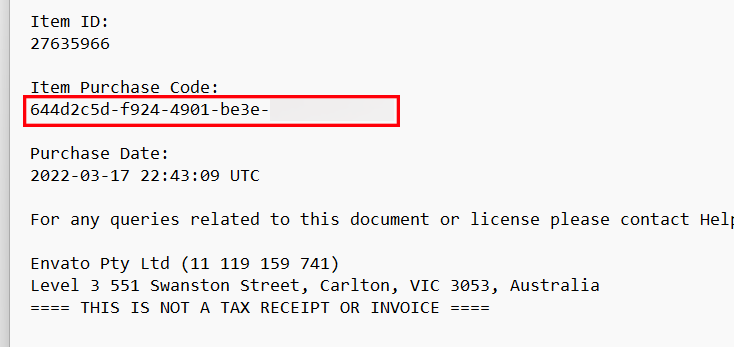
Open the download file and go to "Item Purchase Code"
Paste your license key in the field and validate, If your code is valid, you will get a confirmation page with the details of your purchase and you can continue with the theme configuration.
In this step, click on continue to install the plugins required to run the theme.
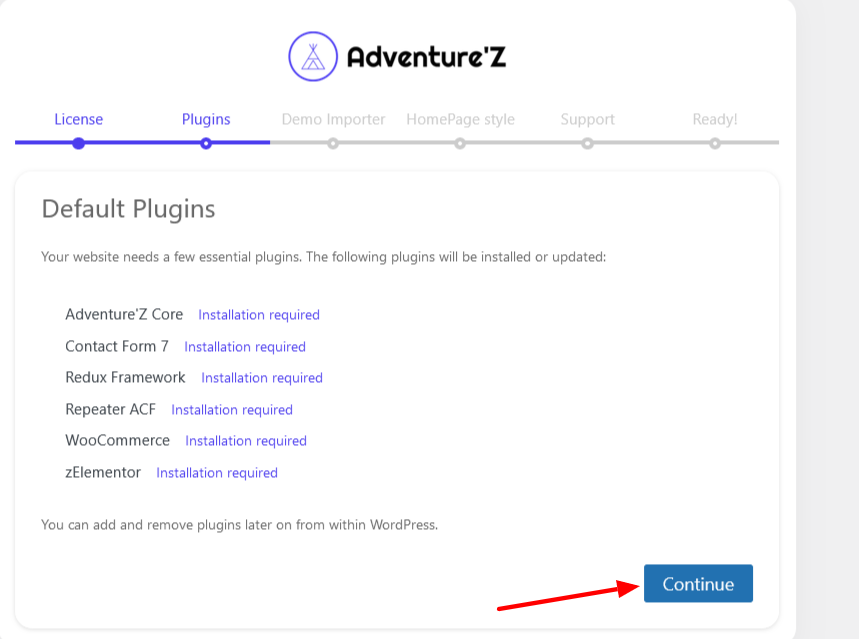
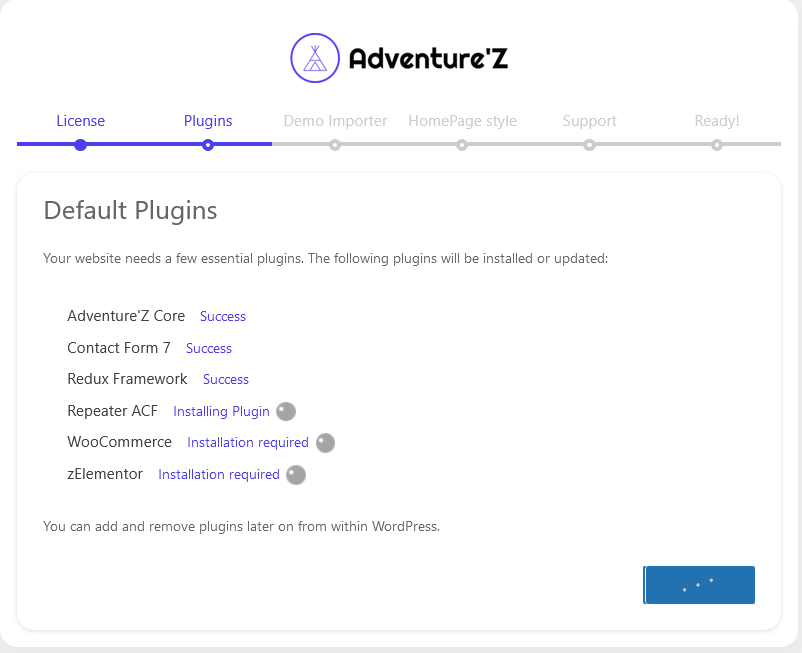
Please check that the plugins are installed and activated for the proper functioning of the theme, you can check after configuration by going to Admin menu -> Plugins
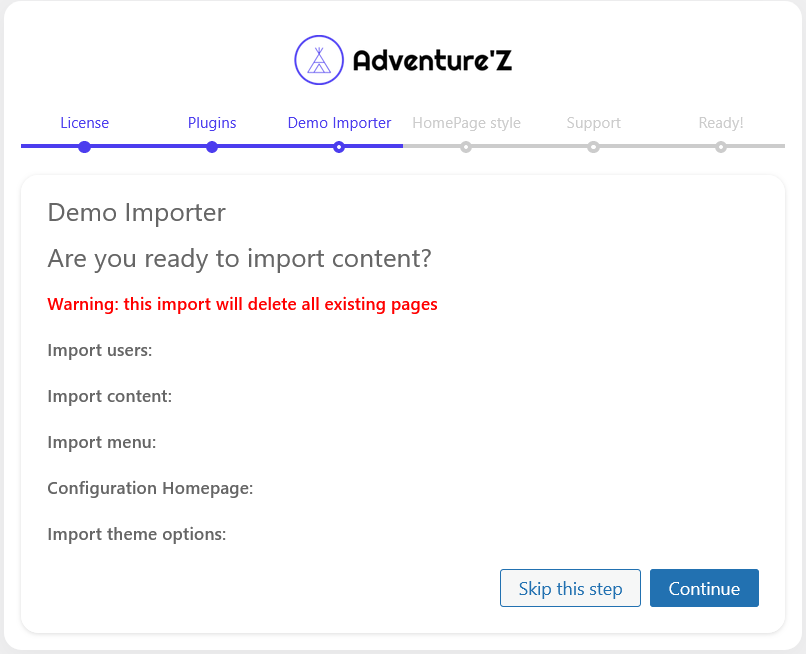
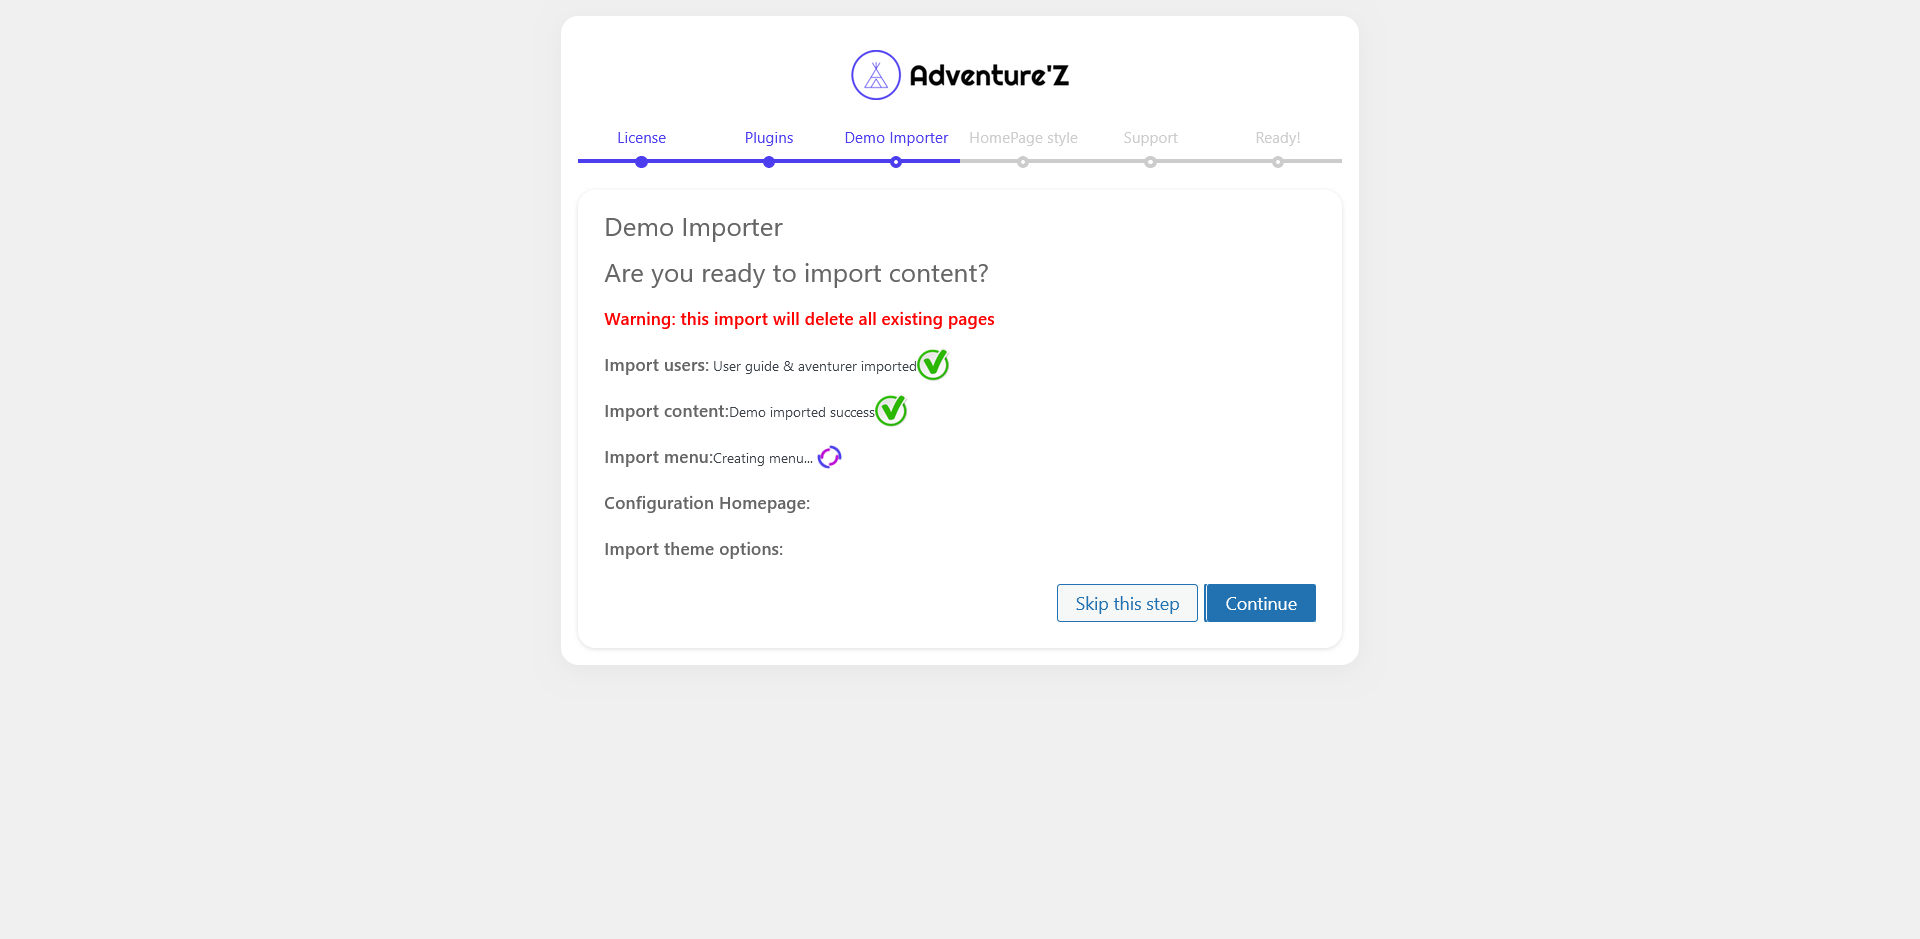
To automatically import demo data, you can simply click on "continue", if you prefer to go to a site without data (no page, no adventures, no menu...) you can "skip this step"
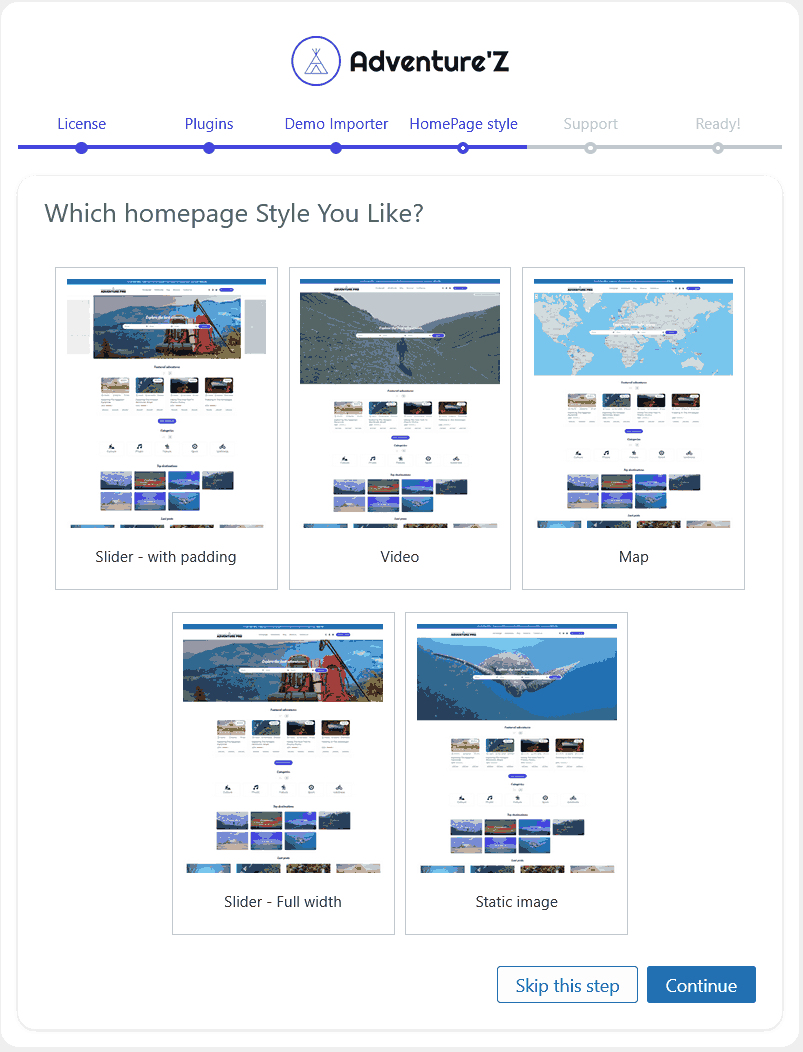
You can directly choose one of the different page styles available to set it as a default home page
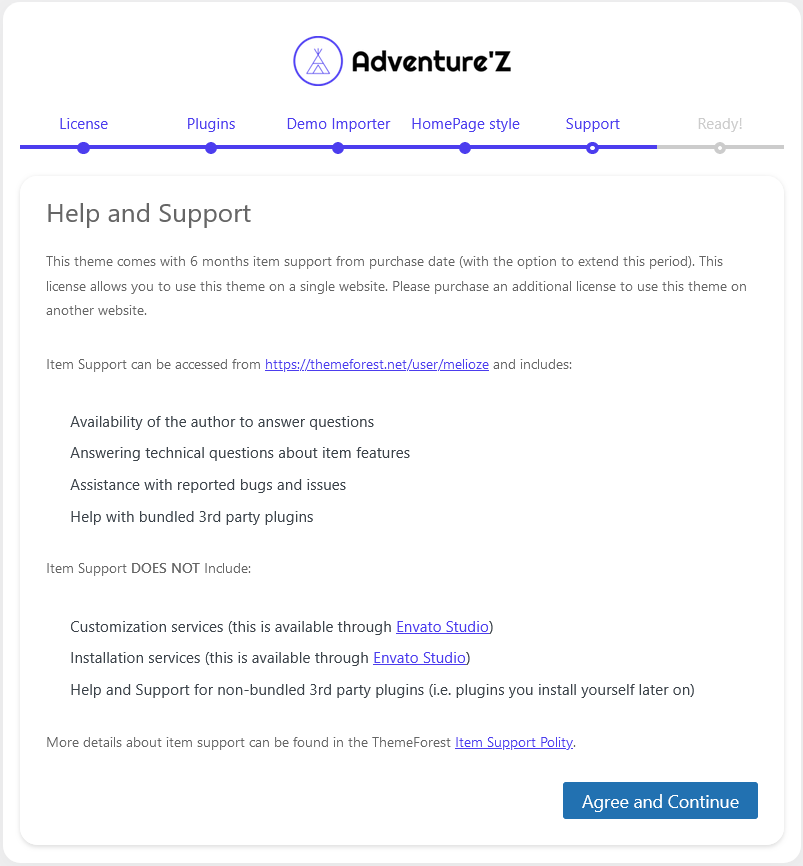
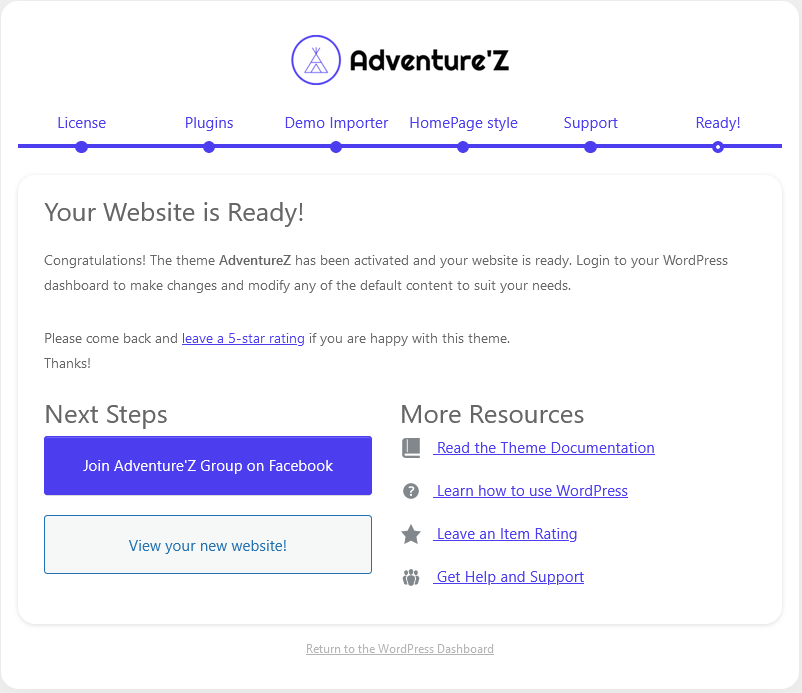
Confirmation of the end of the theme configuration, you can now have fun with your new adventure marketplace, you can also access support in case of problems and contact us on Facebook
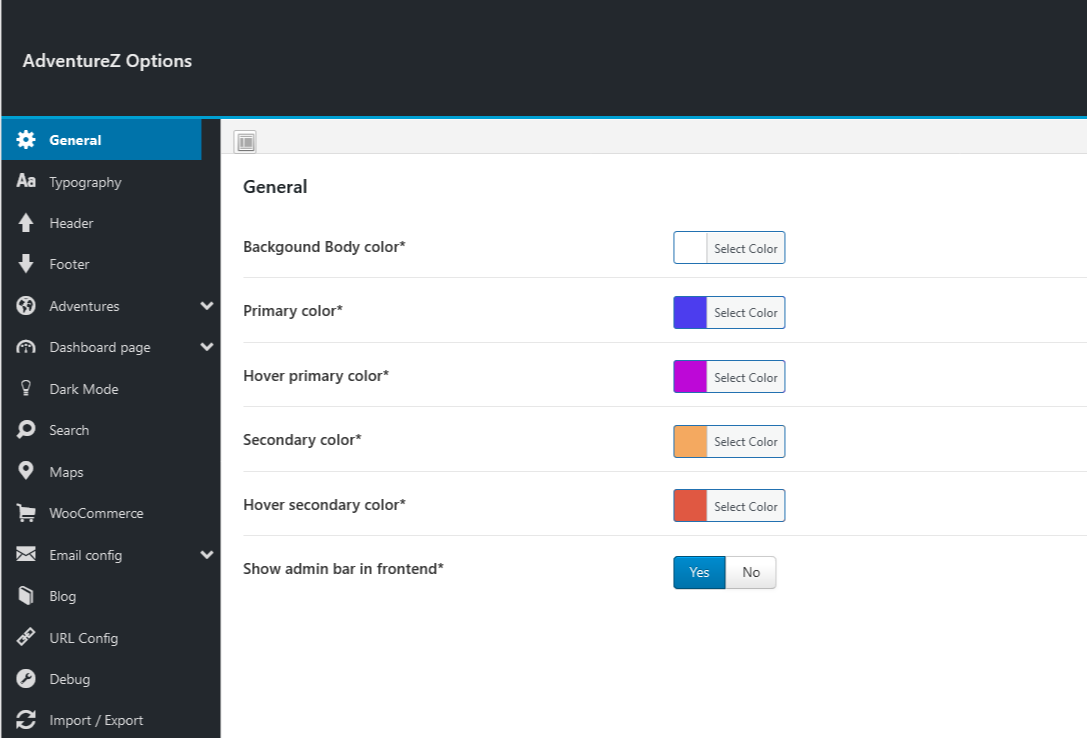
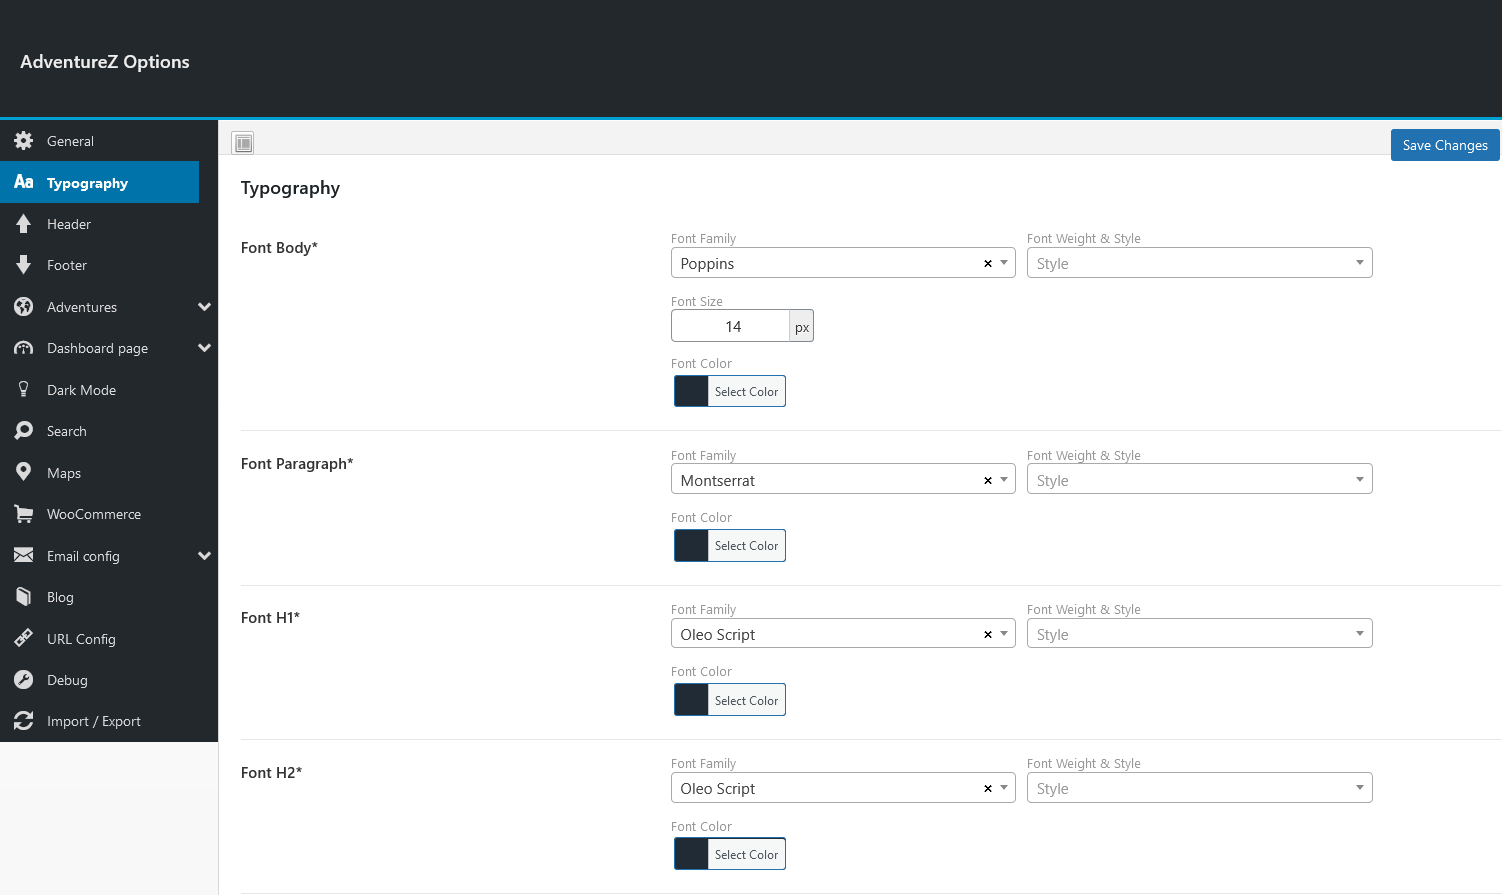
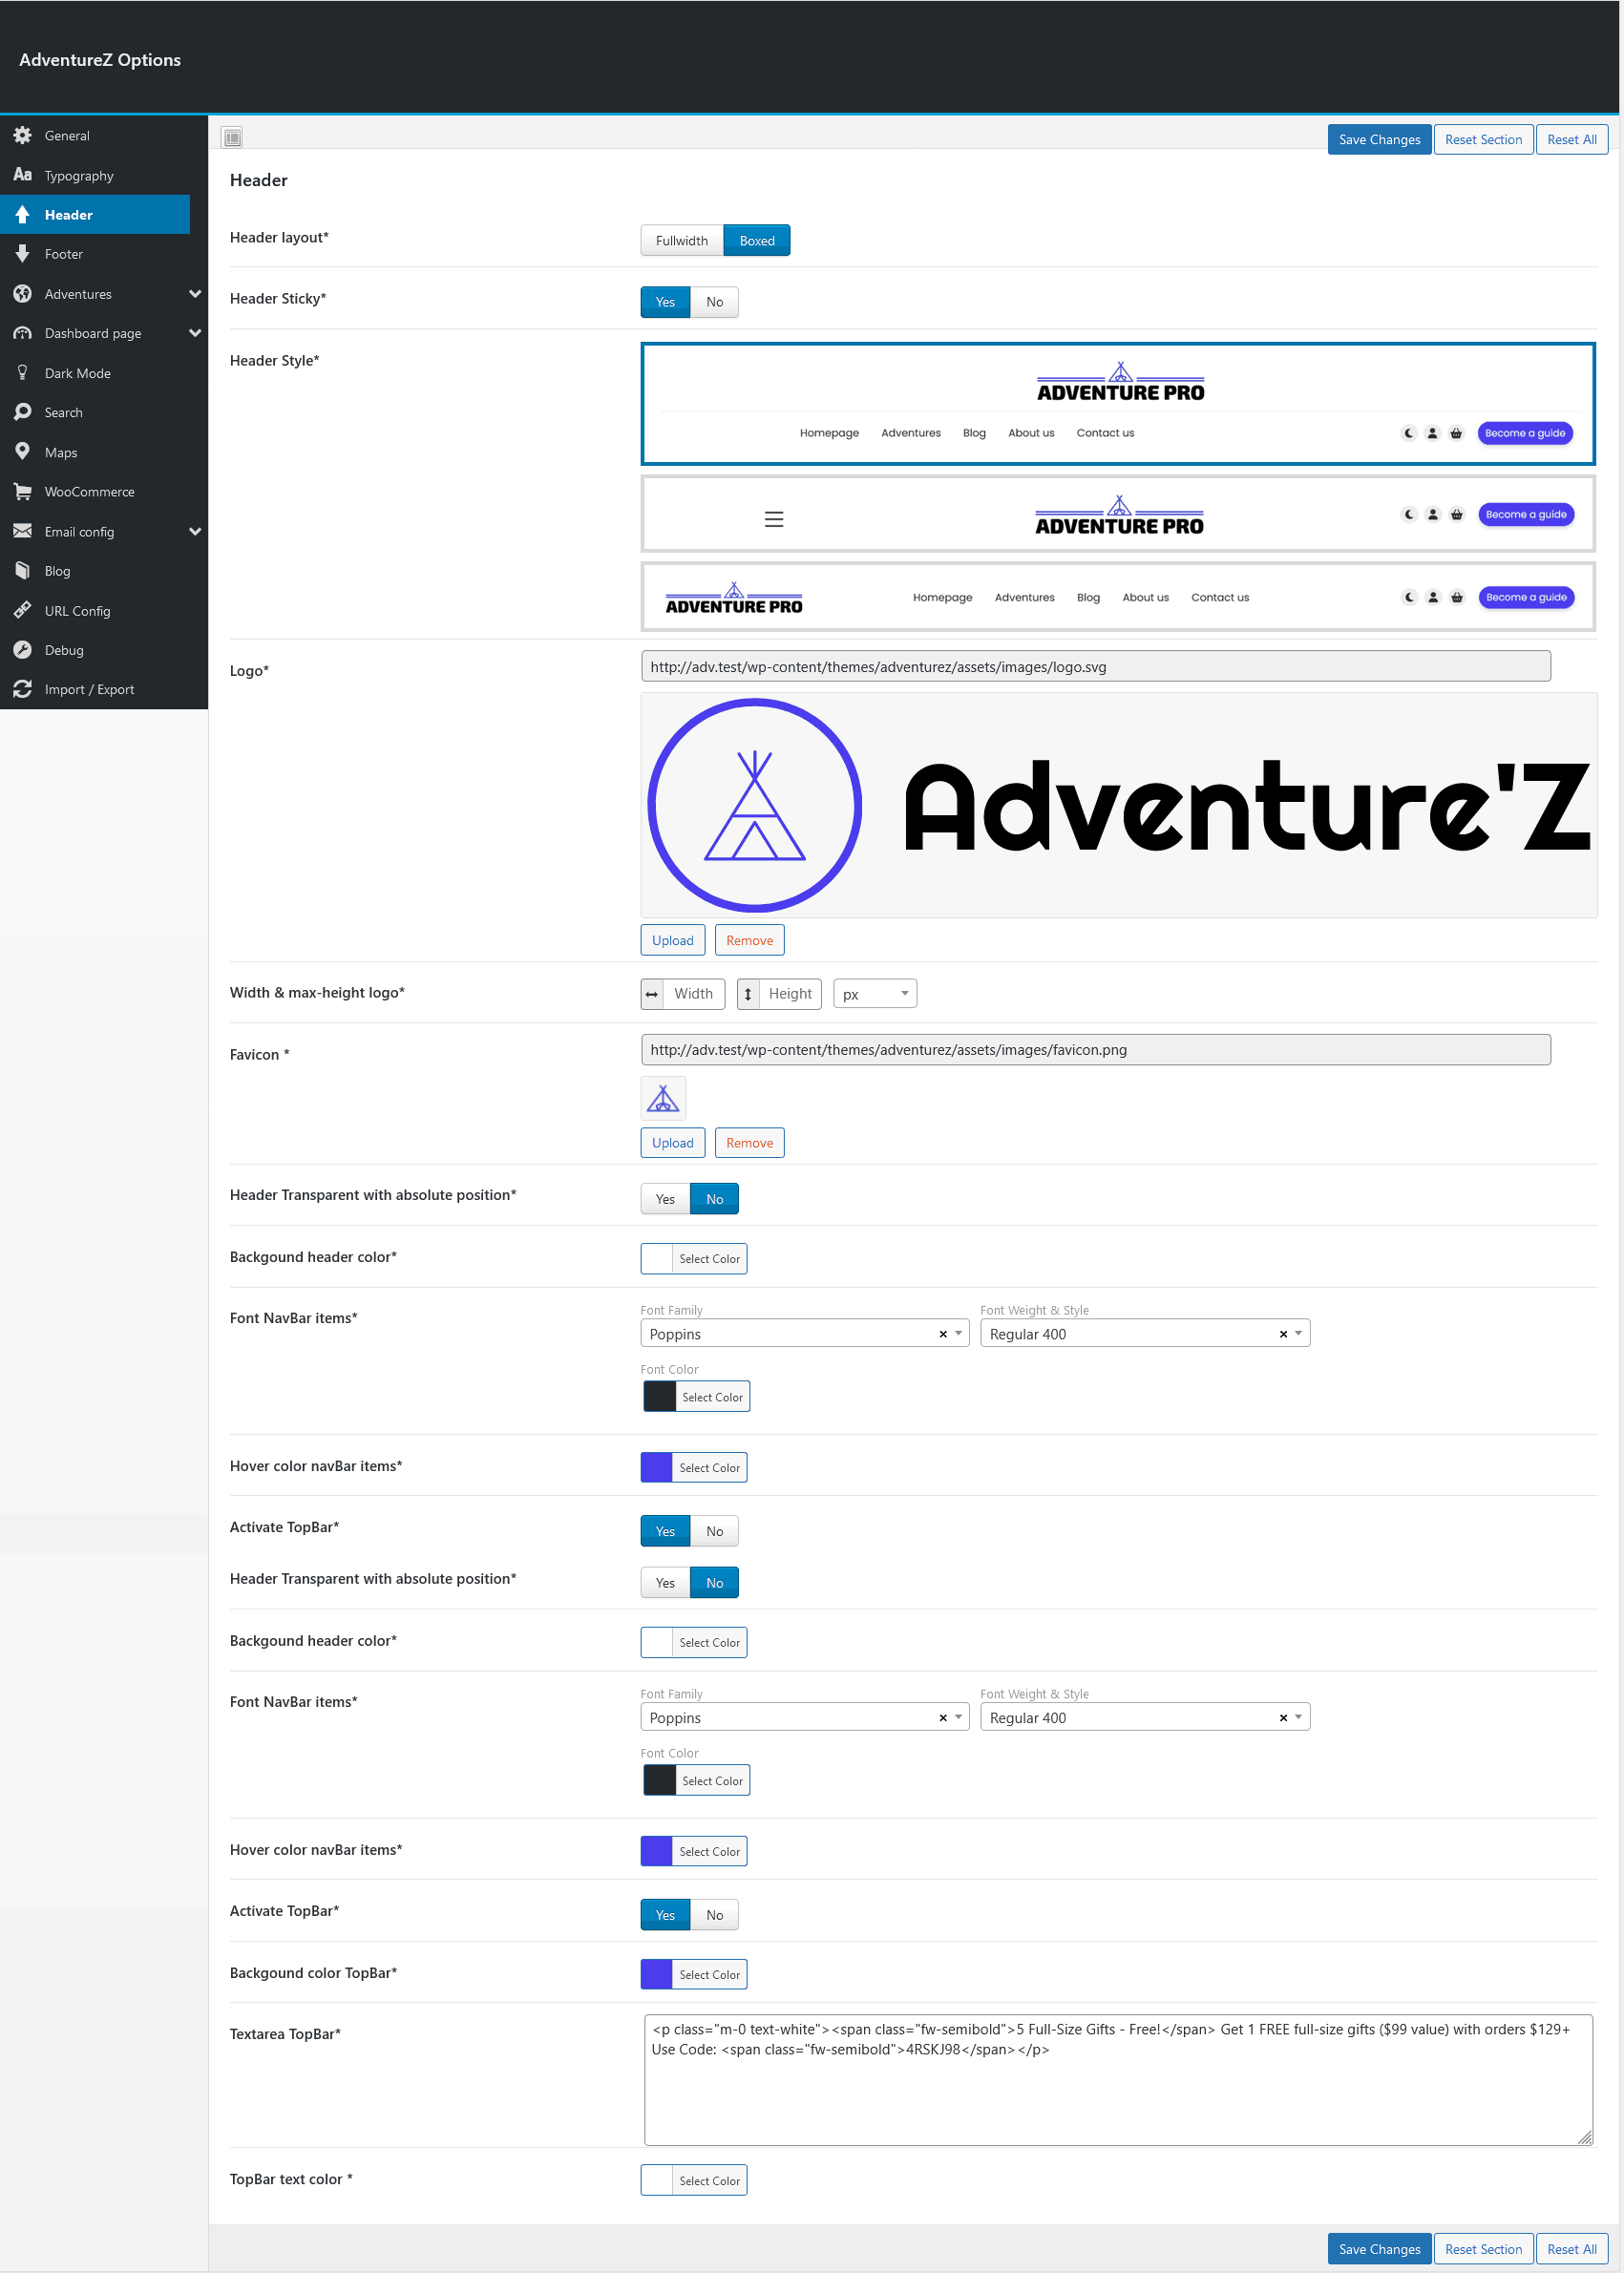
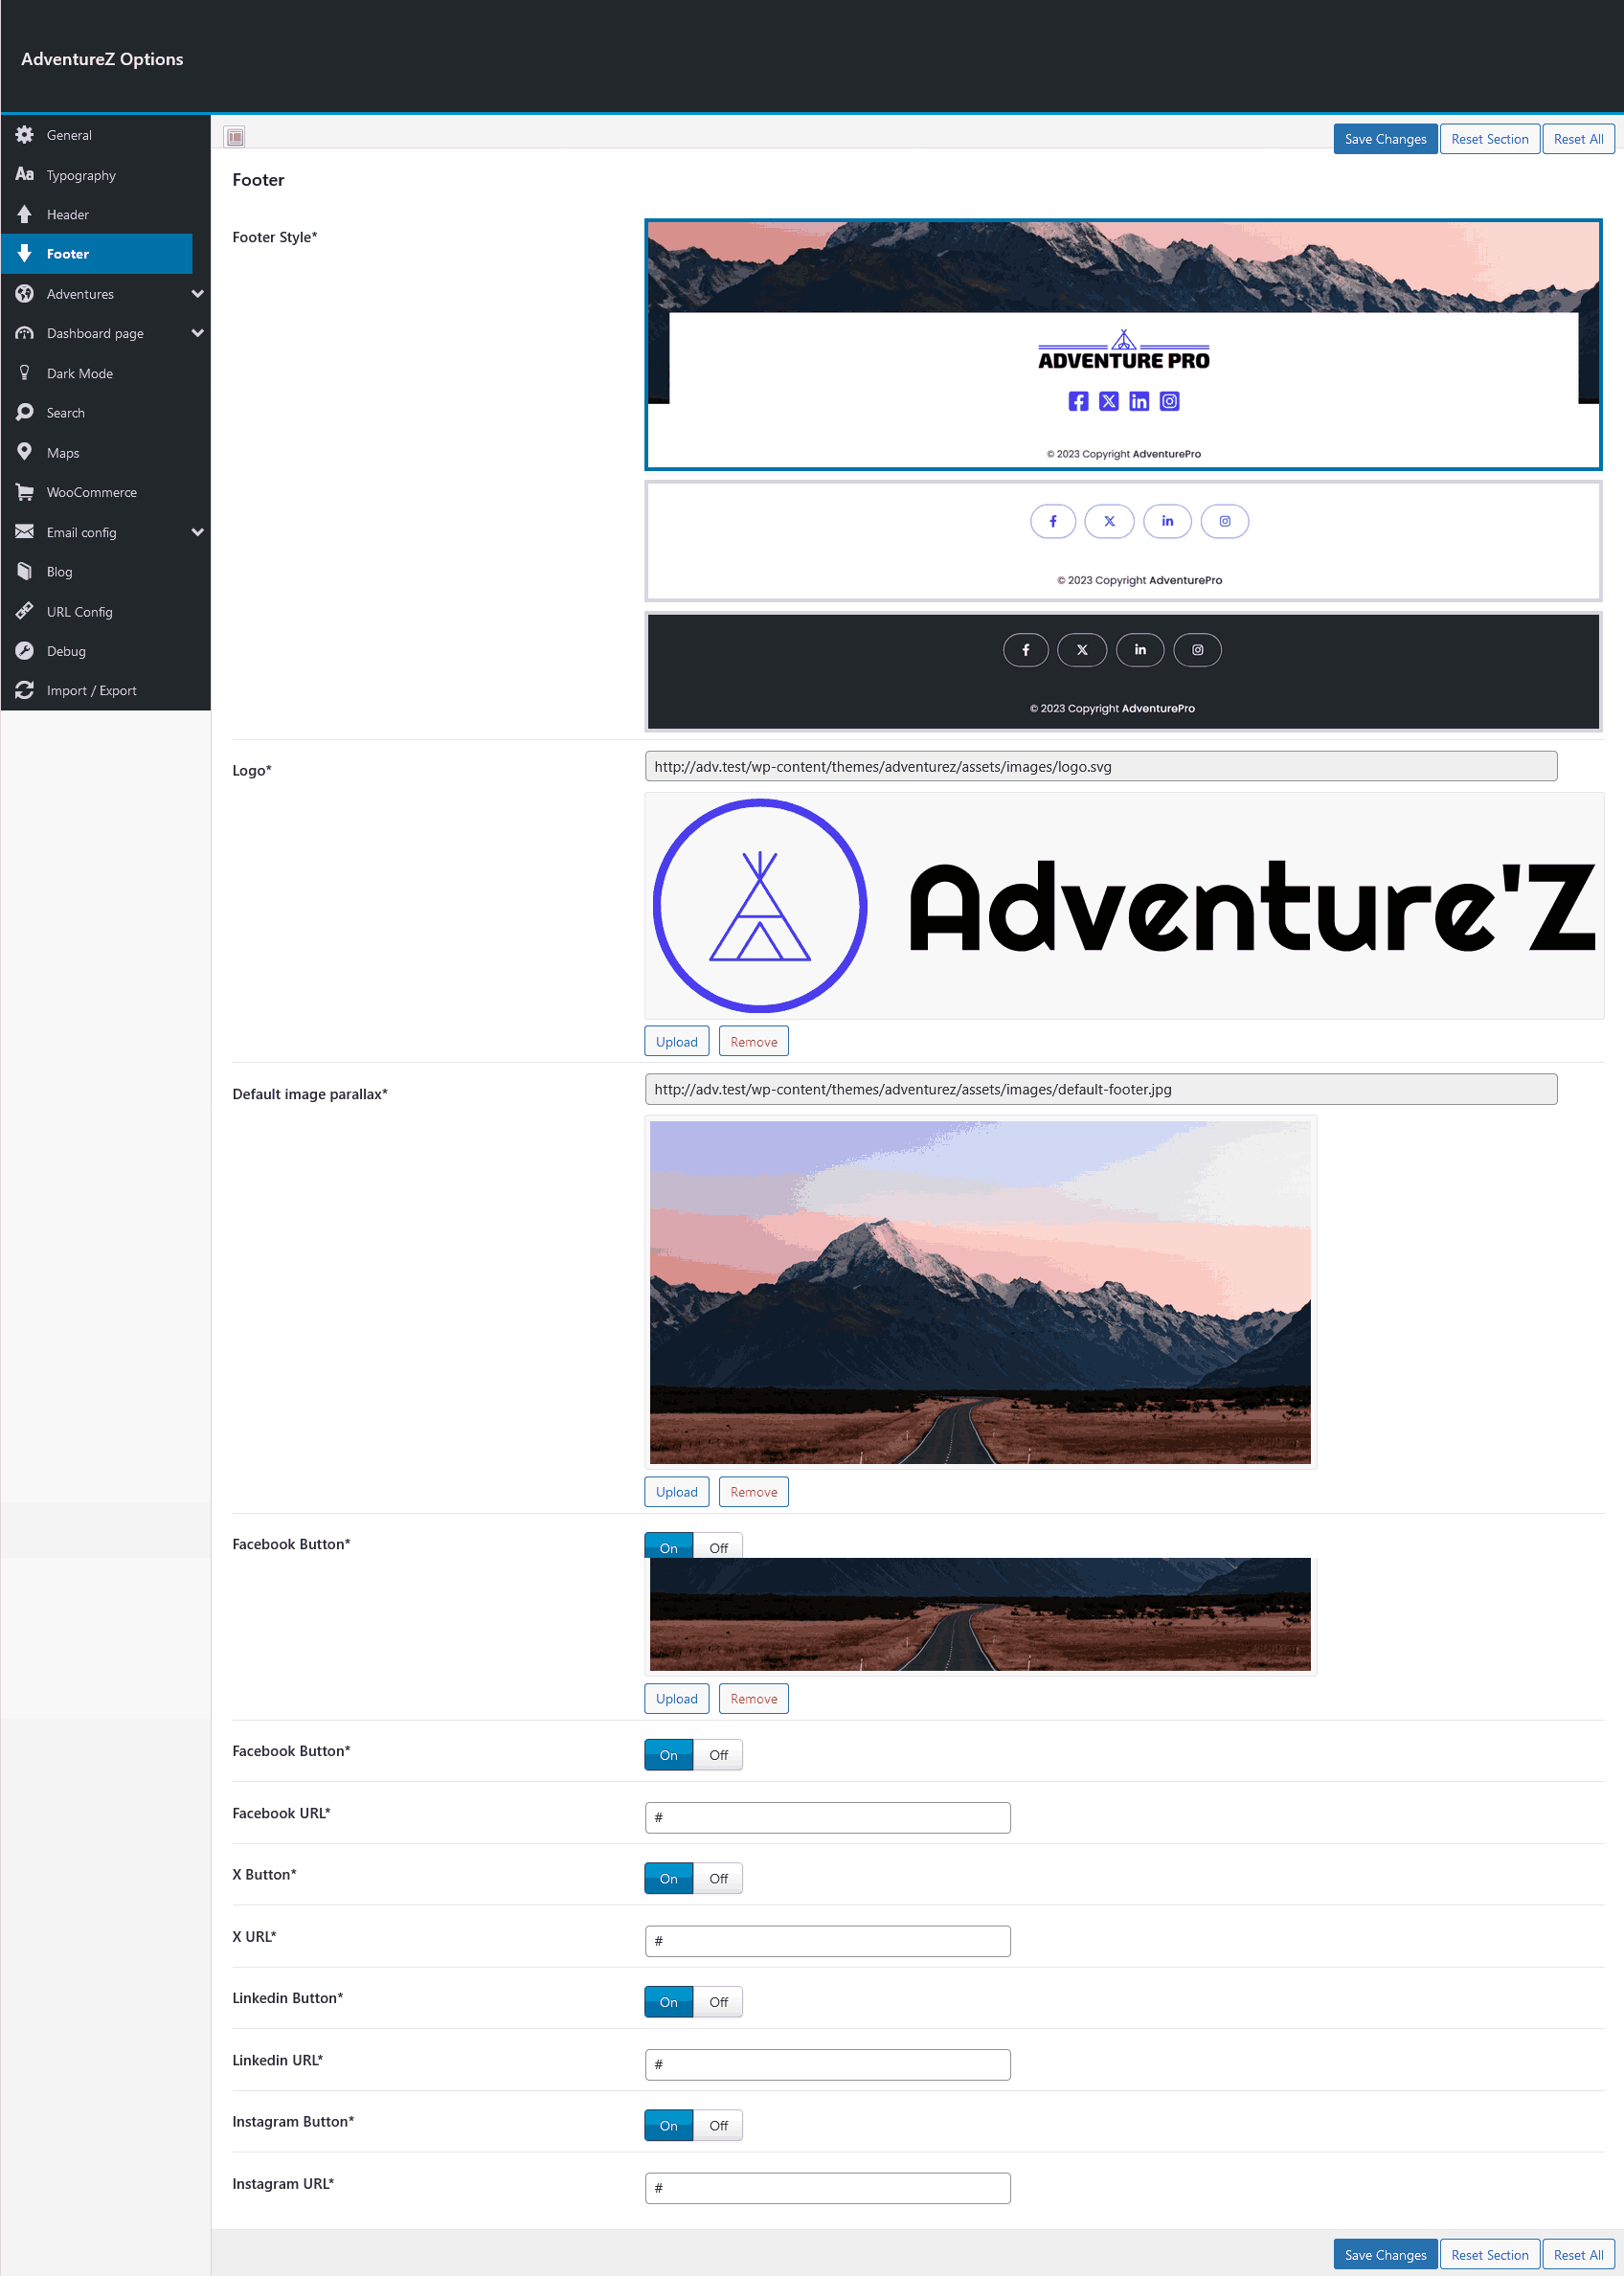
In this section, you can customize a wide range of options:
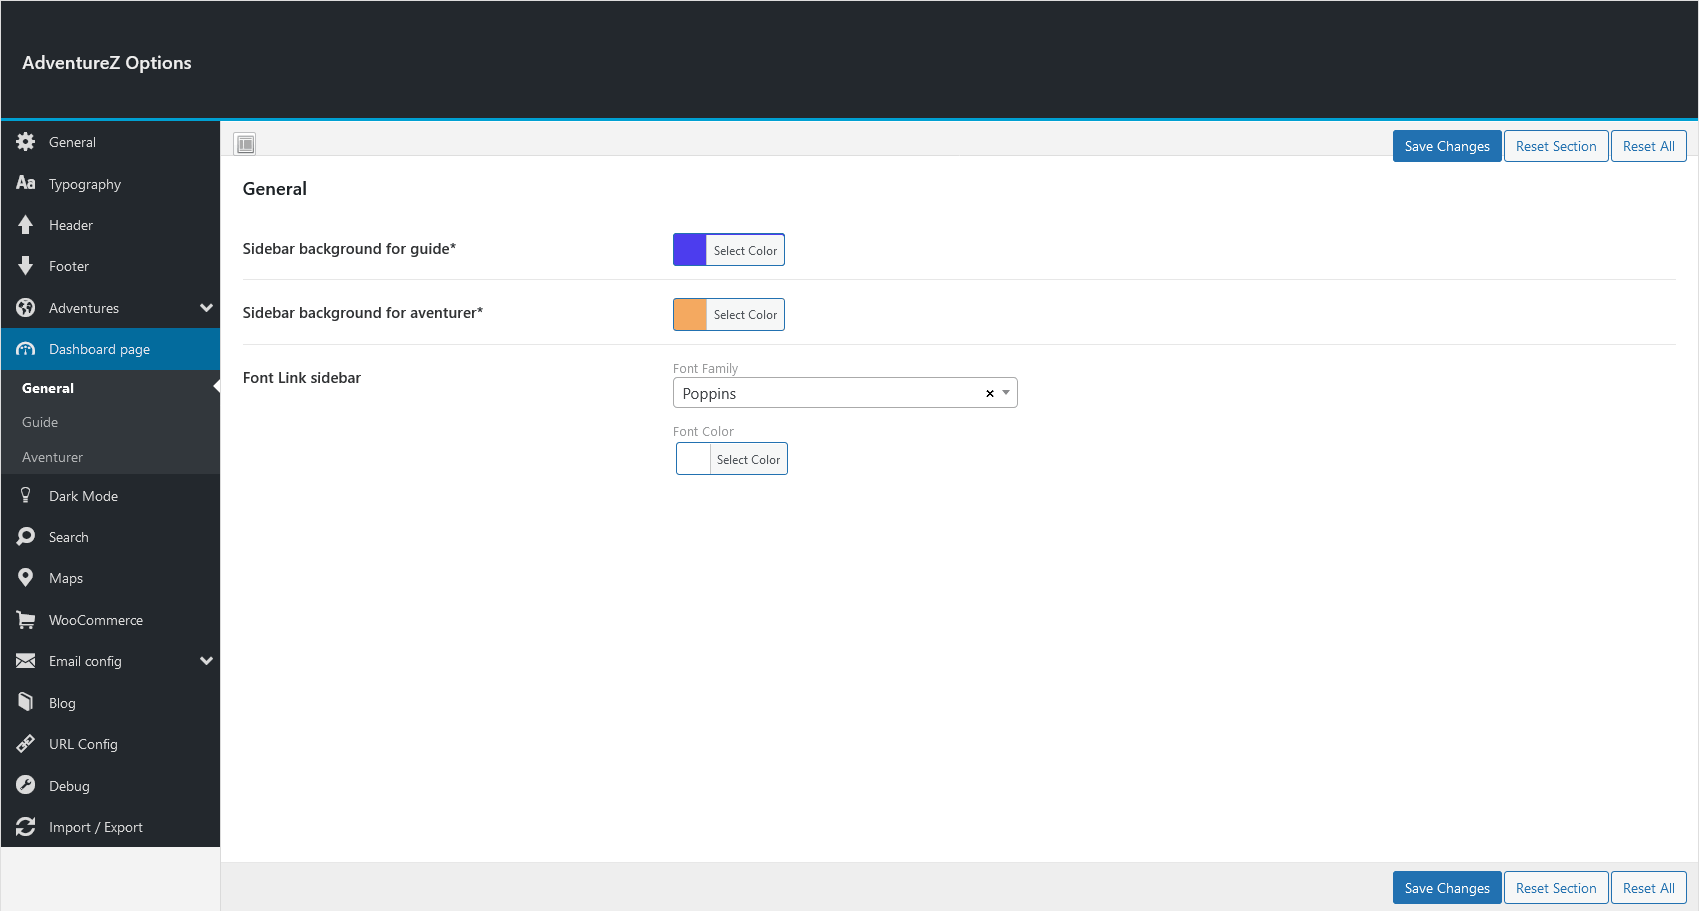
General options, basic colors
Different typography choices for paragraphs, text and titles (h1, h6): you can choose the typeface, color and weight.
In the header section, you can choose the header style, activate the sticky option, modify the logo and favicon and many other options
Choose between several footer styles, select a different logo and links for social networks
Options for guide and adventurer dashboards, choice of sidebar colors, FAQs in 'HELP' pages and many other options.
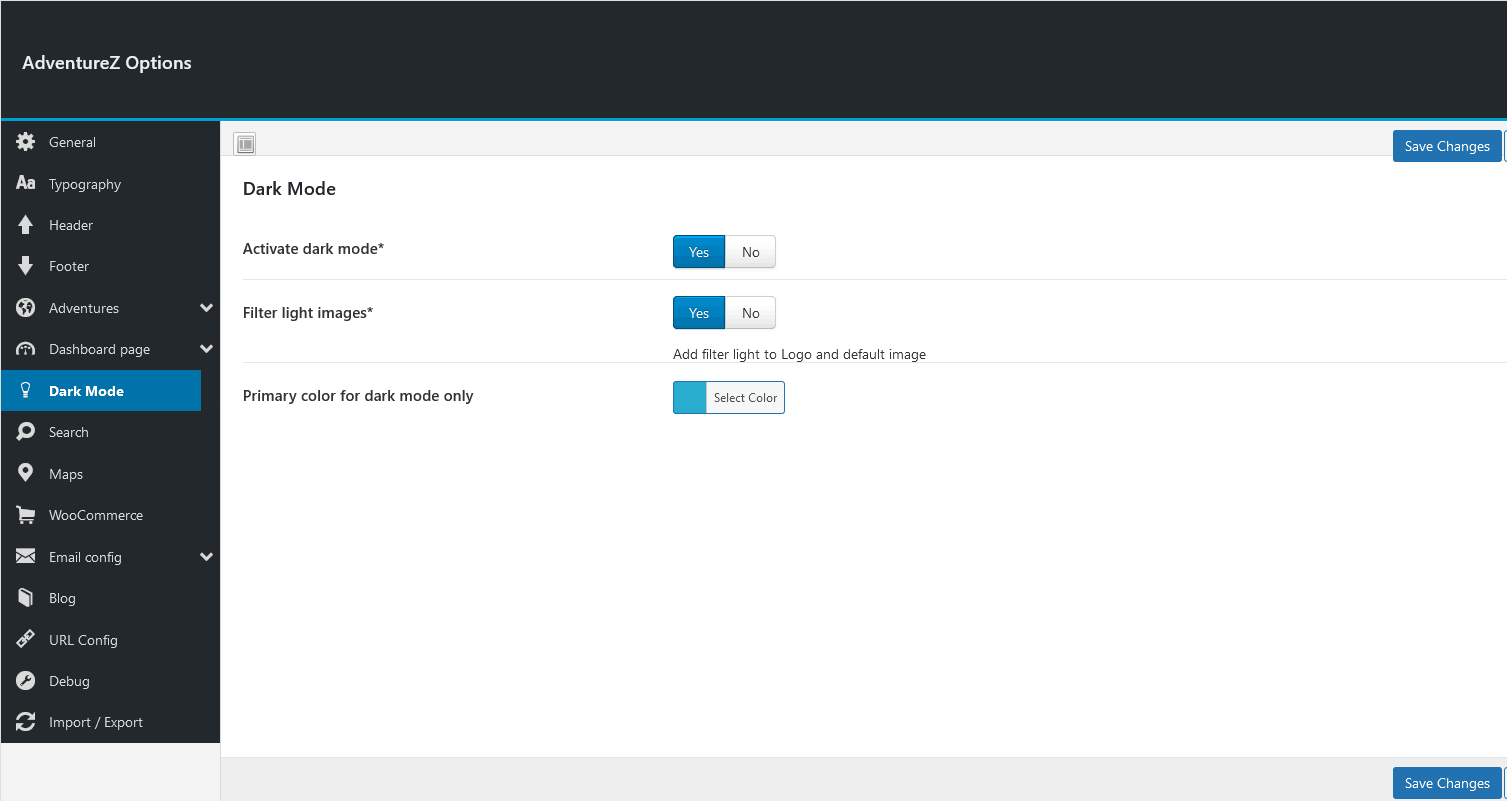
You can activate or deactivate the dark mode and choose to change the primary color if the mode is activated, activate a filter for images to turn them white
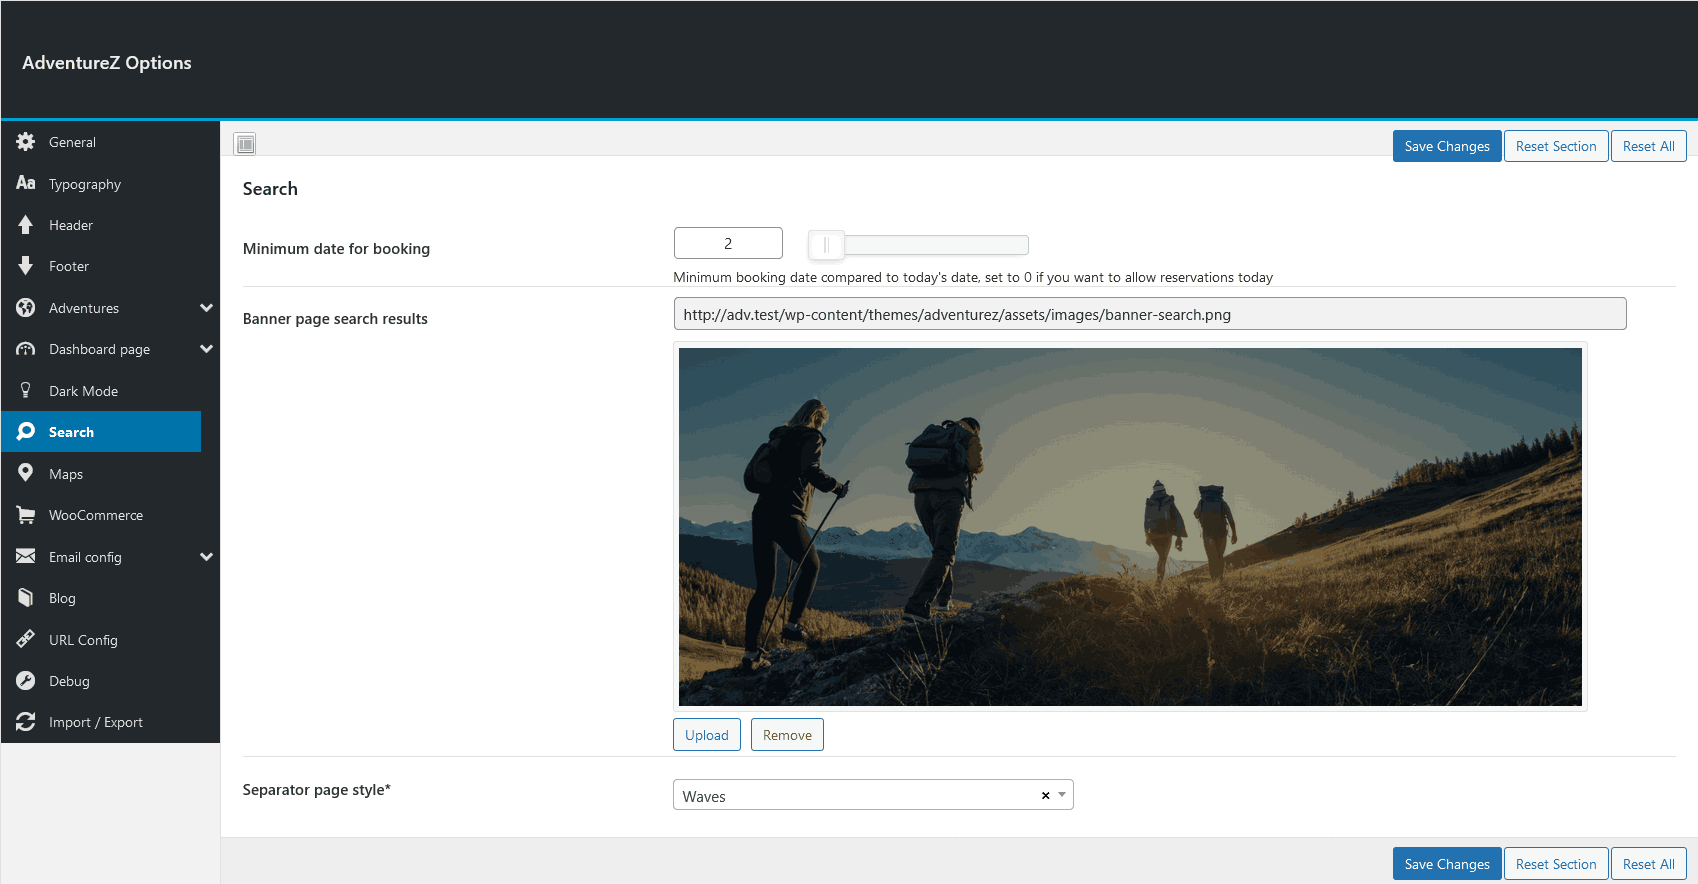
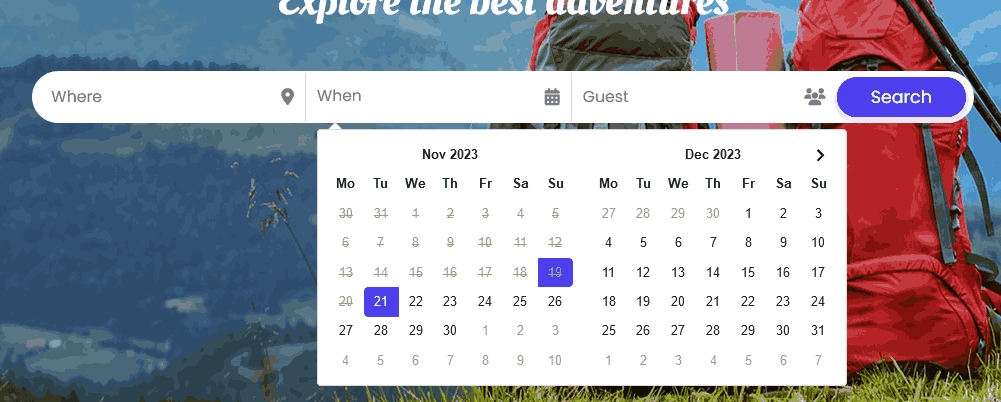
You can specify the minimum number of days to be able to book, by default 2
i.e. customers can only select the d+2 date, this rule also applies in the adventure details page, the proposed dates are 2 days after today's date.
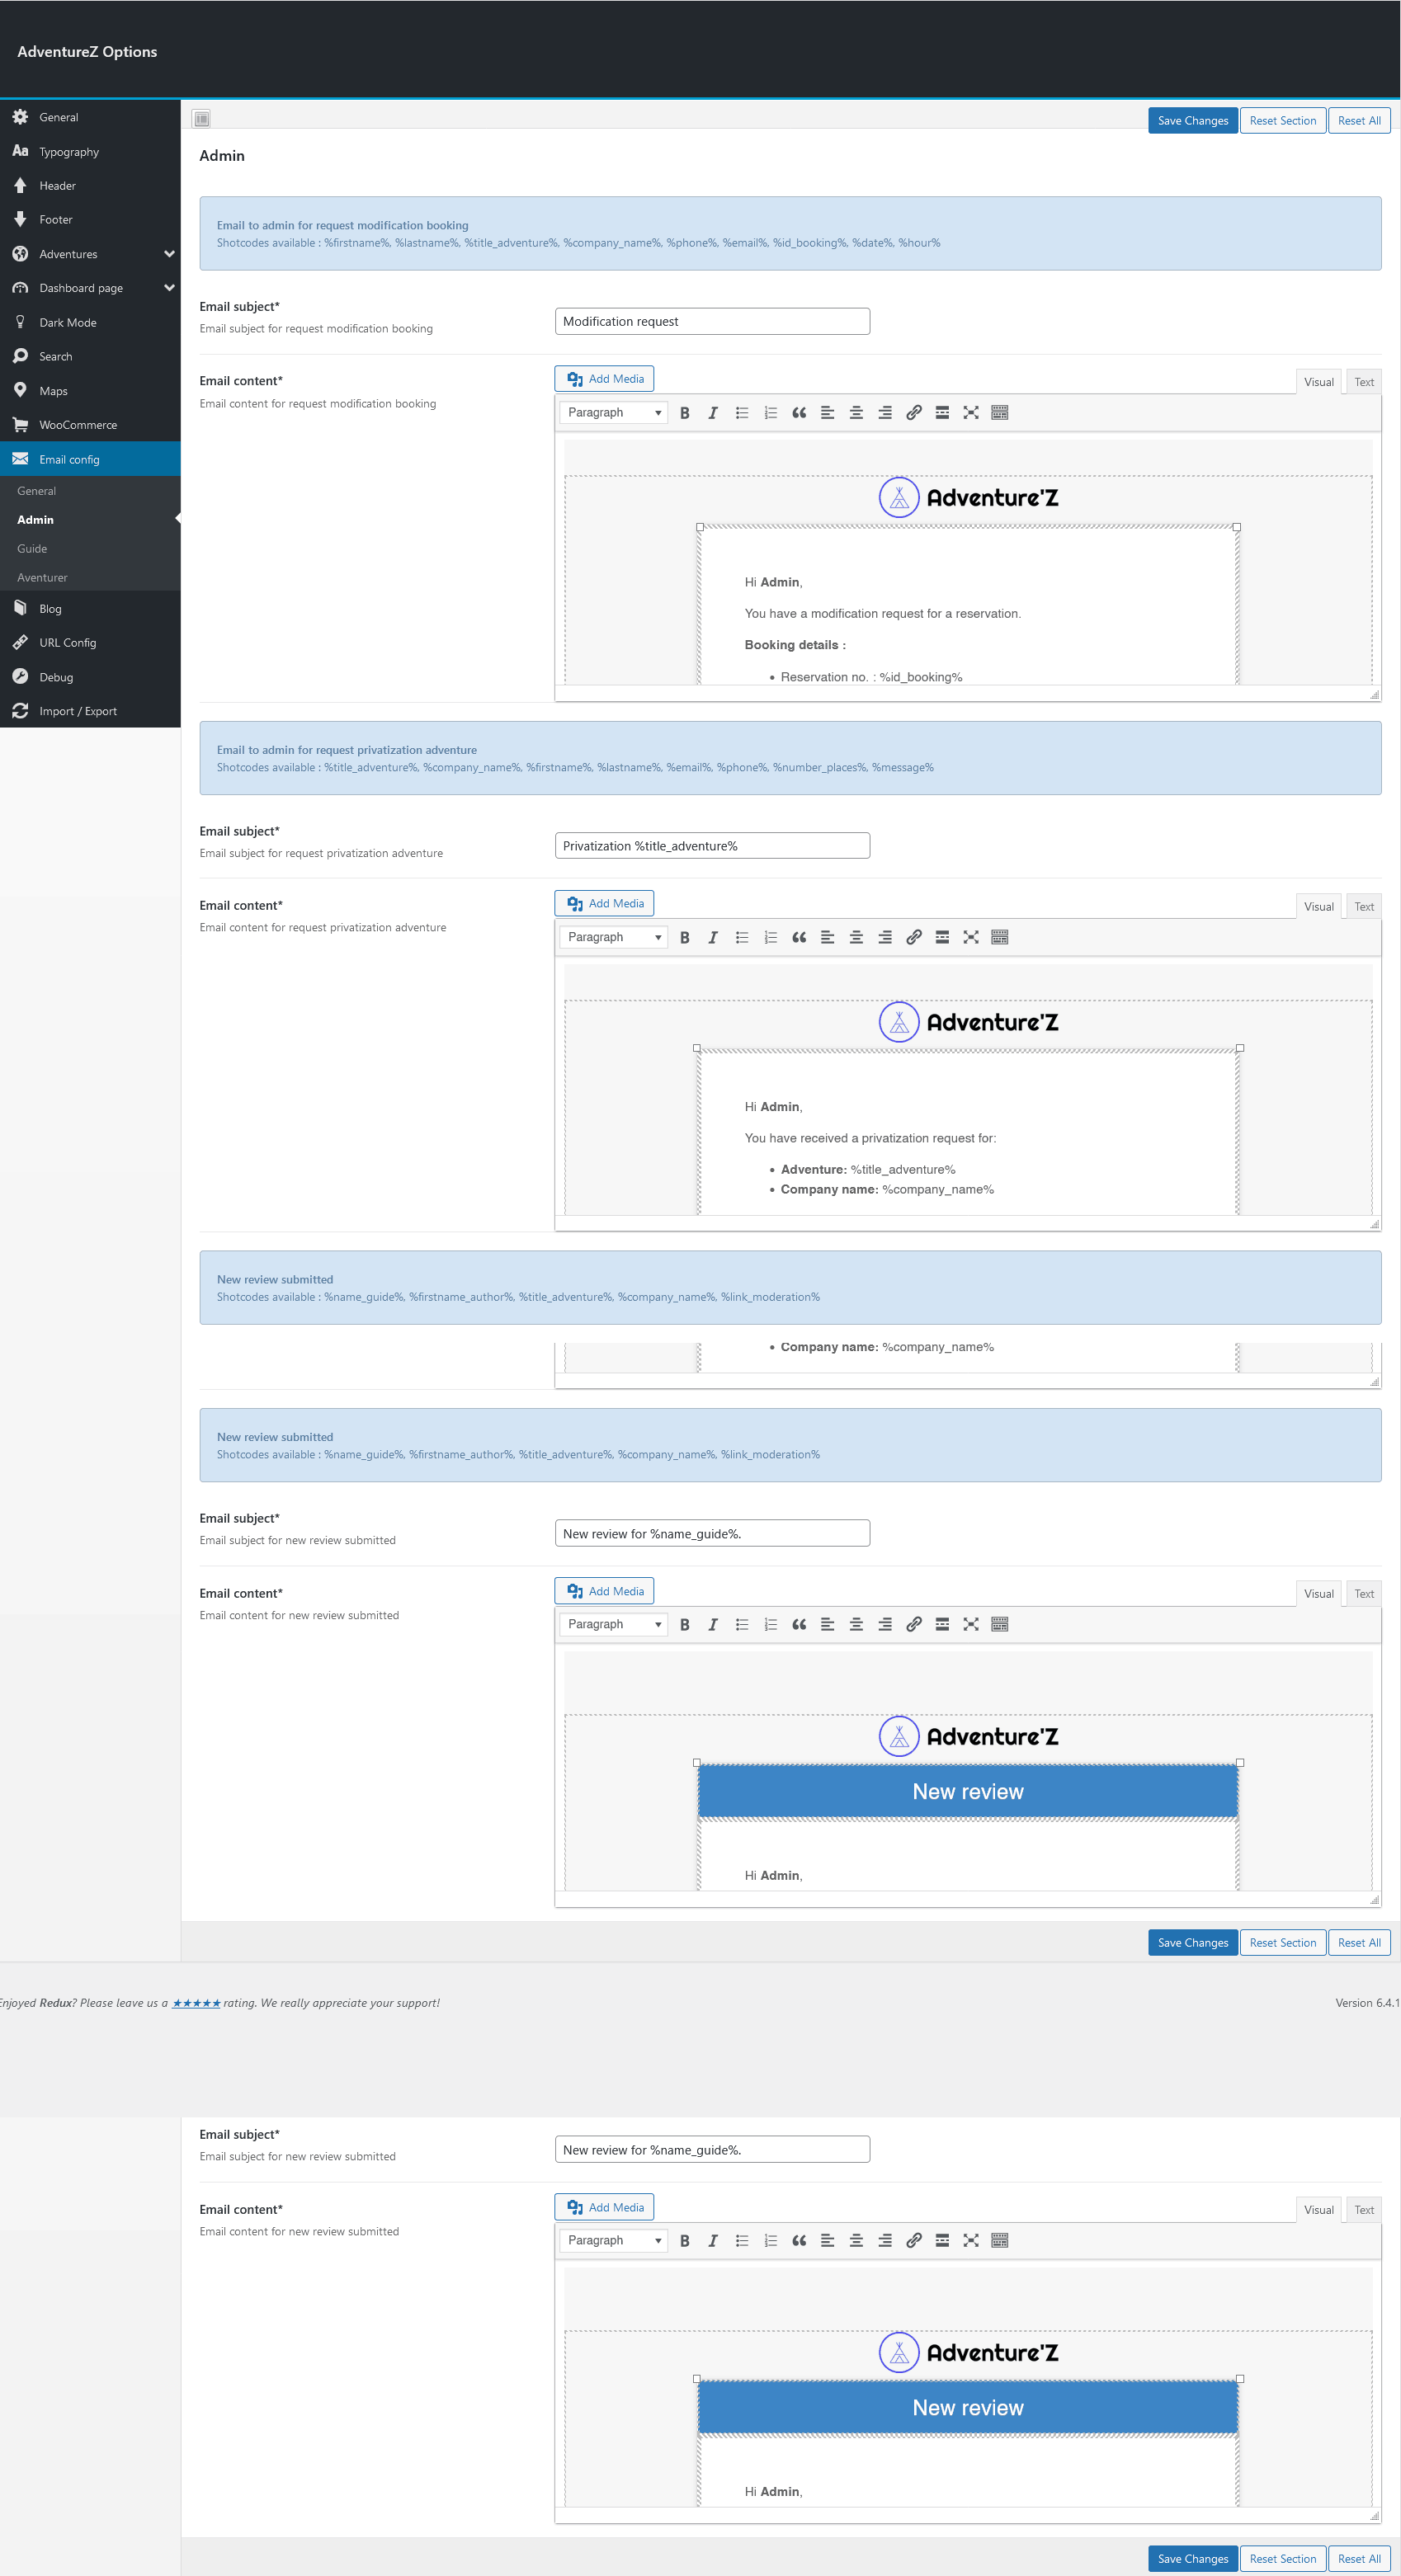
You can easily modify the subject and content of emails sent to admin, guide and adventurer.
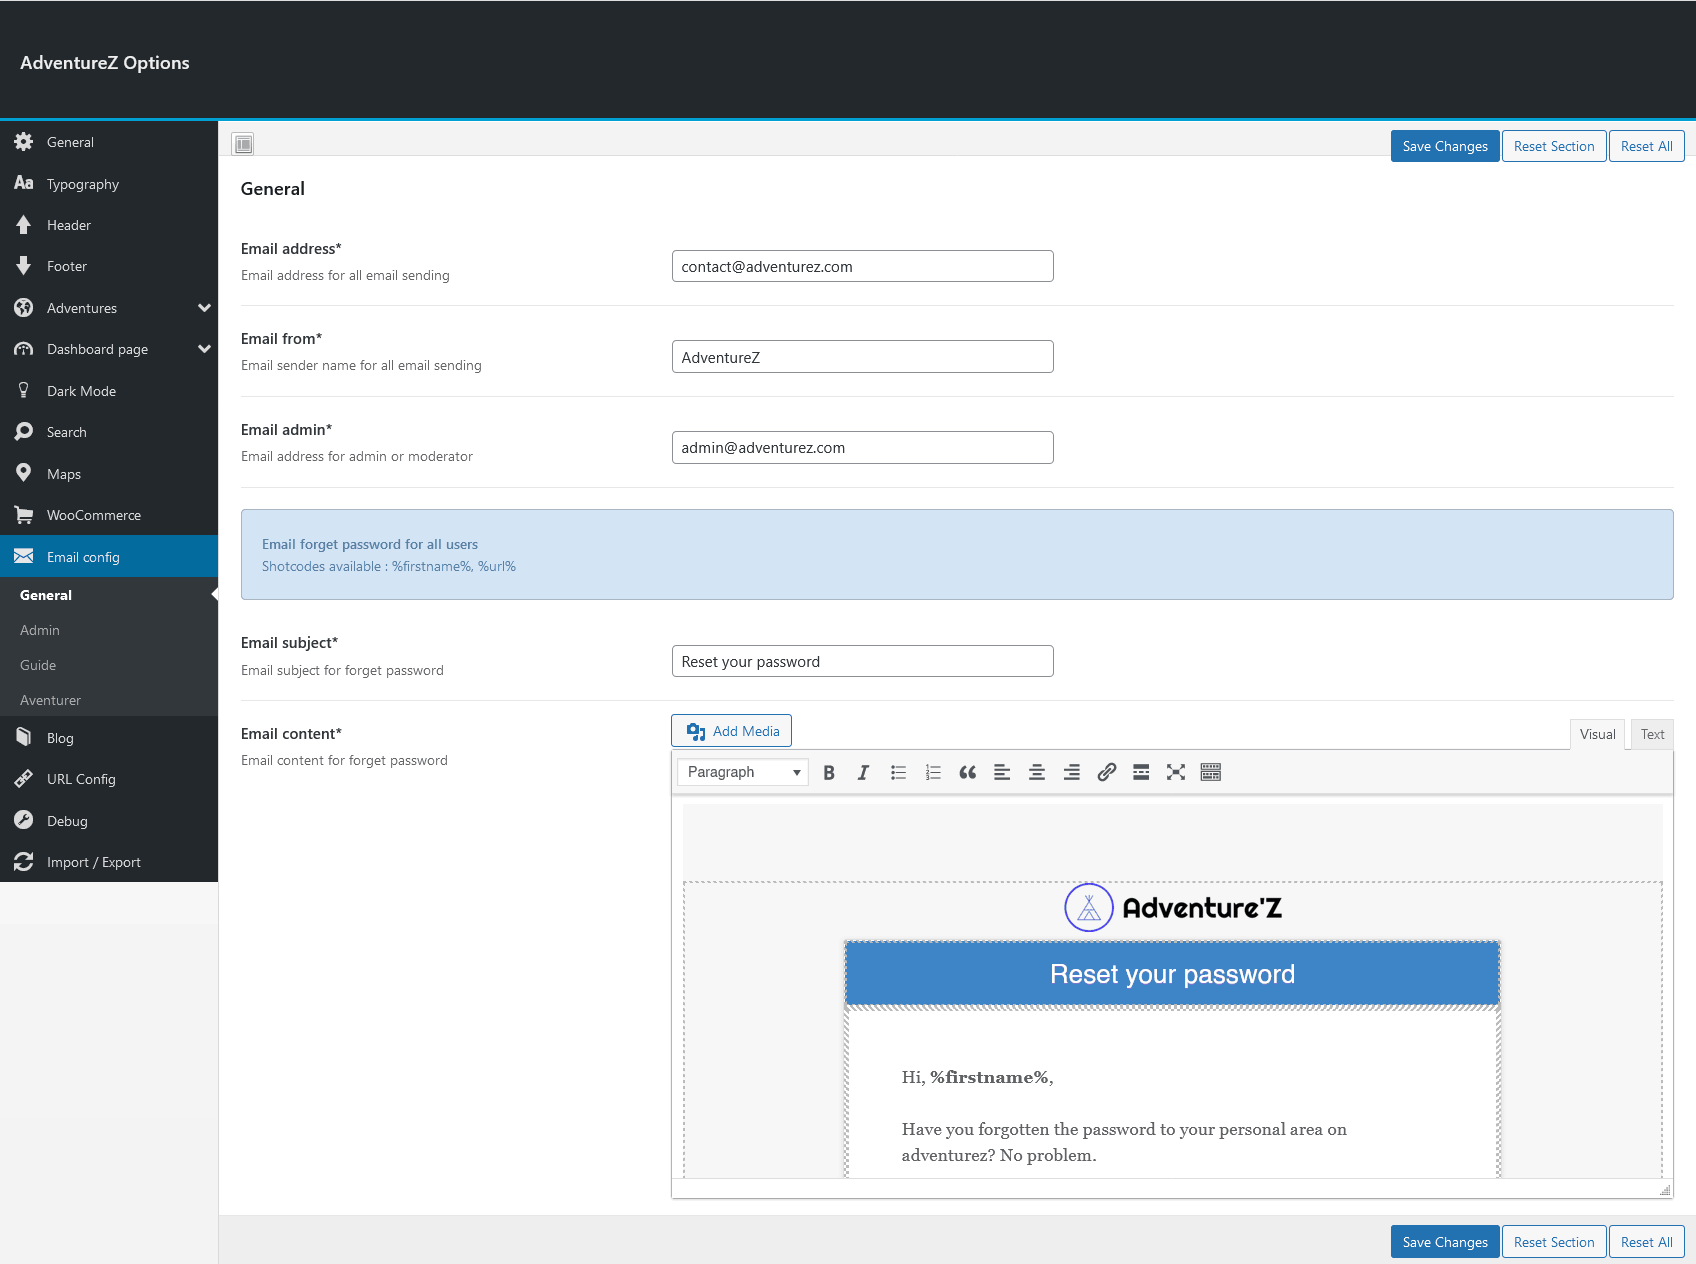
Example Email for Admin
This section will soon be updated with other emails (personalized order emails, refund emails, satisfaction emails).
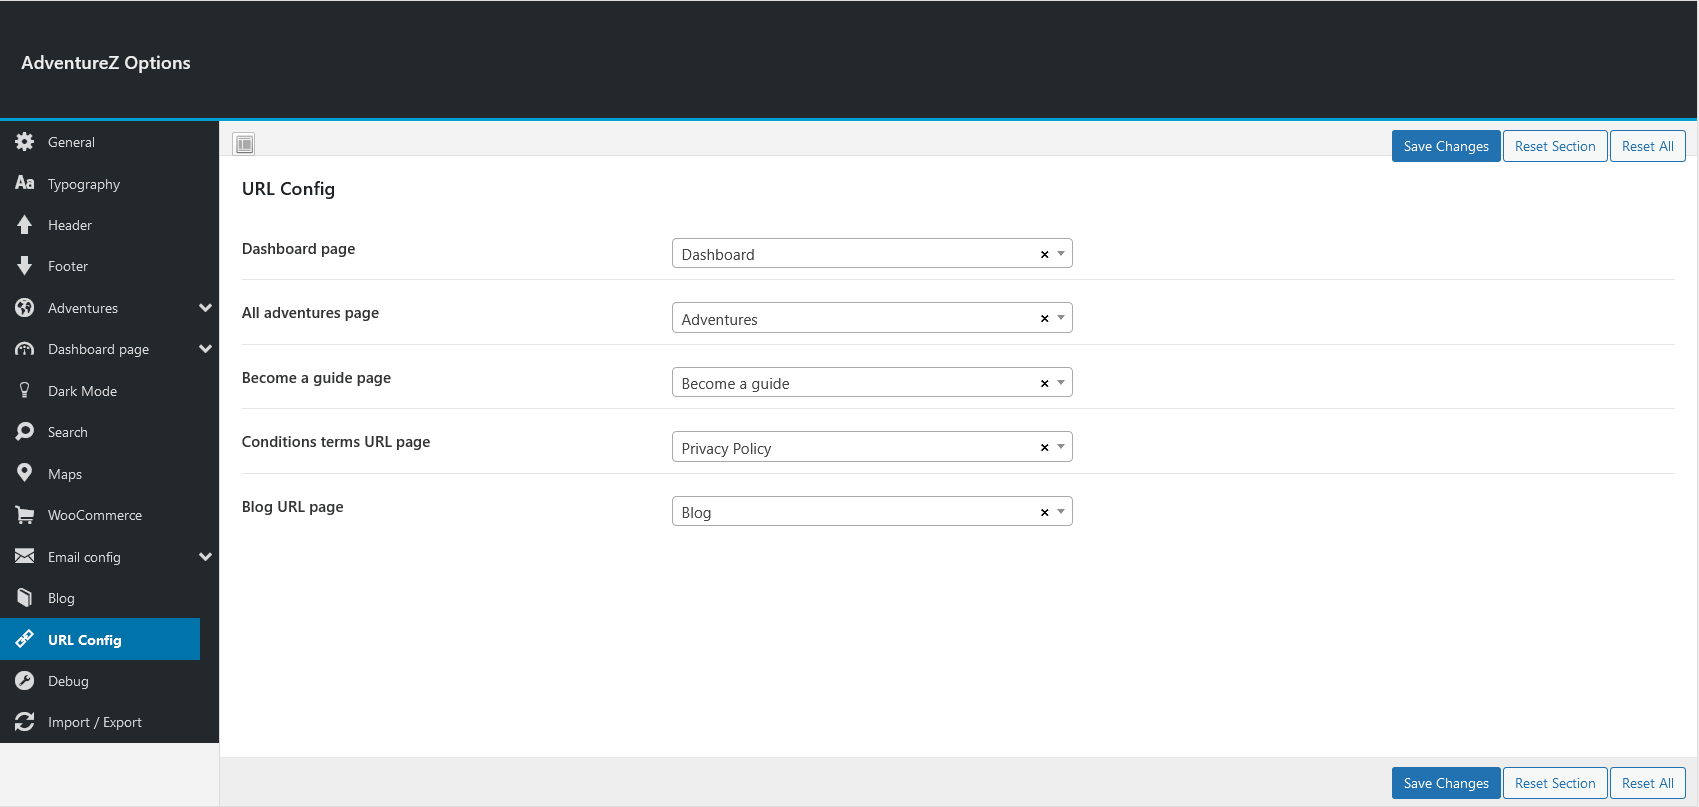
Assign pages directly from the options
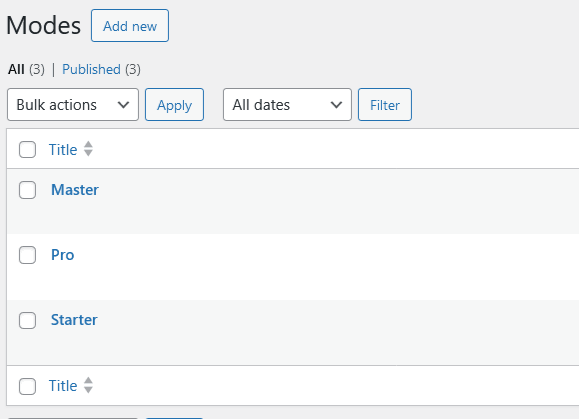
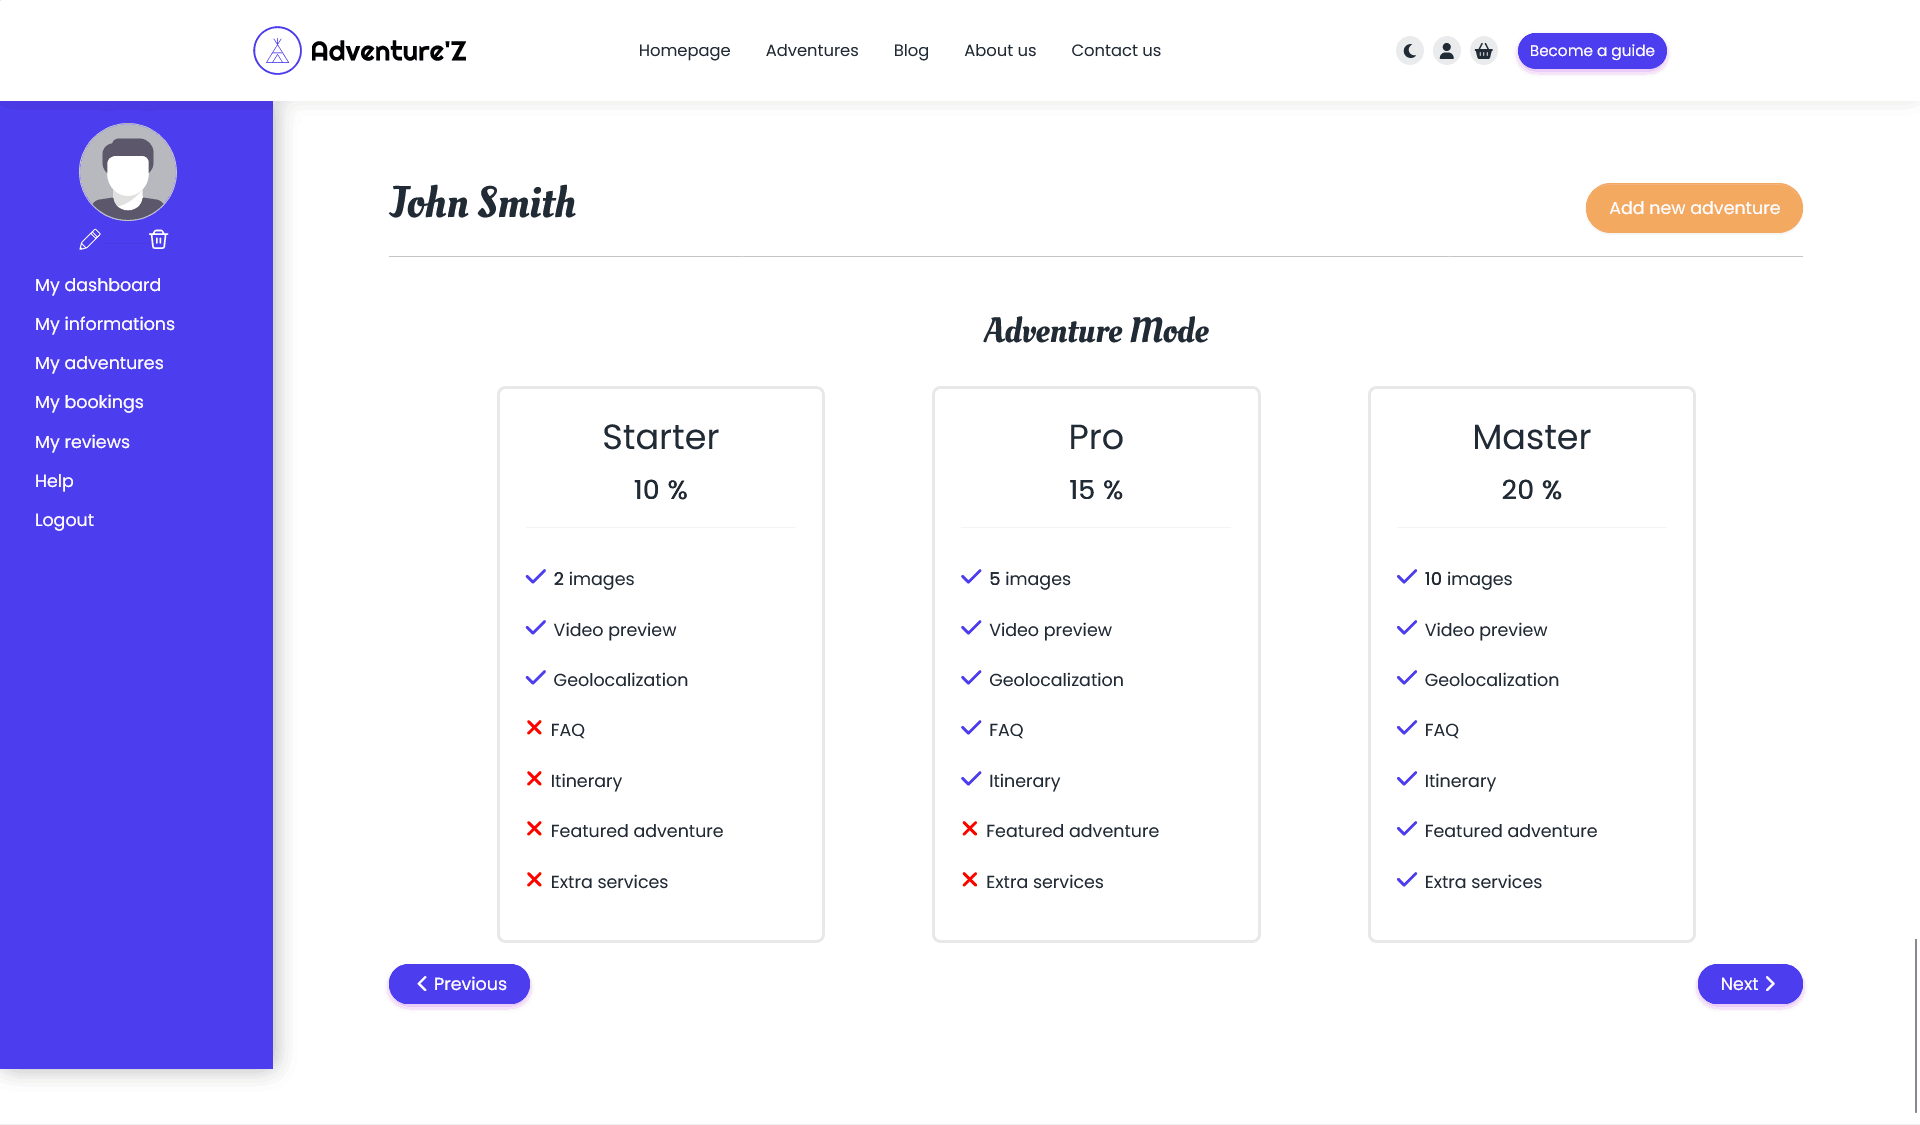
In this section, we will explain the Adventure'Z commission mode principle. You can choose to activate the mode system or deactivate it to use a single commission for all adventures.
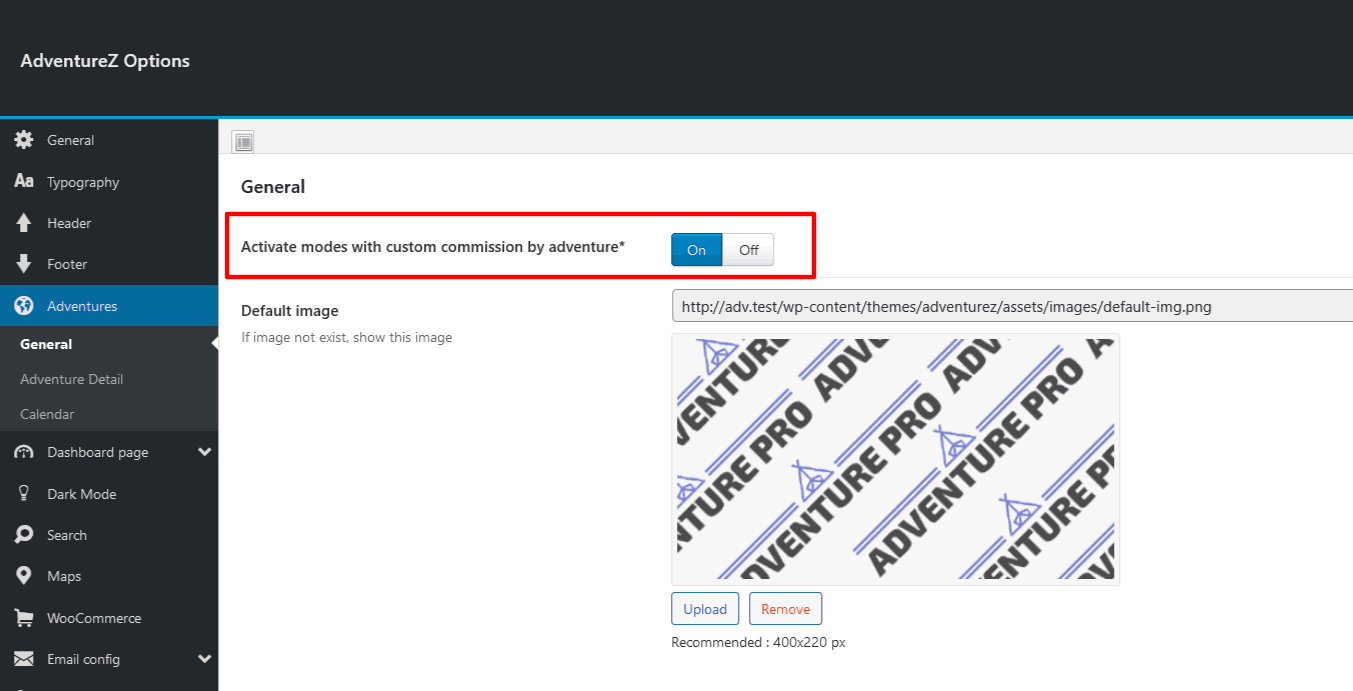
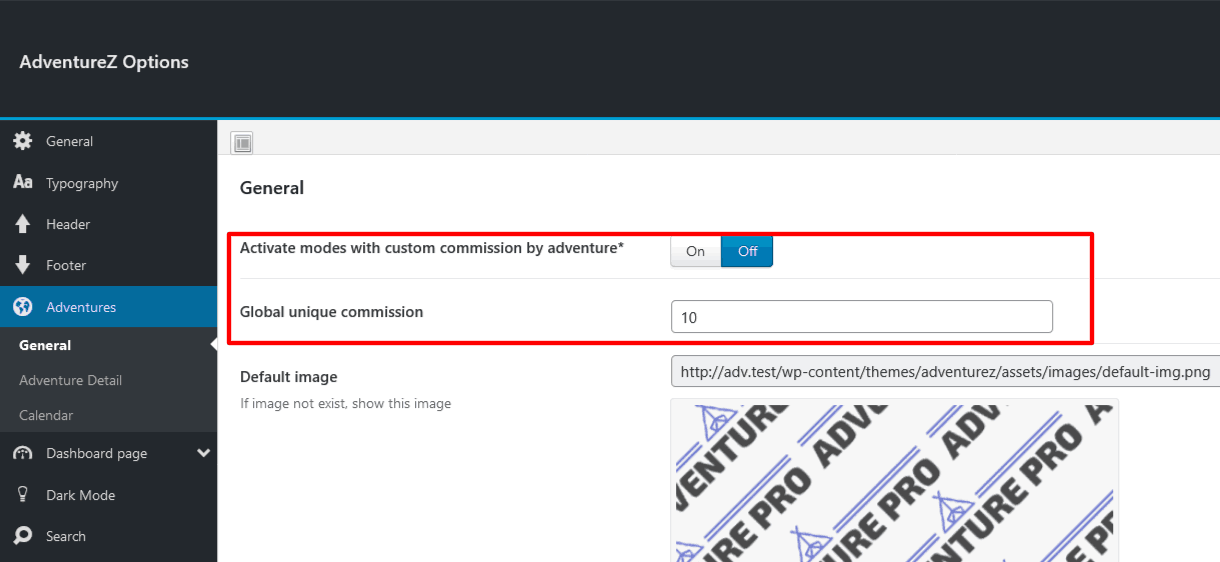
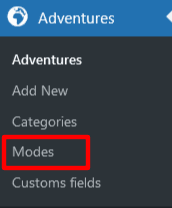
If you choose to activate commission modes, you'll see a new "Modes" section.
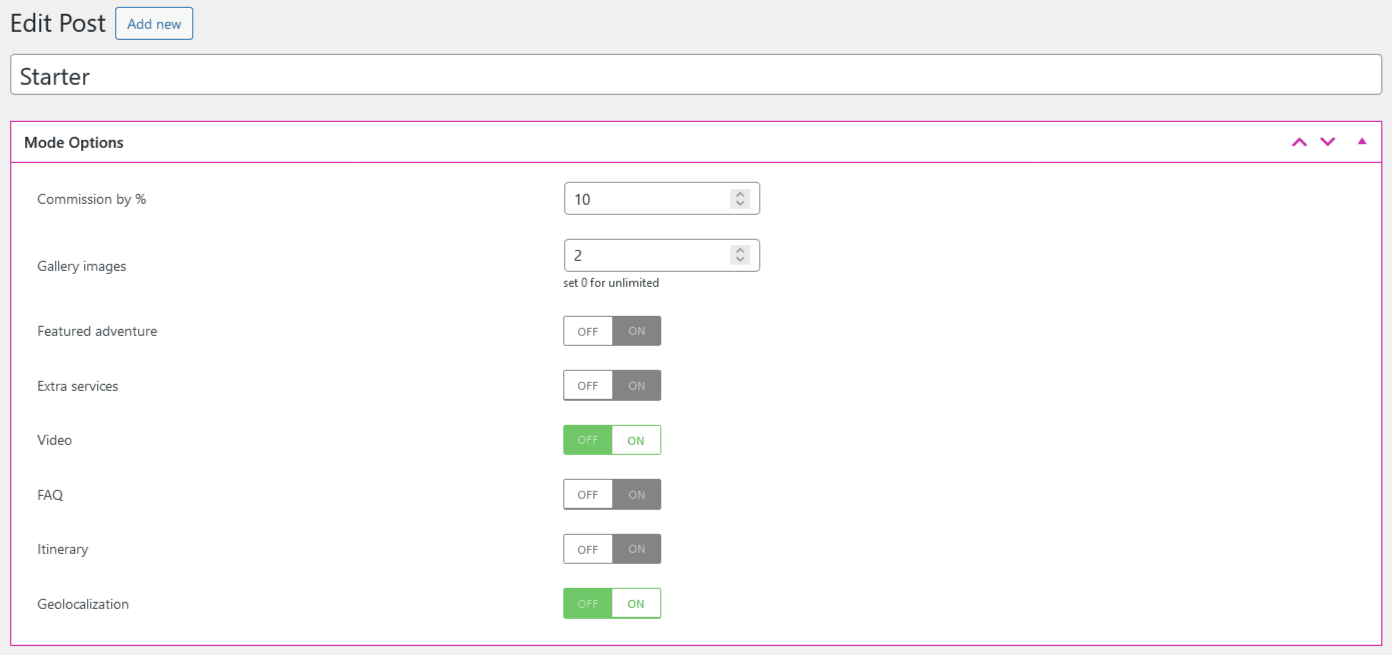
You can create several modes with different options: choose the name of the mode, the commission applied, the number of images allowed to be uploaded and the different options activated.
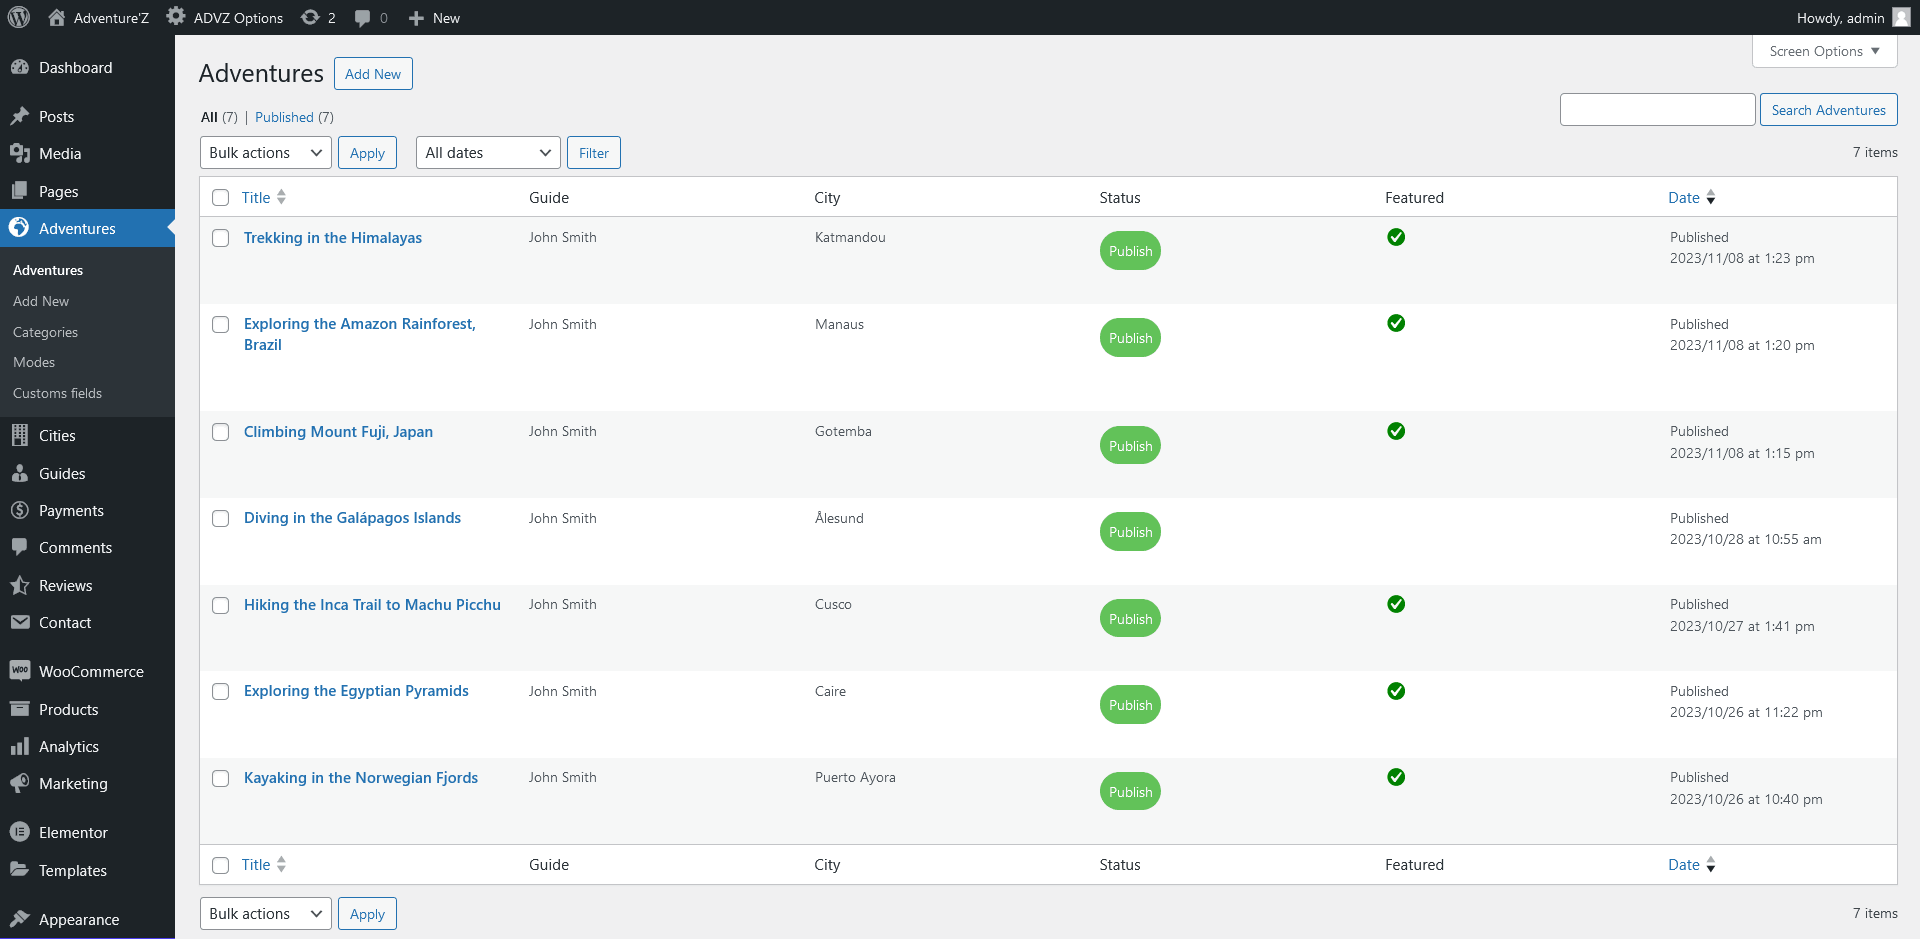
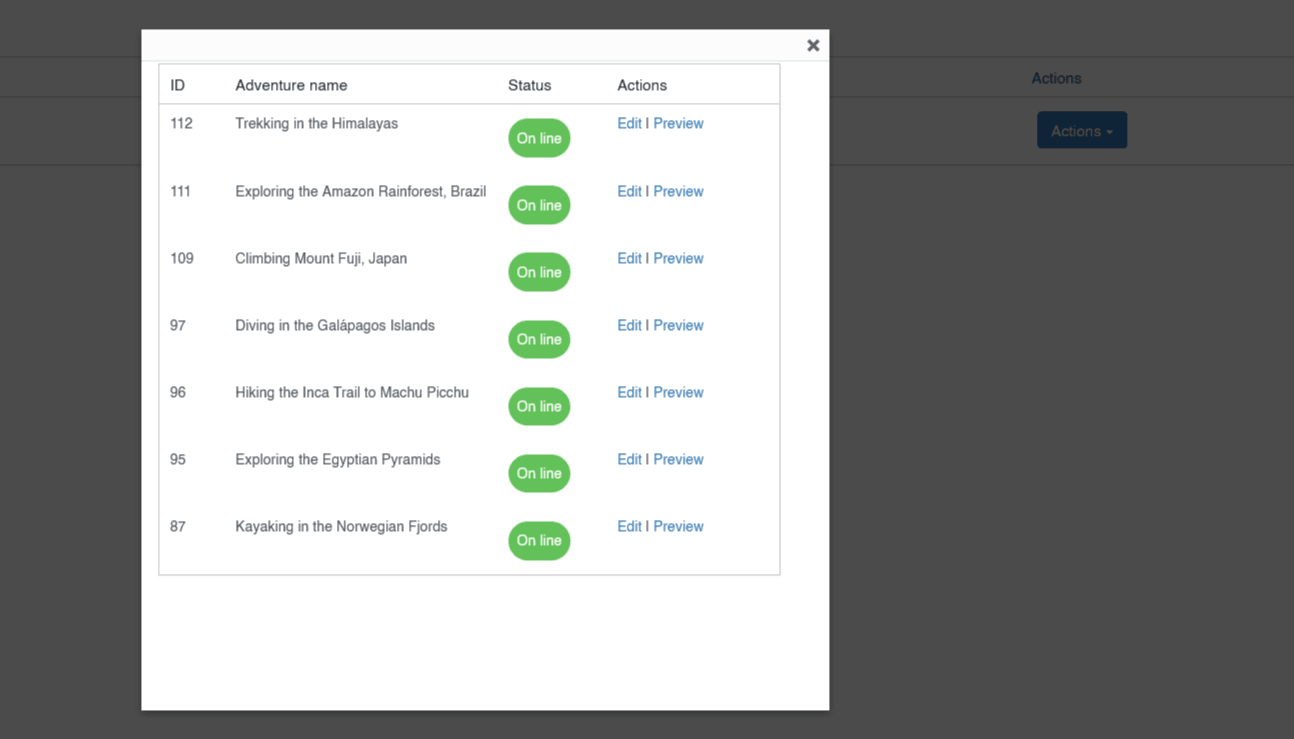
In the adventure listing page, you can see the guide, the city, the status of the adventure and, if it's a featured, directly without going into the details of the adventure.
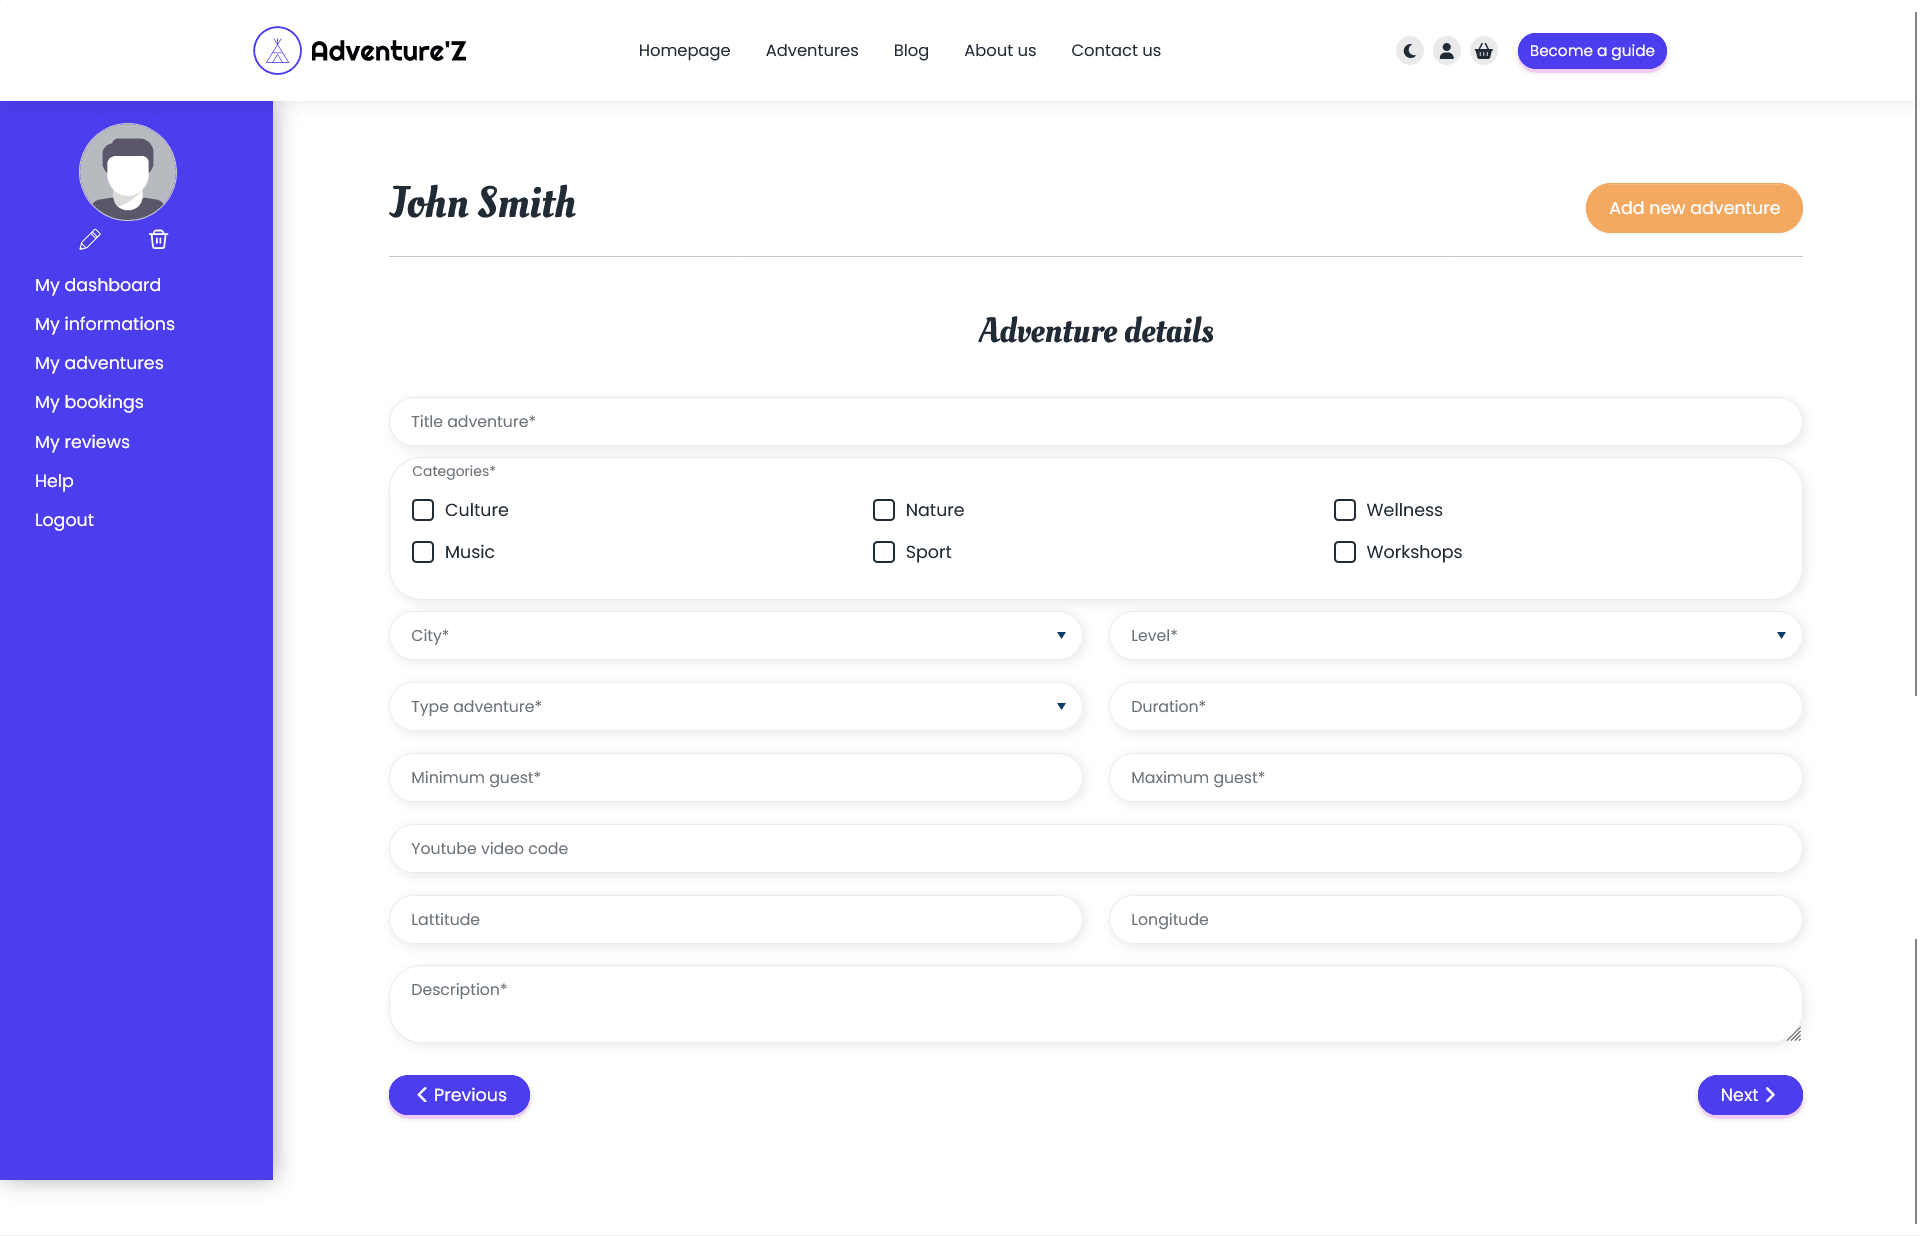
In the details of the adventure, we have several elements:
This part is important: you must choose between (by hour or by day) to be able to display or not the time selection.
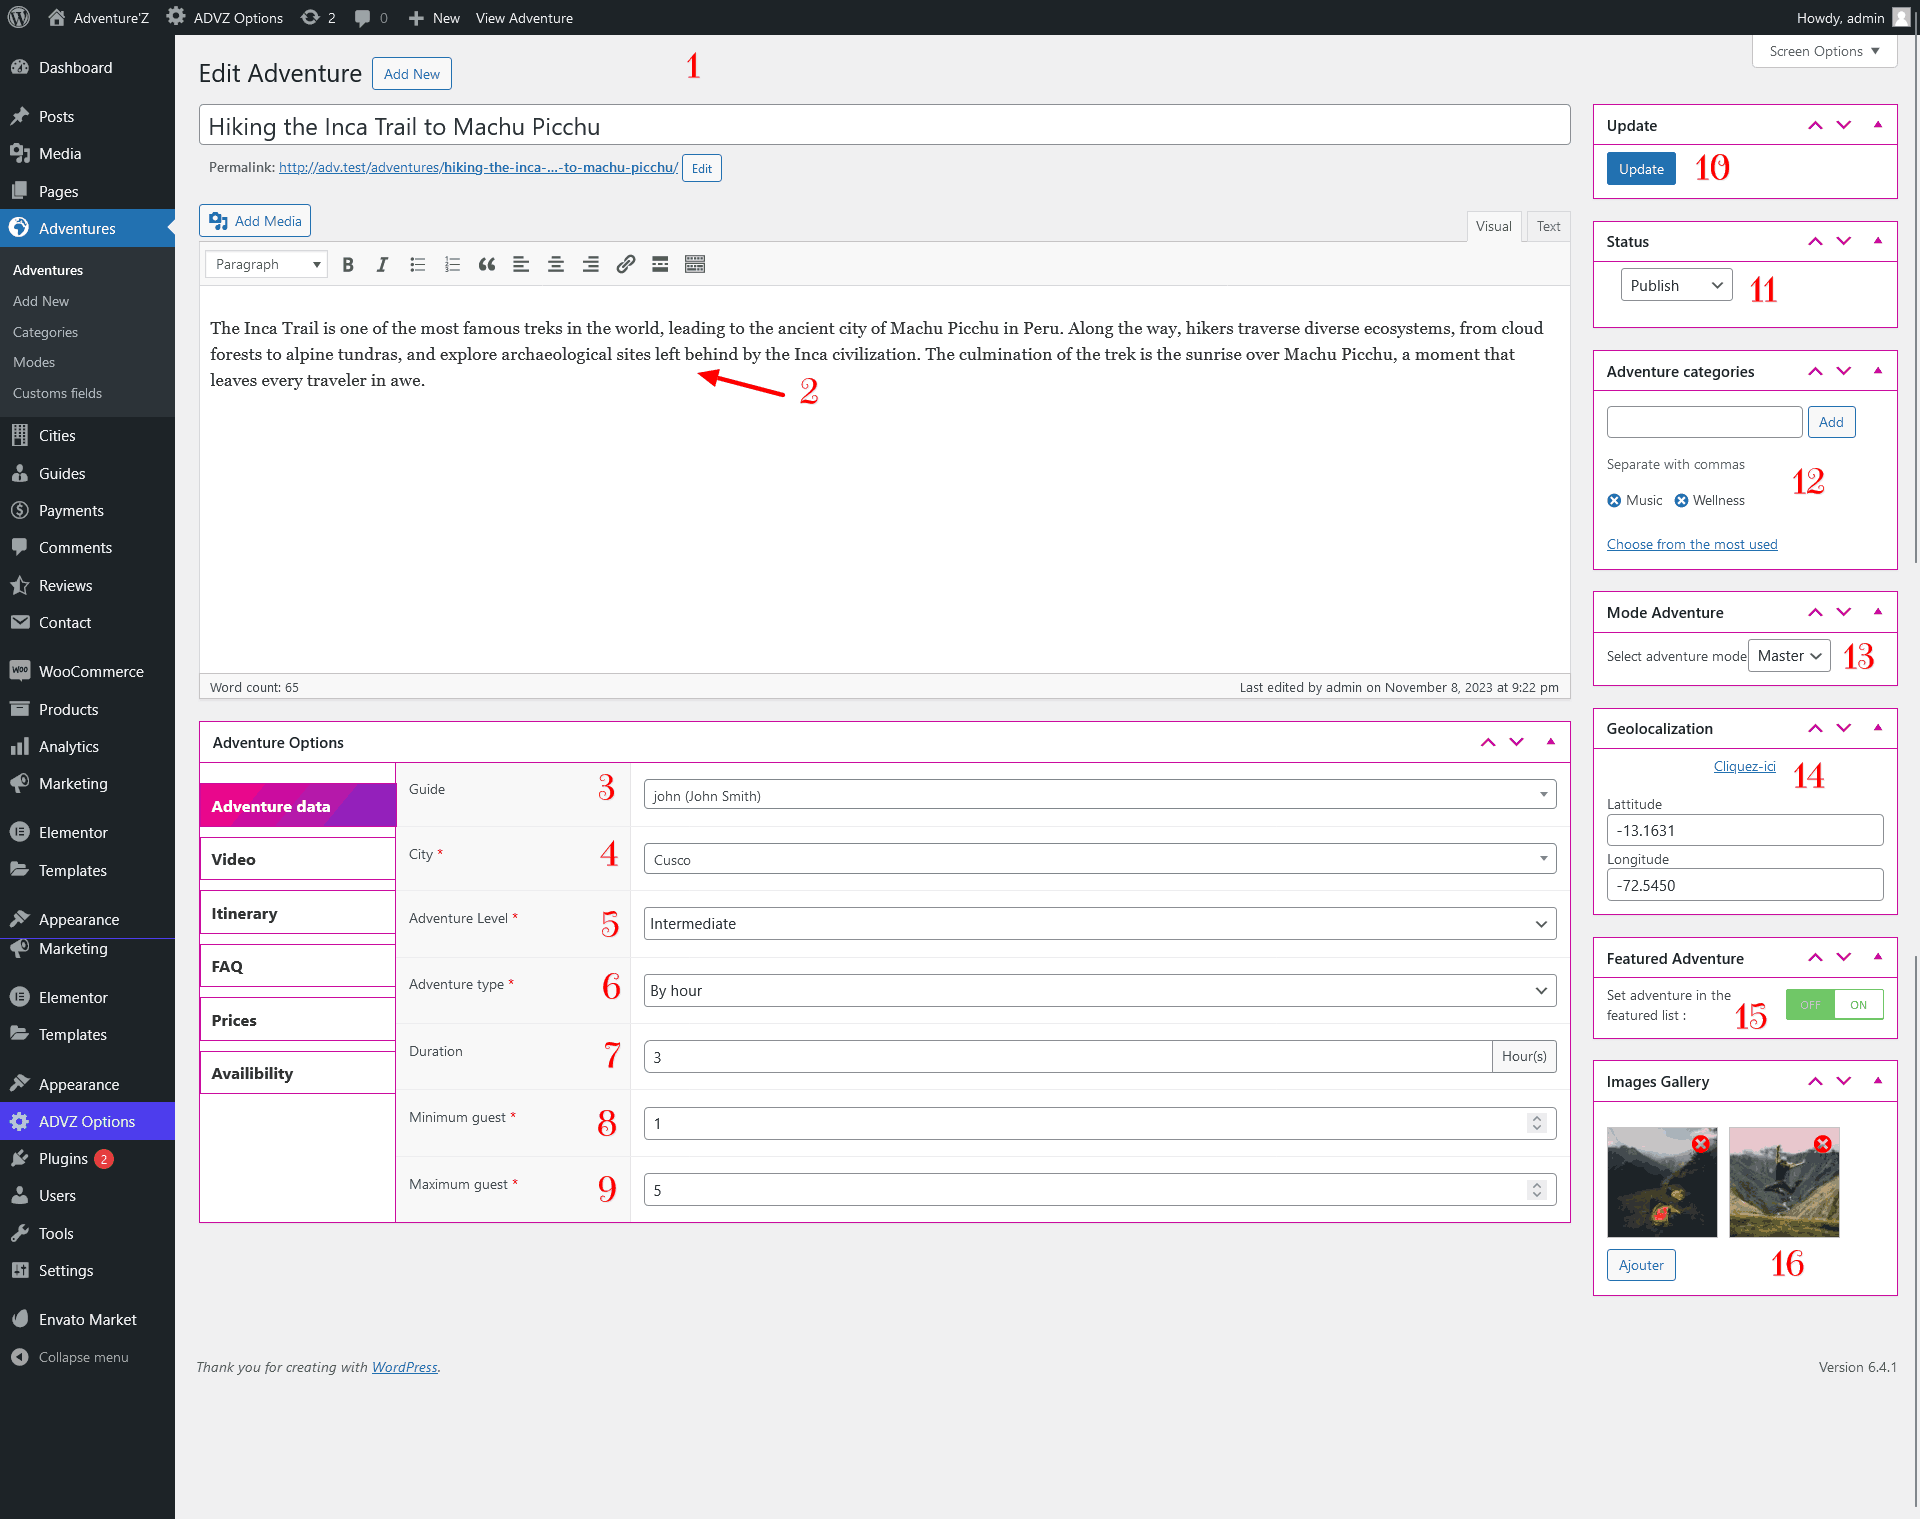
You can choose between several statuses: Draft, Pending, Publish, Completed, Suspended
If the status is different from publish and you move the adventure to Publish, you can send an email to the guide to notify them that the adventure is online
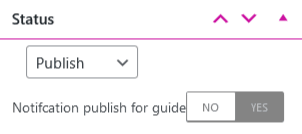
The sections (Video, Itineray, FAQ) are linked to the mode, these sections only appear if it is activated for the current mode
You can automatically have the longitude and attitude with drag and drop by clicking on Click here
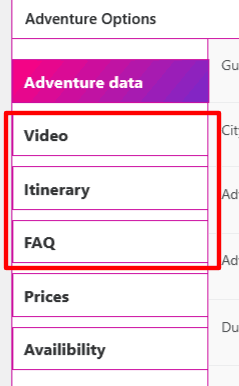
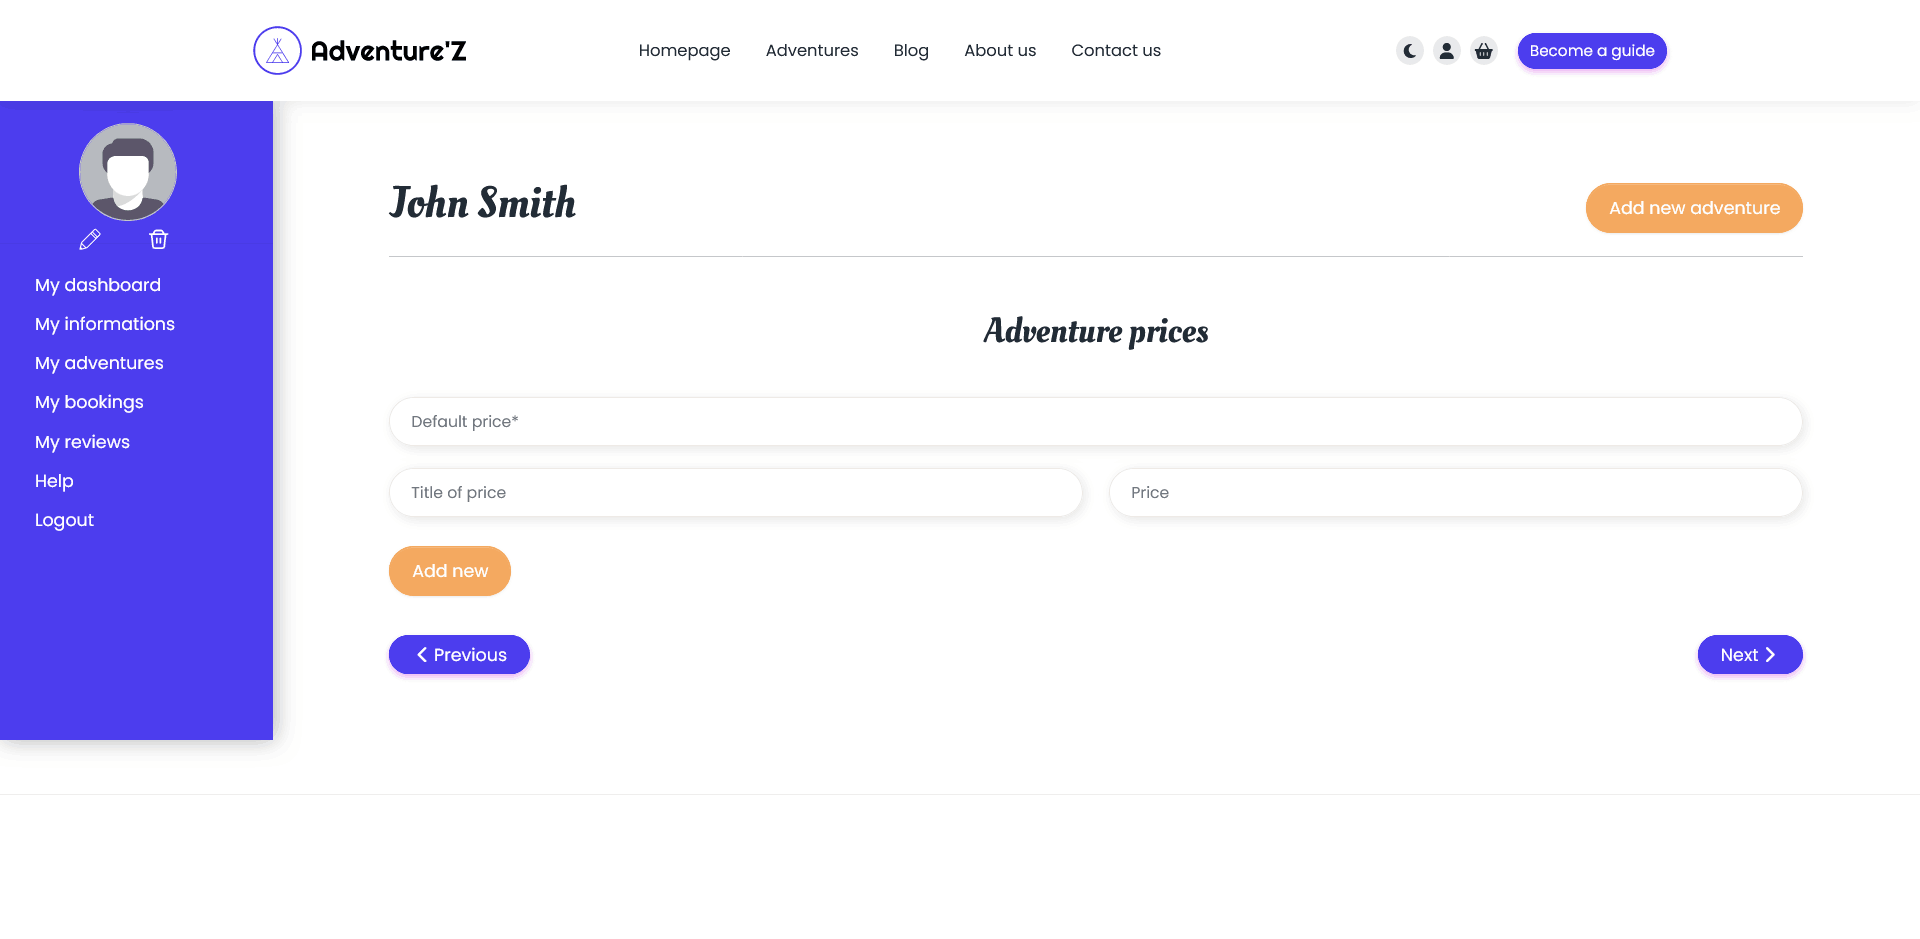
You must have at least the default price, you can add several types of prices
The display depends on the option: type of adventure, if the type is by time then the display is by hour otherwise it is by daypart
The "Start time" field disappears if the type of adventure is by day
The display of adventures also depends on the adventure duration field
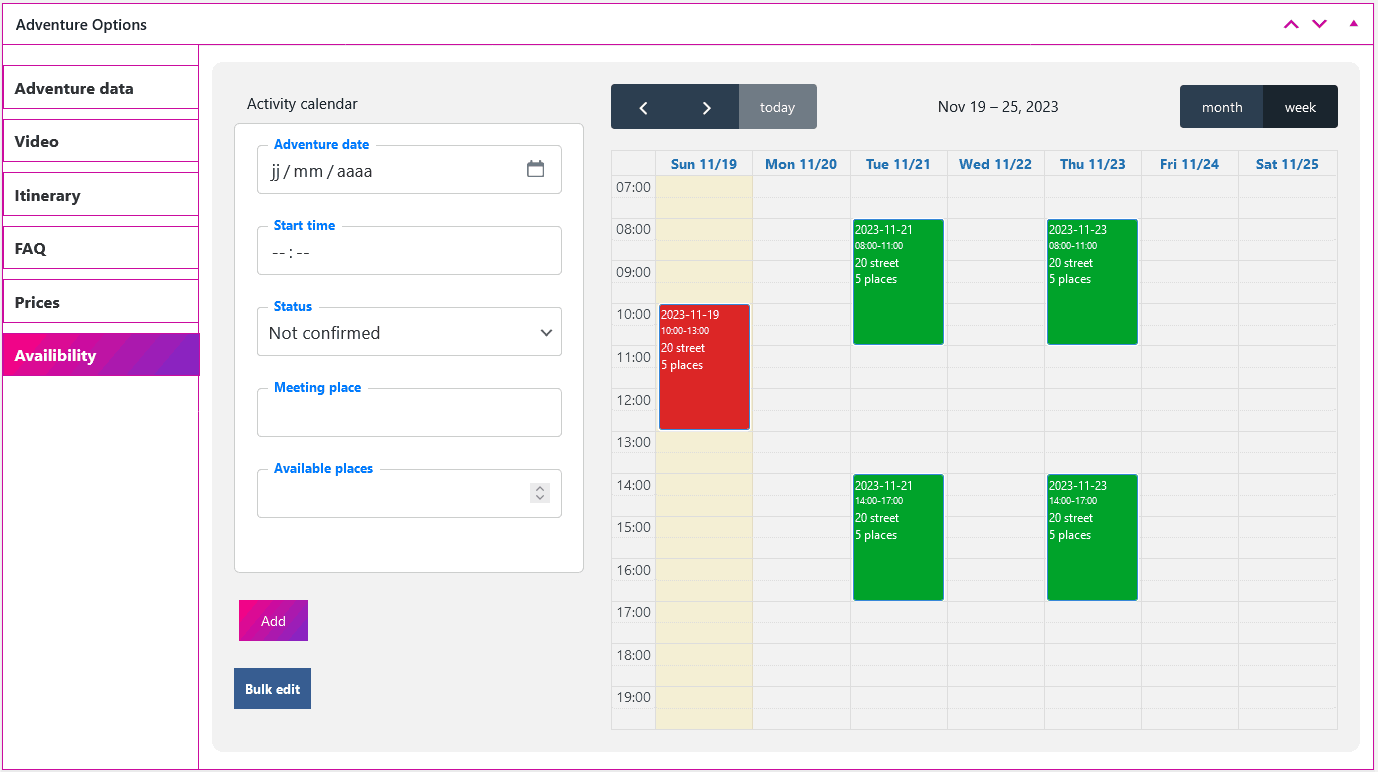
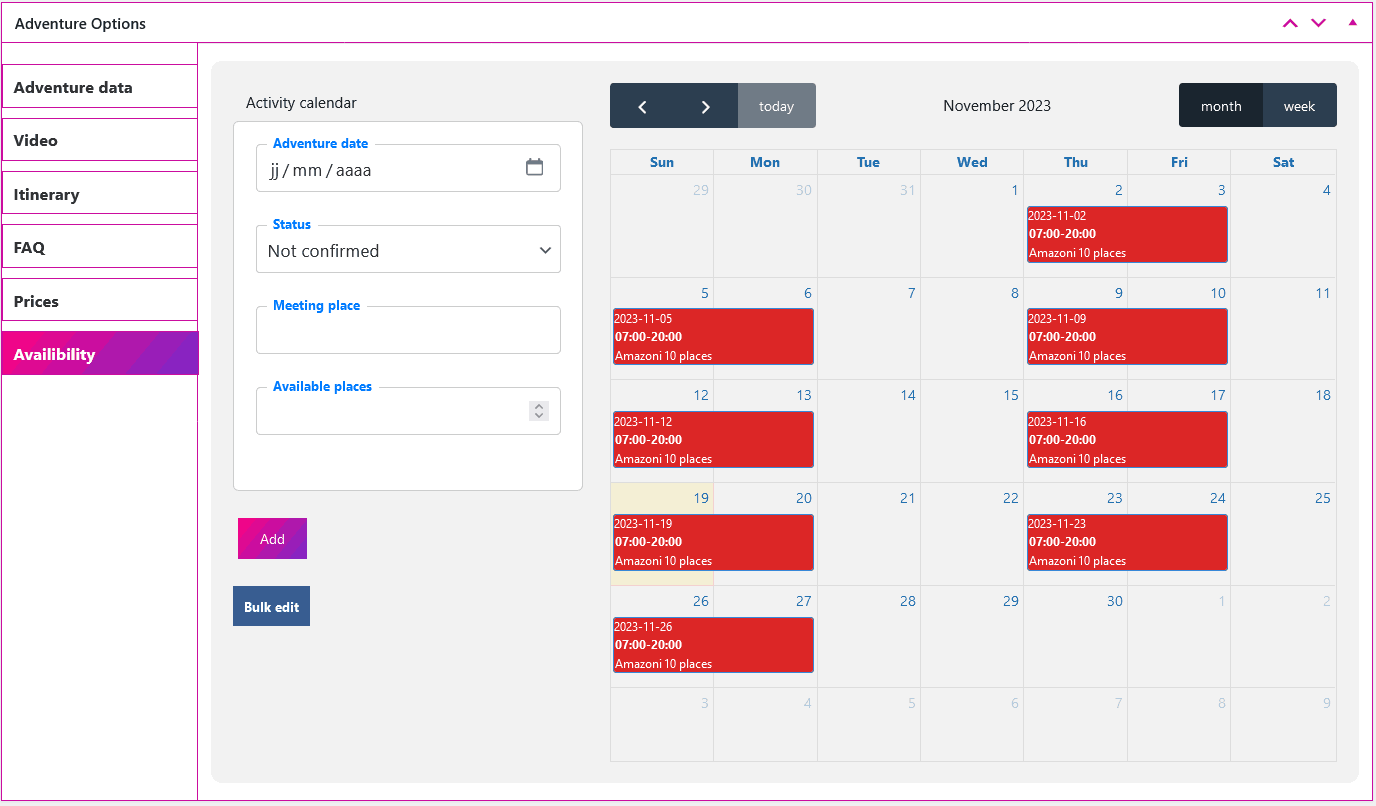
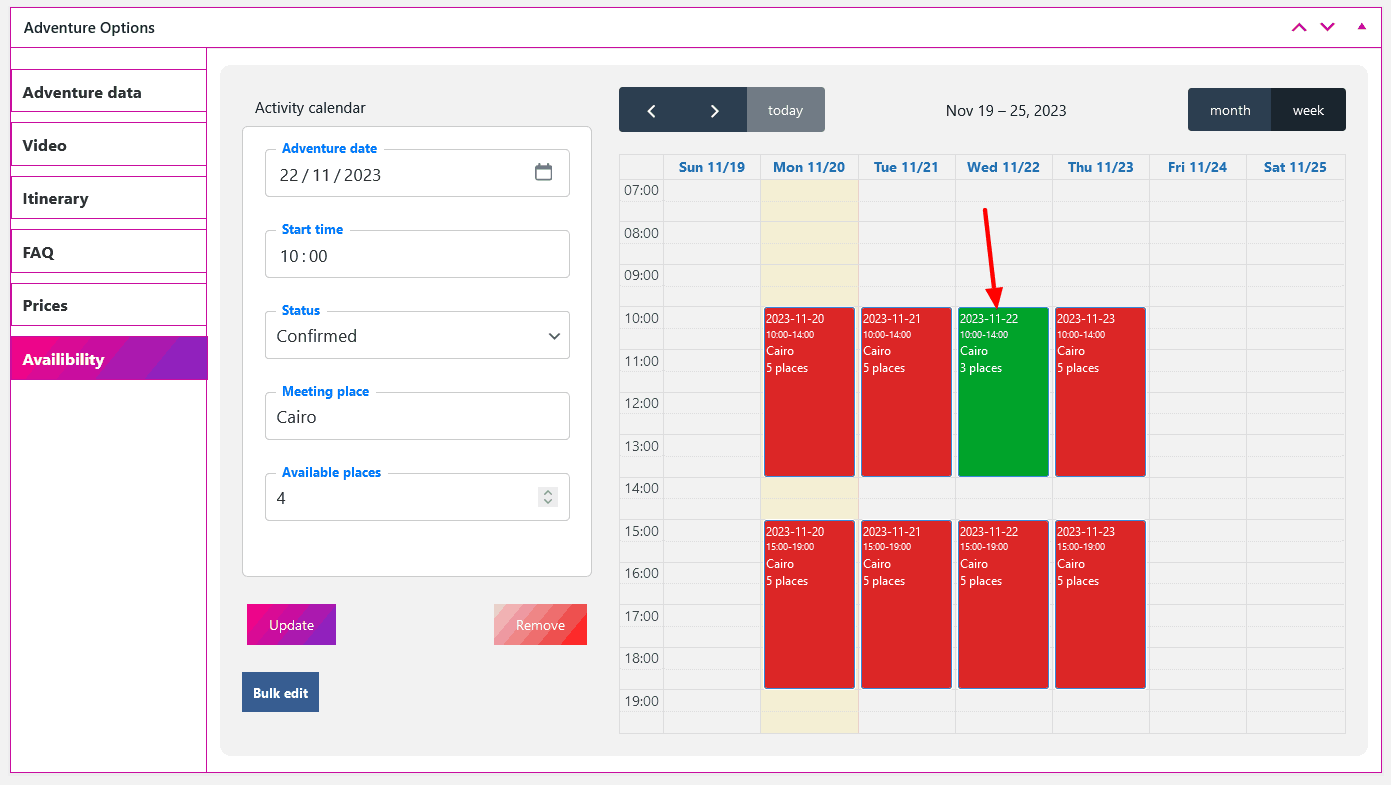
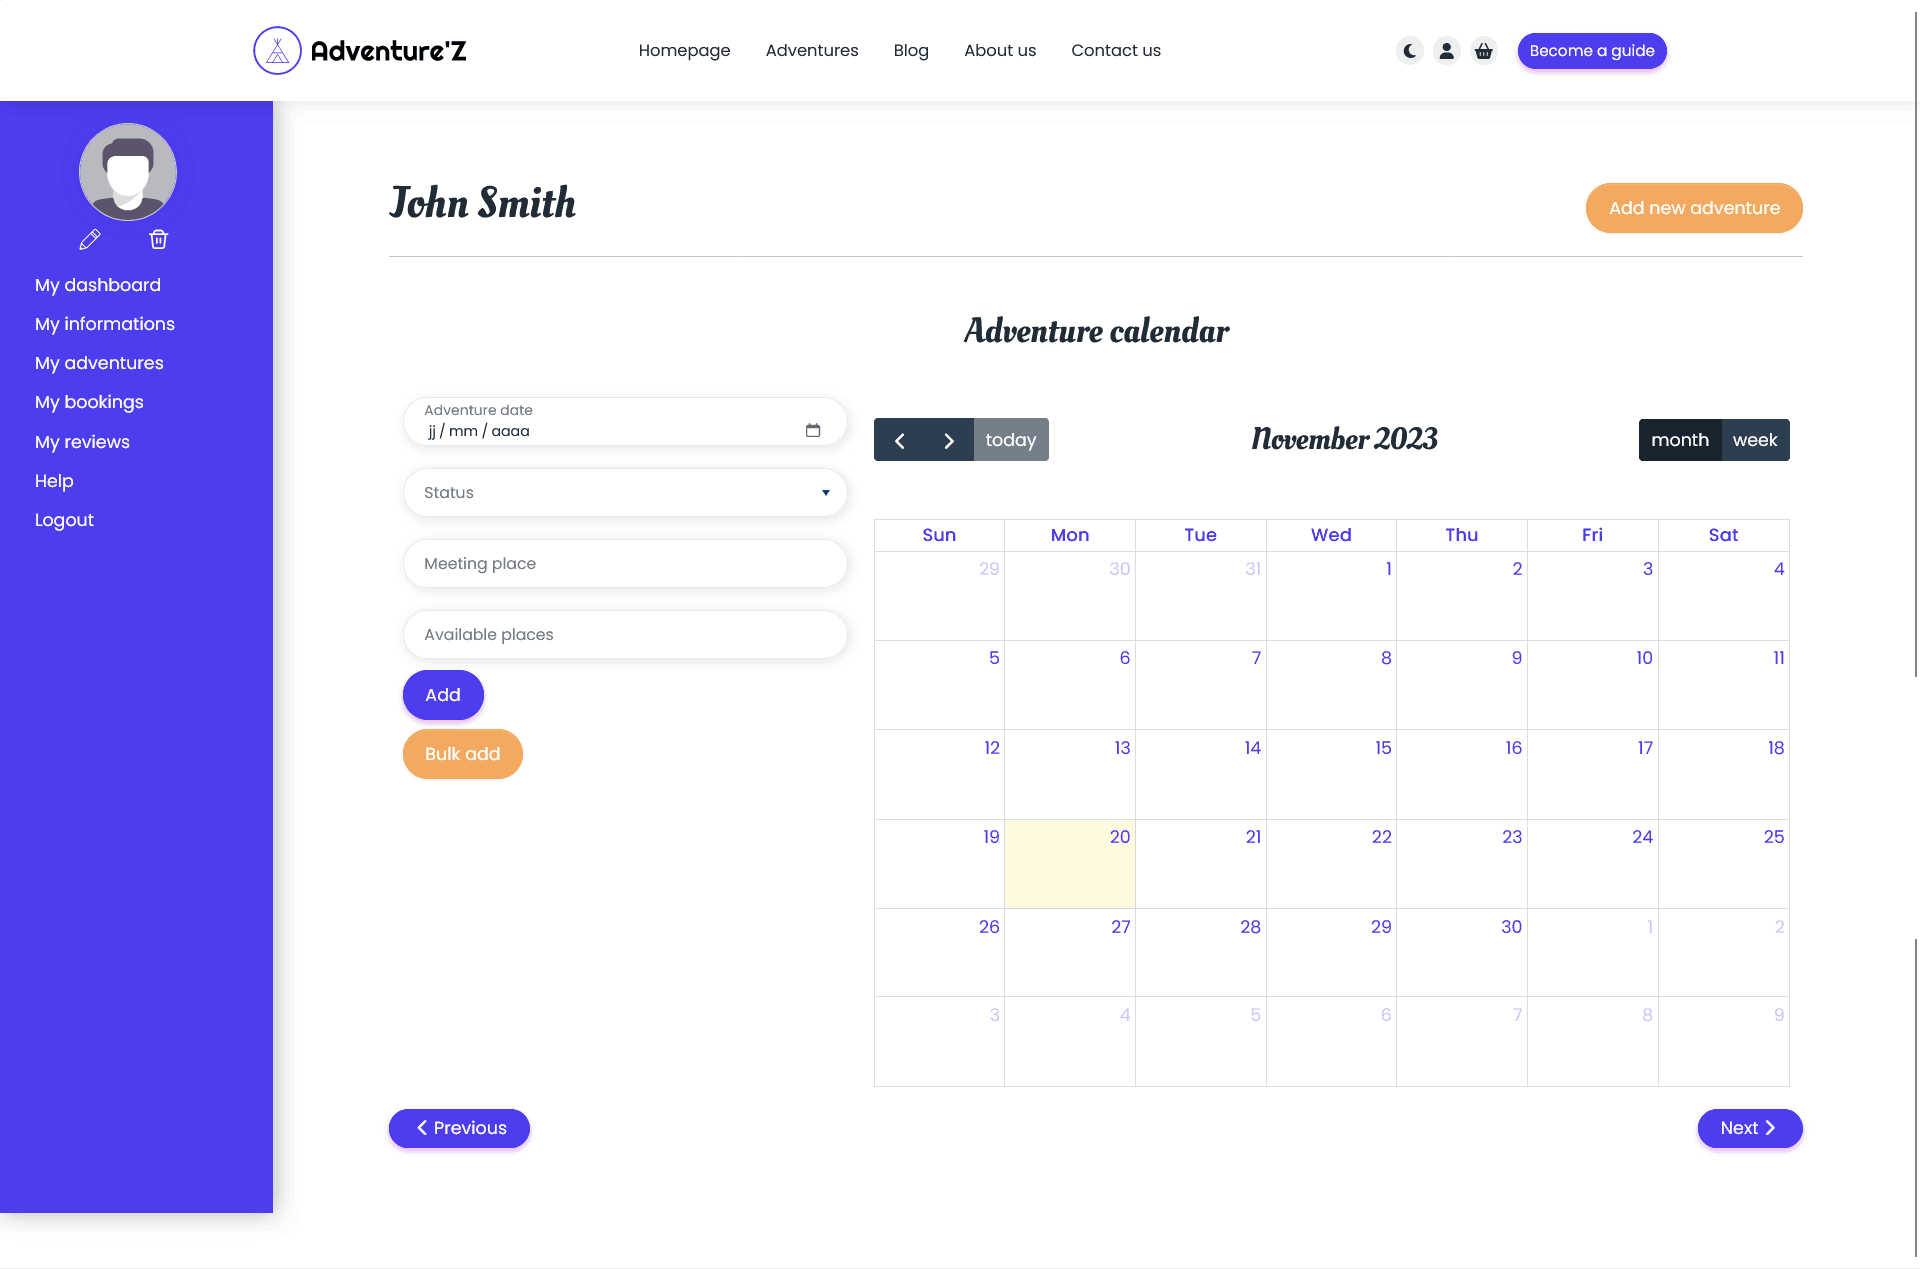
The colors correspond to different statuses by date or time, the colors can be administered from the theme options

You can add several dates and times of adventures with the Bulk edit option, select the desired days, months, years
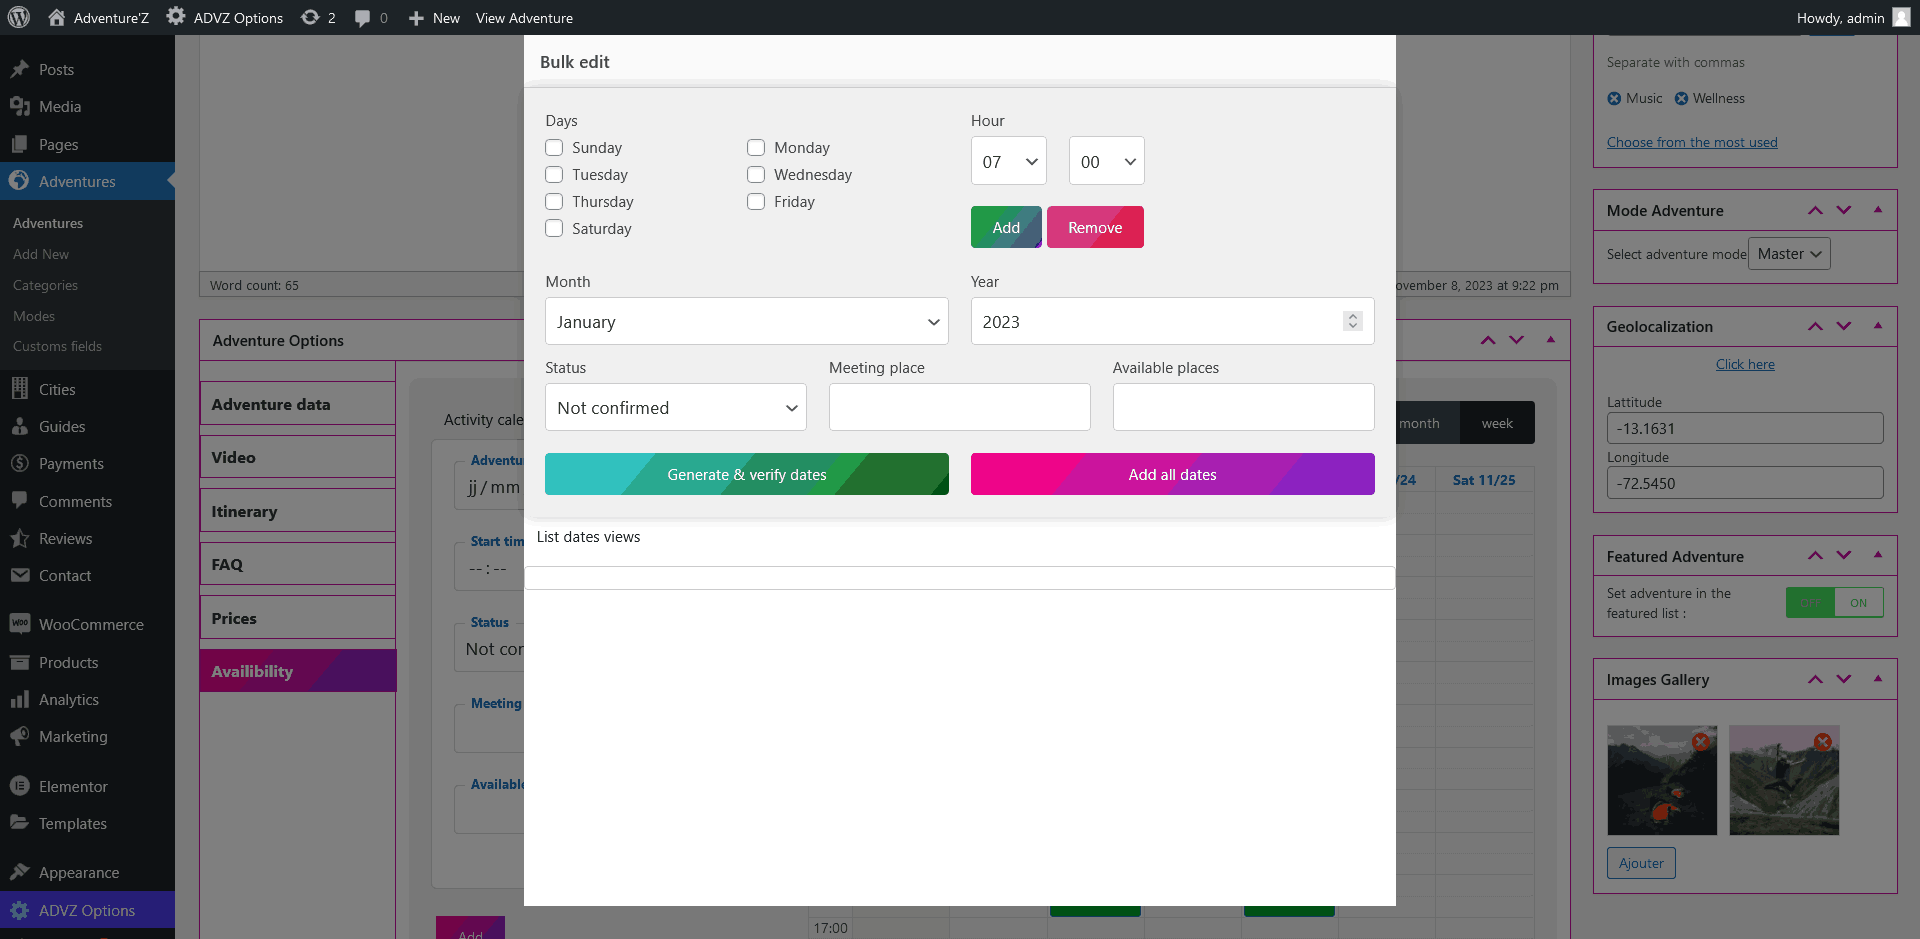
You can verify the dates before adding them by clicking on "Generate & verify dates"
If everything is OK, you can click on "Add all dates" to confirm the addition
All dates will have the same status, same meeting place & available places
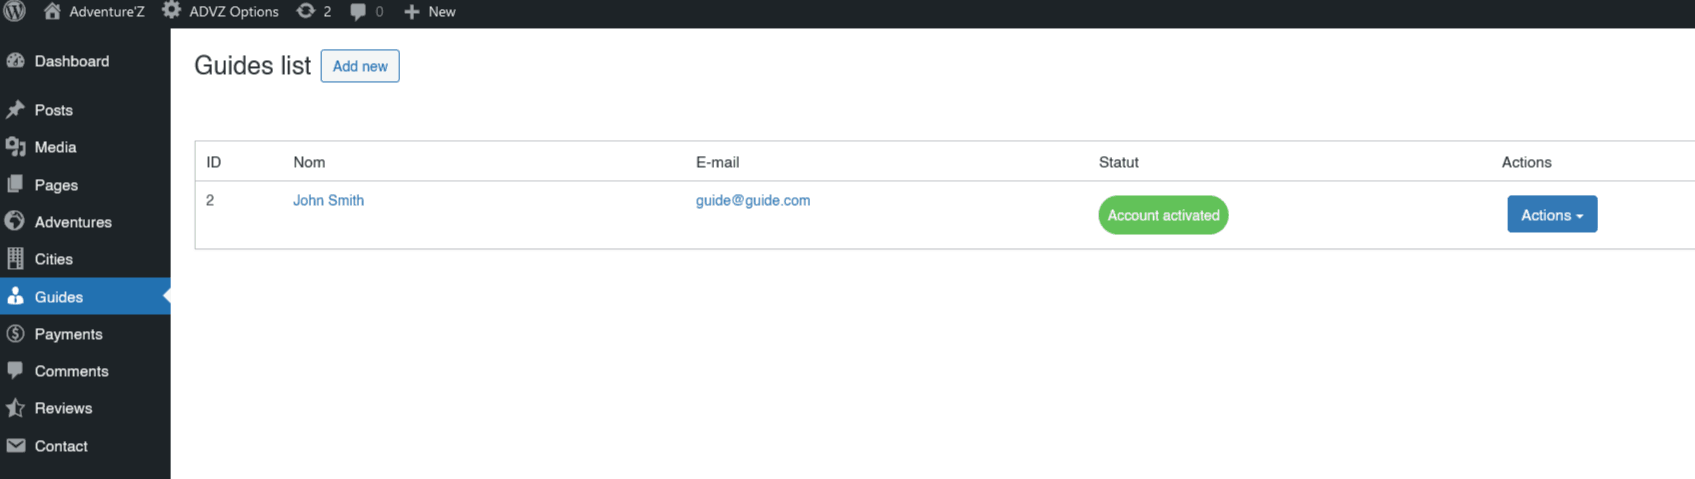
In this section, the administrator can find the complete list of guides, and :
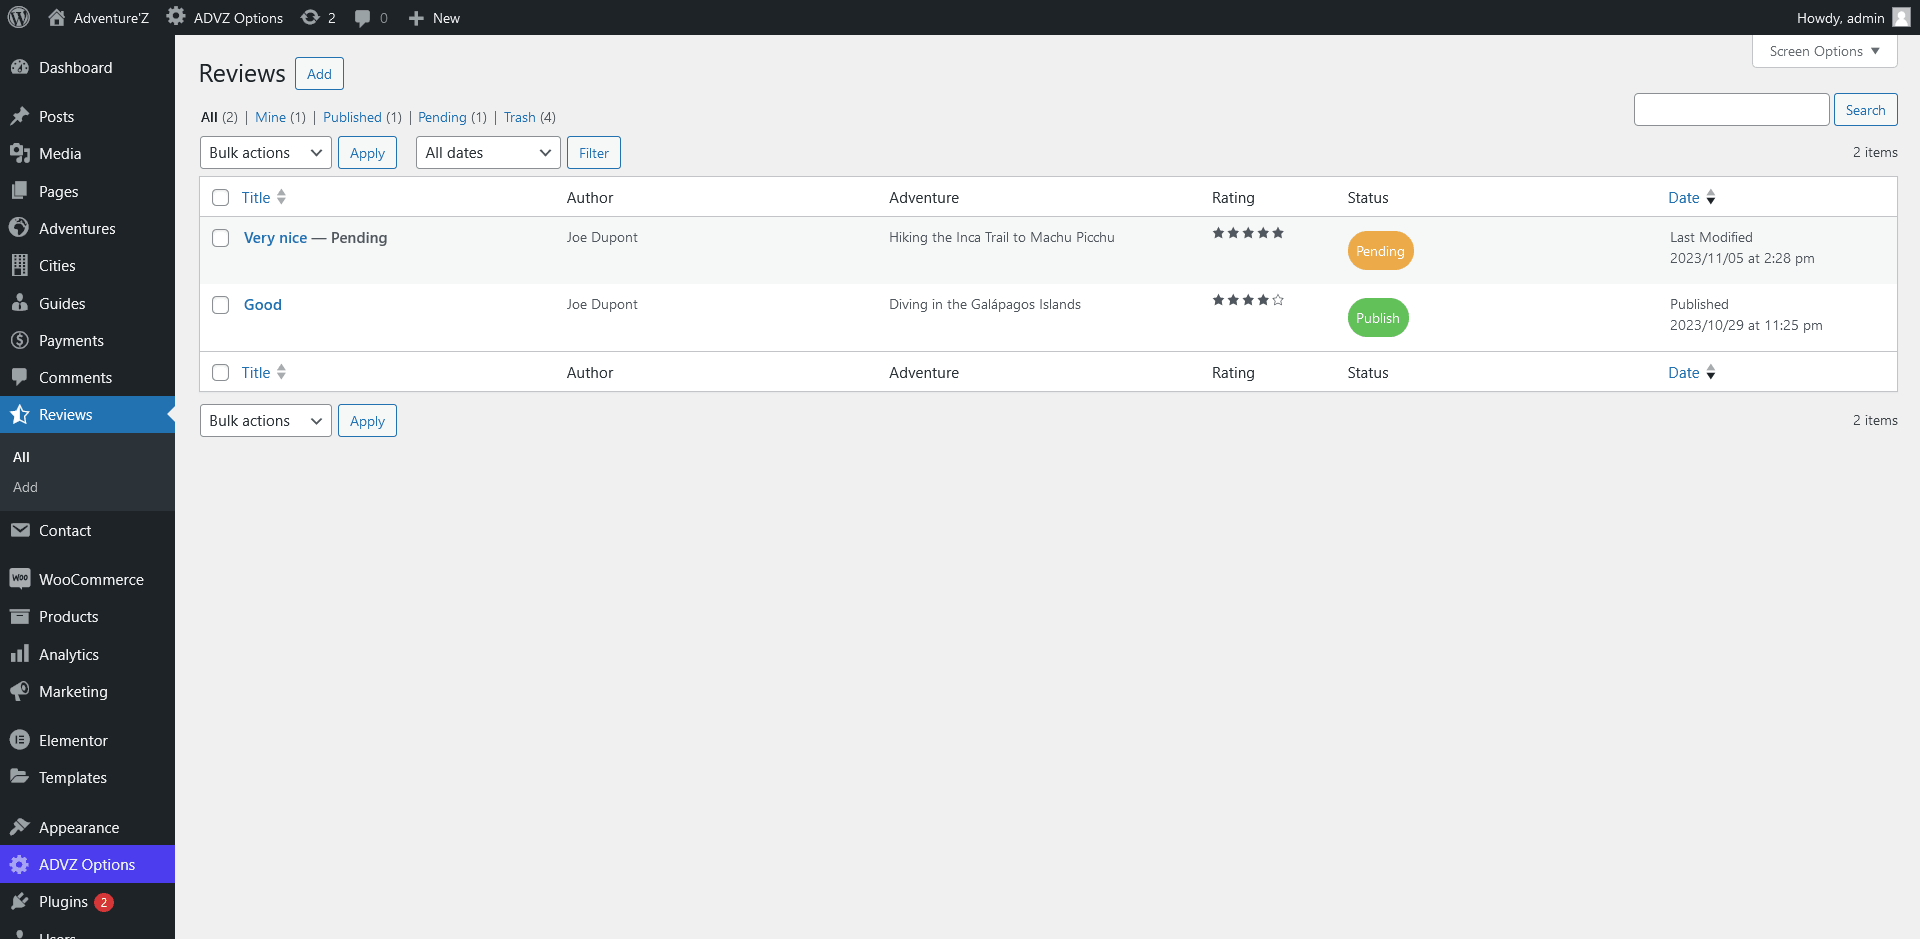
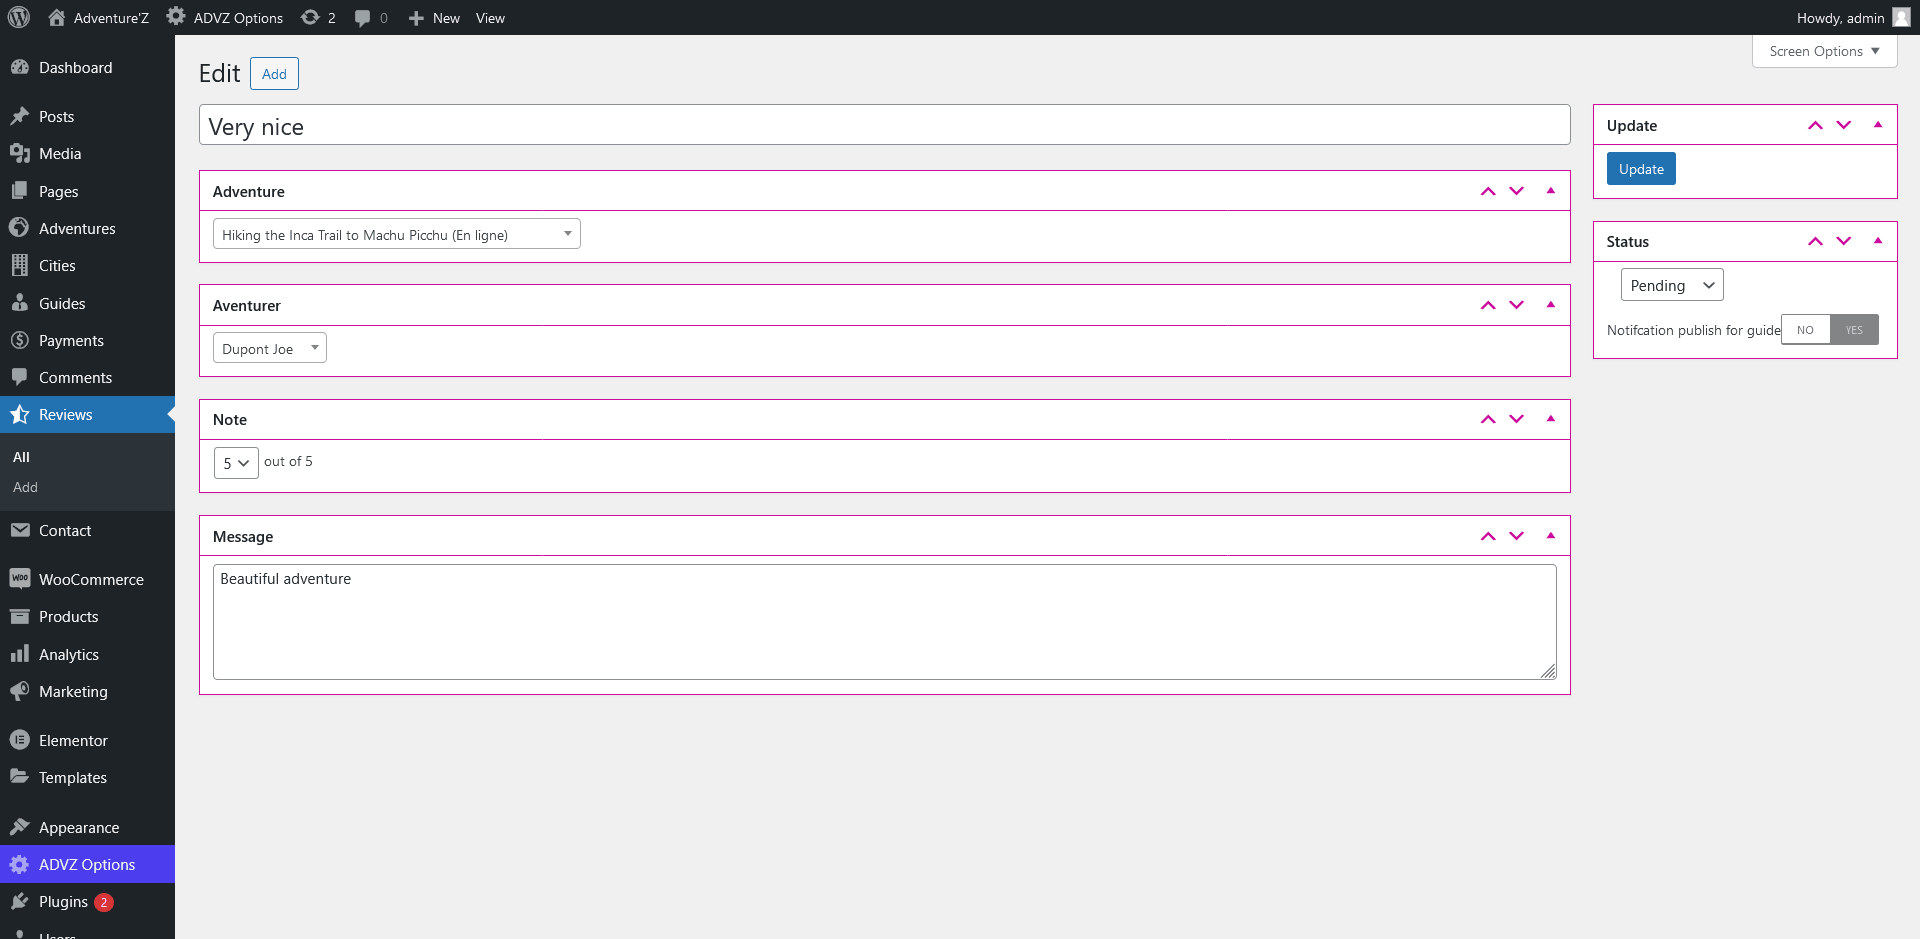
In this section, the administrator can find all the notices and can :

After selecting the options, you will be redirected to the results page
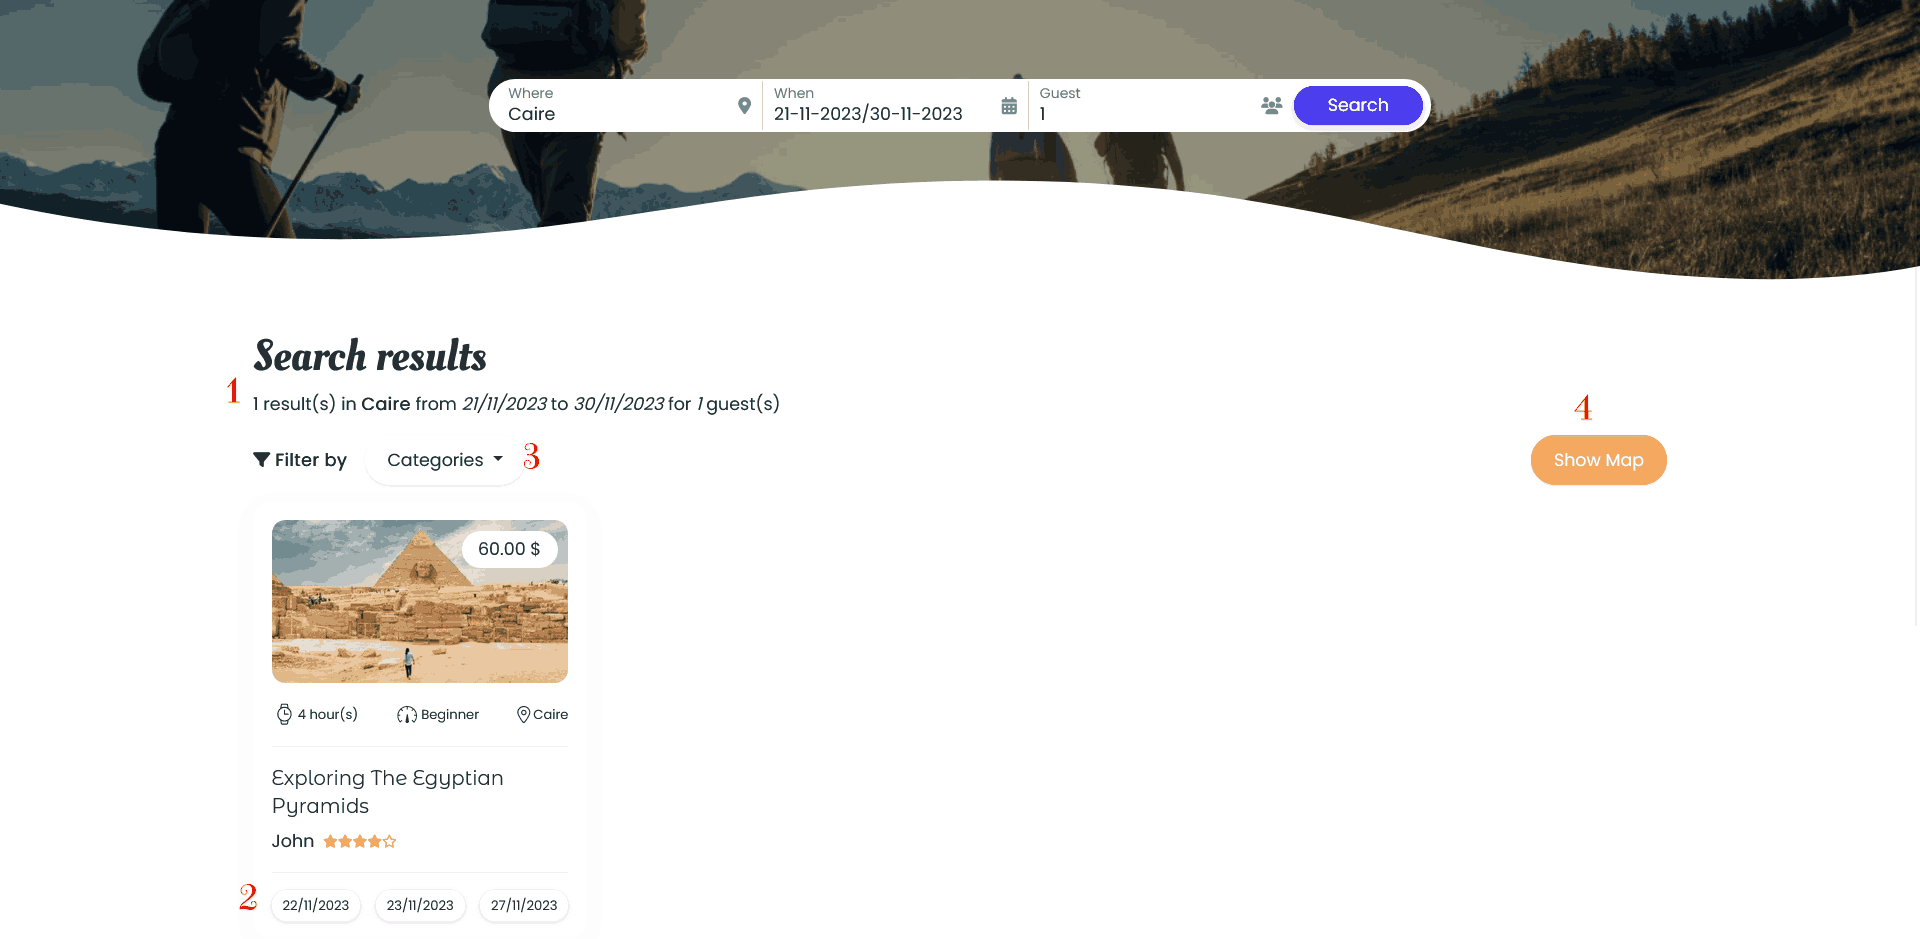
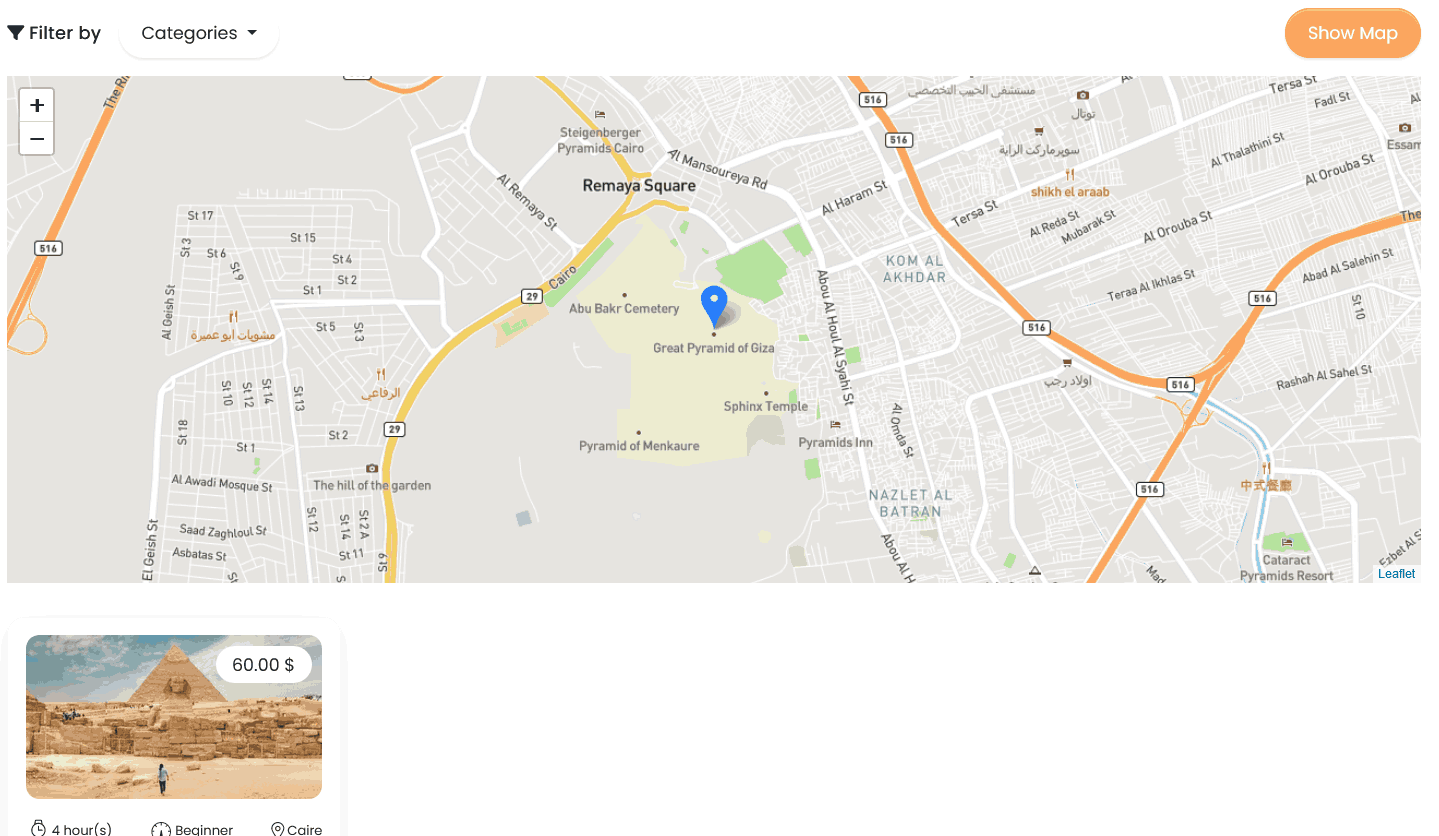
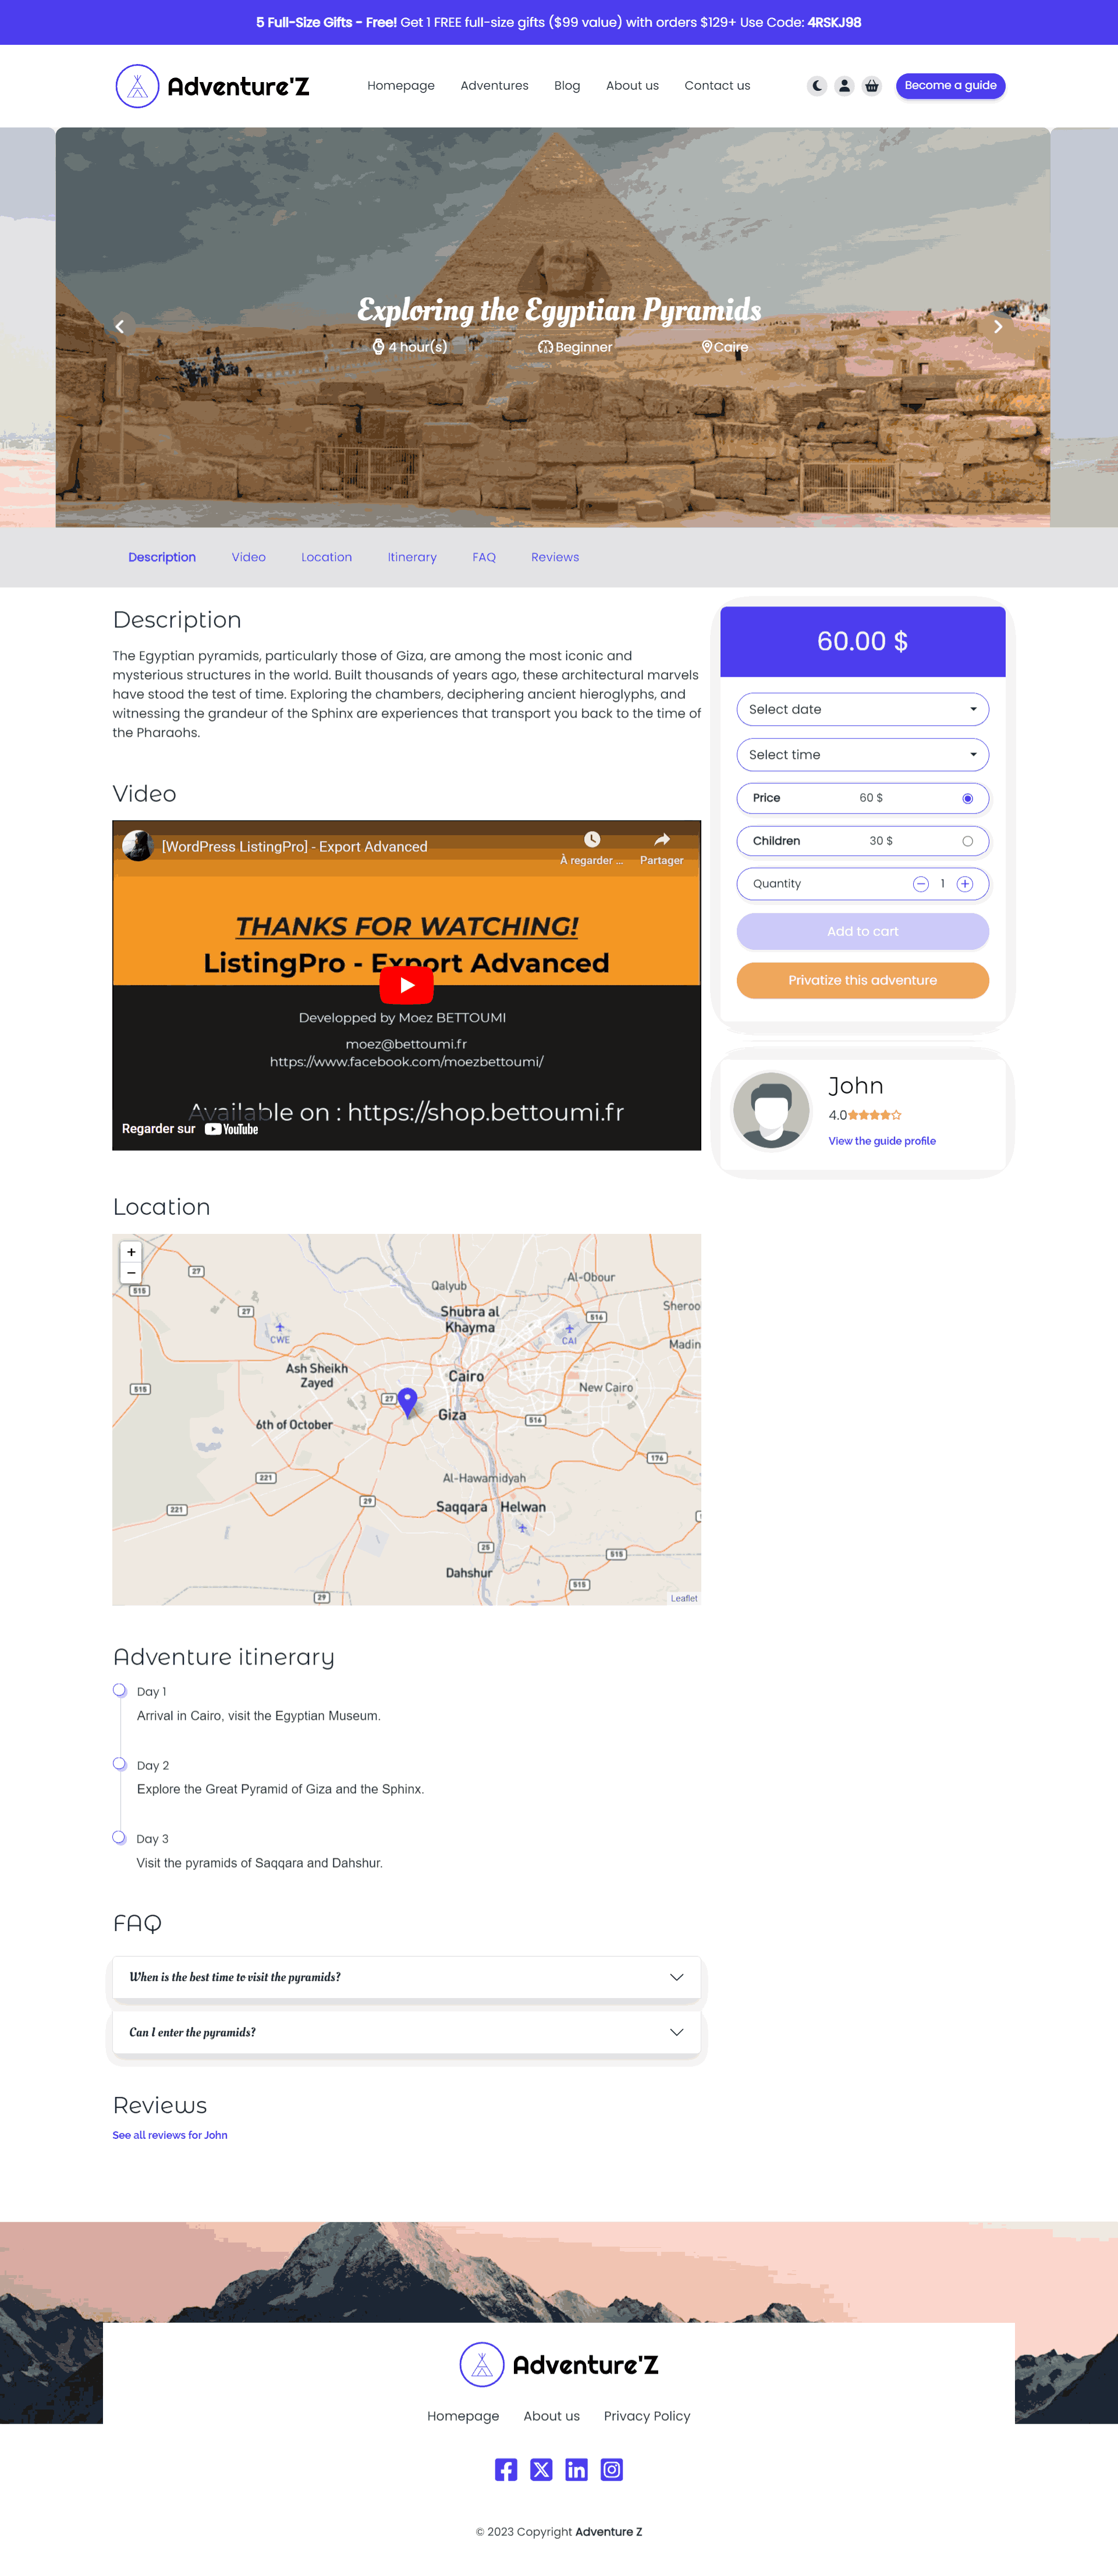
On this page, you can find the details of the adventure: Description, Video, Geolocation, itinerary, FAQ, Reviews, Guide profile
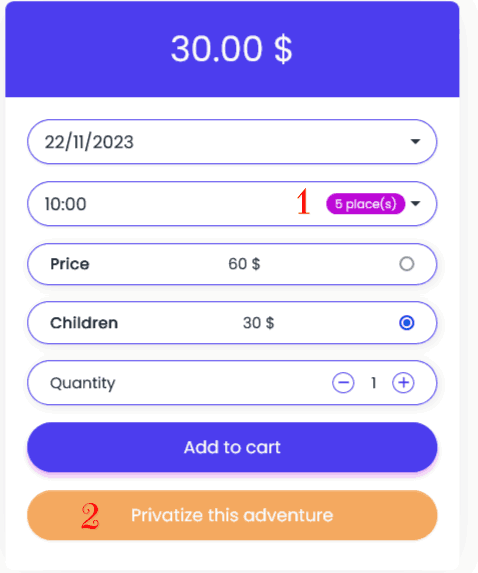
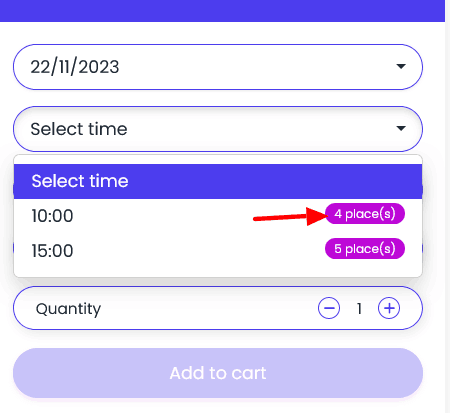
In this box, you can add an adventure to the shopping cart. You must select the date and time, the price (if there are several prices) and the quantity.
The time field is of course only displayed if the adventure type is set to "By time".
If adventure modes are activated via Options, Video, Location, Itinerary and FAQ are displayed depending on the adventure mode.
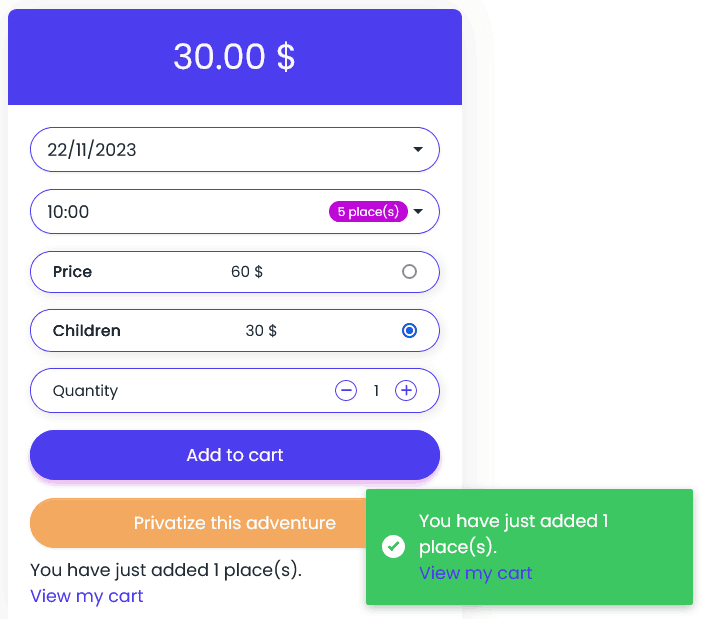
You can add to the cart after selecting the available choices.
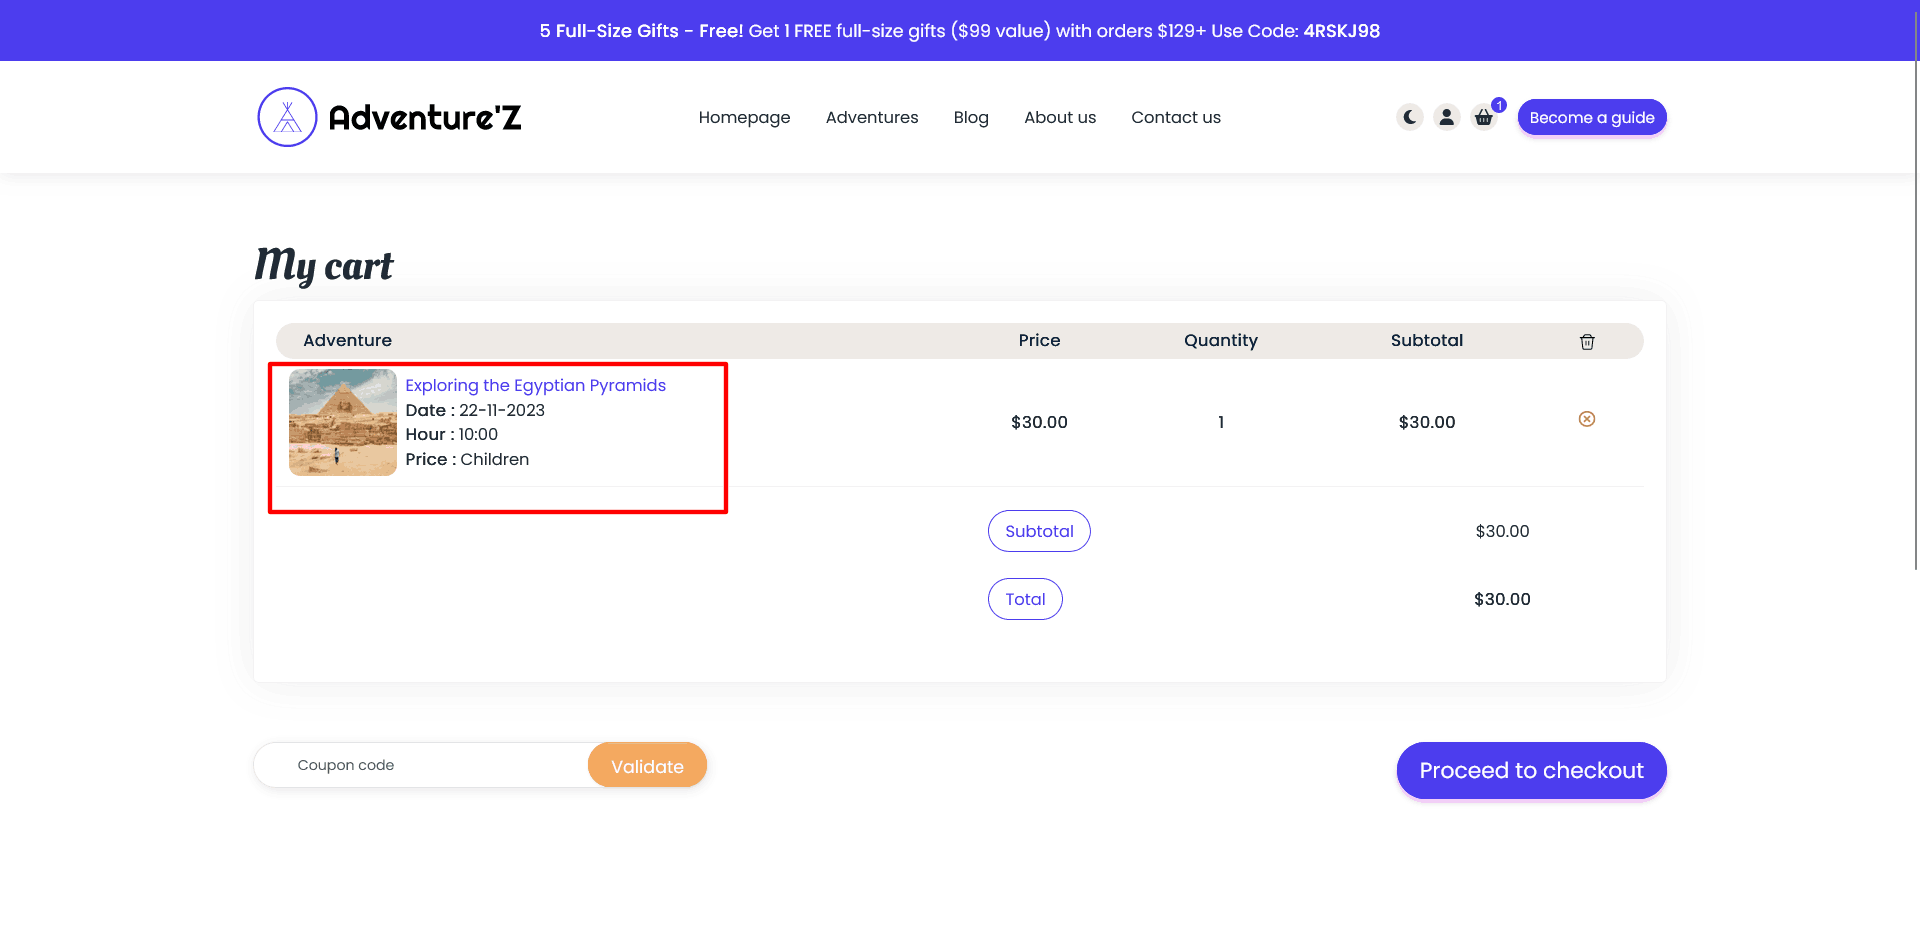
You can find a custom template for this shopping cart page, with a summary of adventures (images, date & time, price name).
You can add a promotional code.
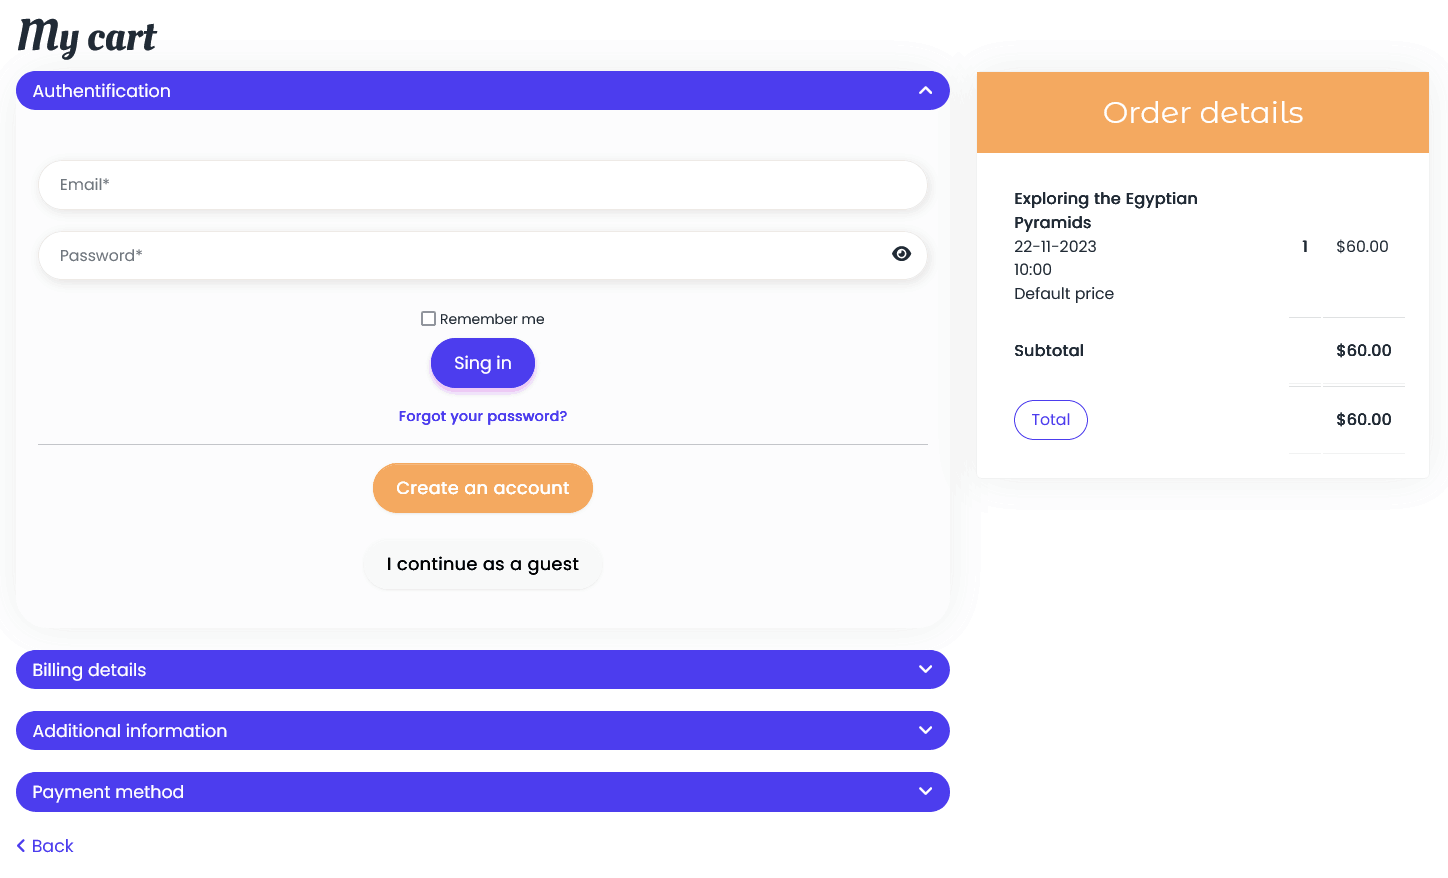
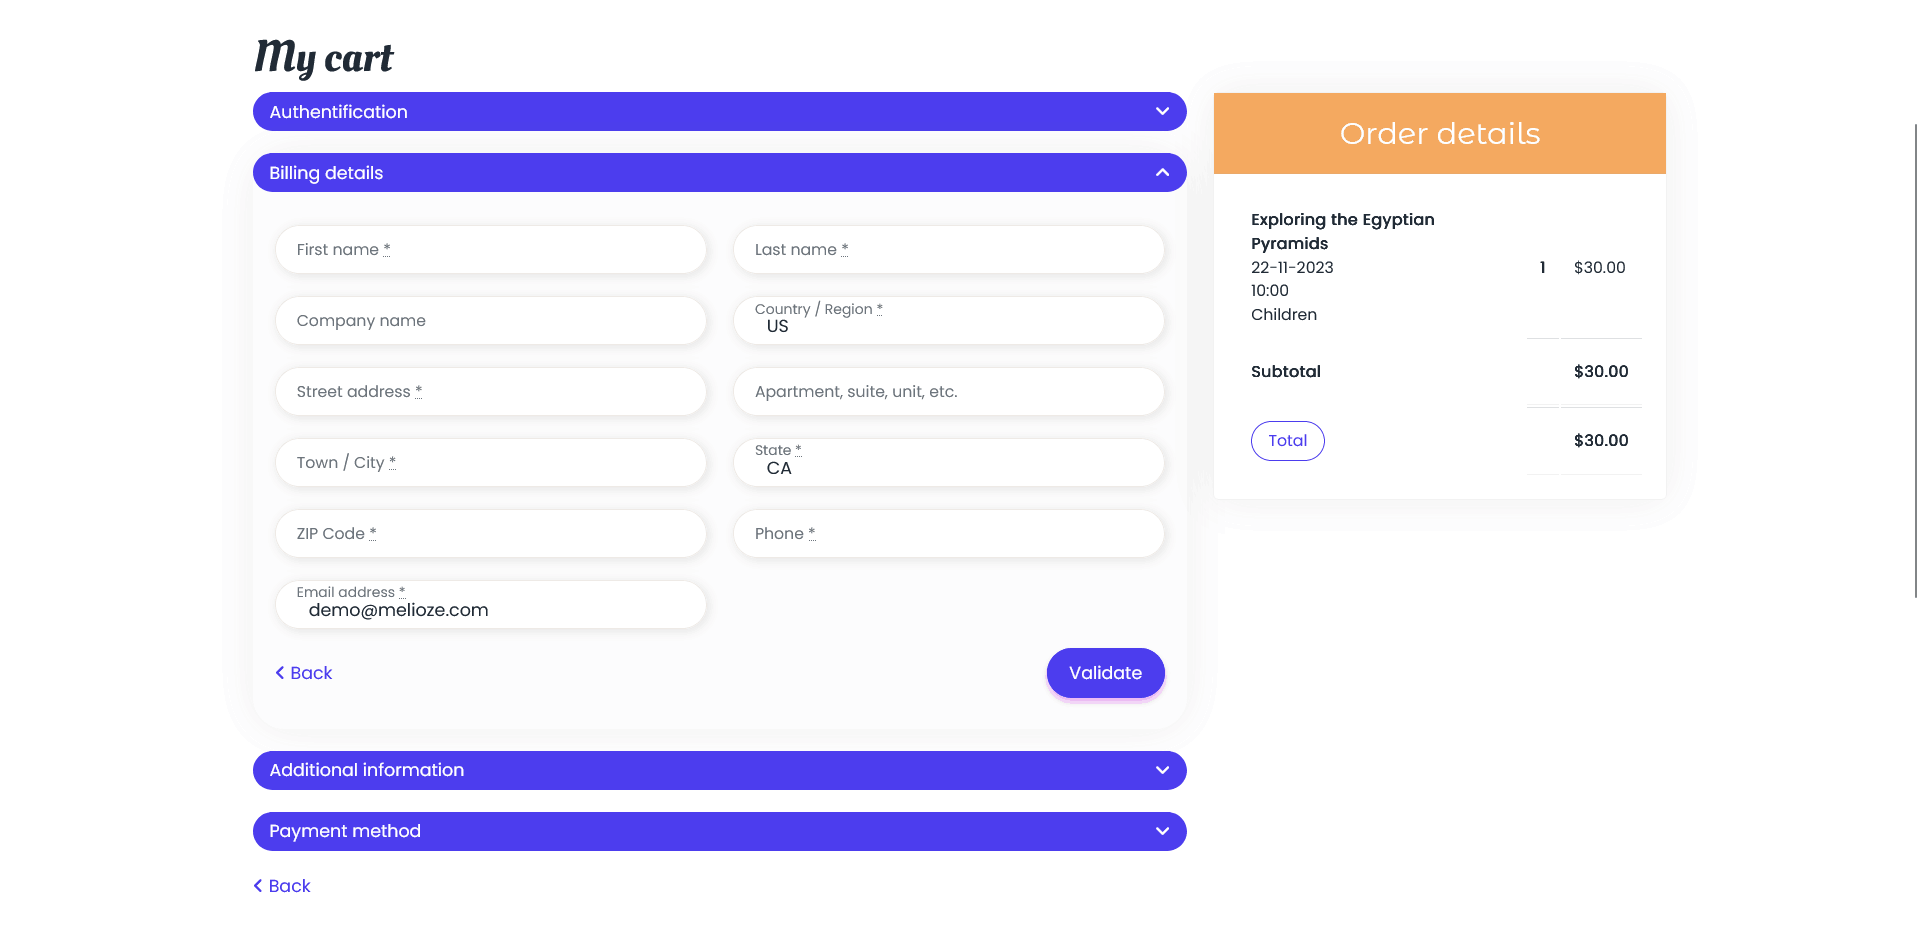
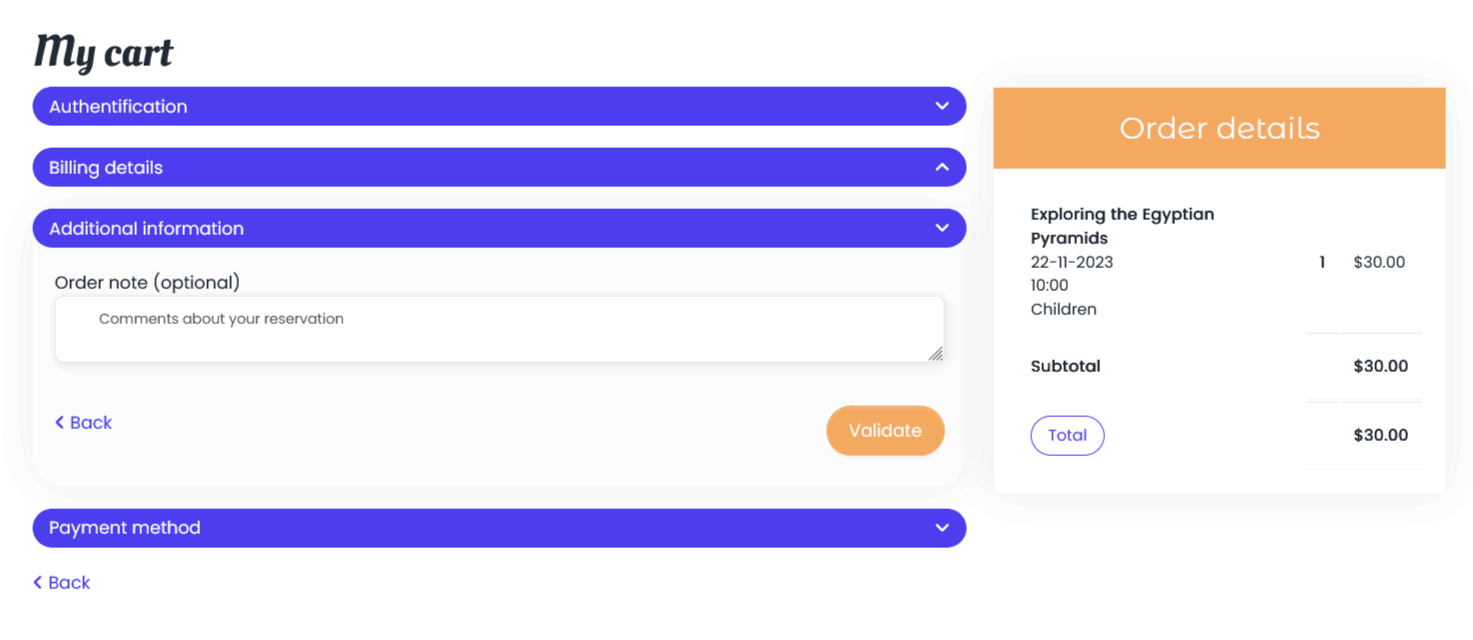
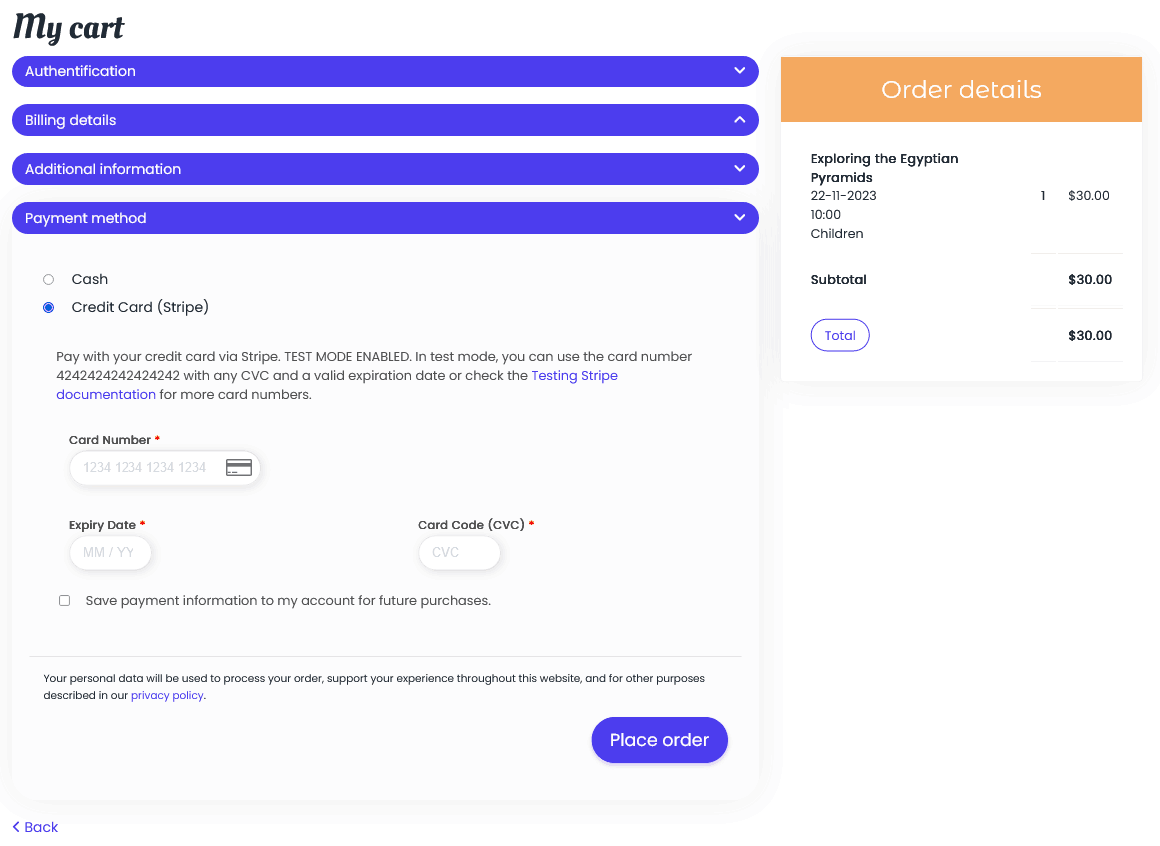

The checkout process is completely personalized, you can see the login steps, data entry and additional information and payment methods as well as a personalized thank you page.
Once the order has been confirmed, the number of places available for that date and time is automatically updated.
If we look at the calendar for this adventure, we can see that this date has changed color (status) to confirmed, since the minimum number of guests for the adventure is 1, and since the order has a quantity of 1, this date changes status to confirmed.
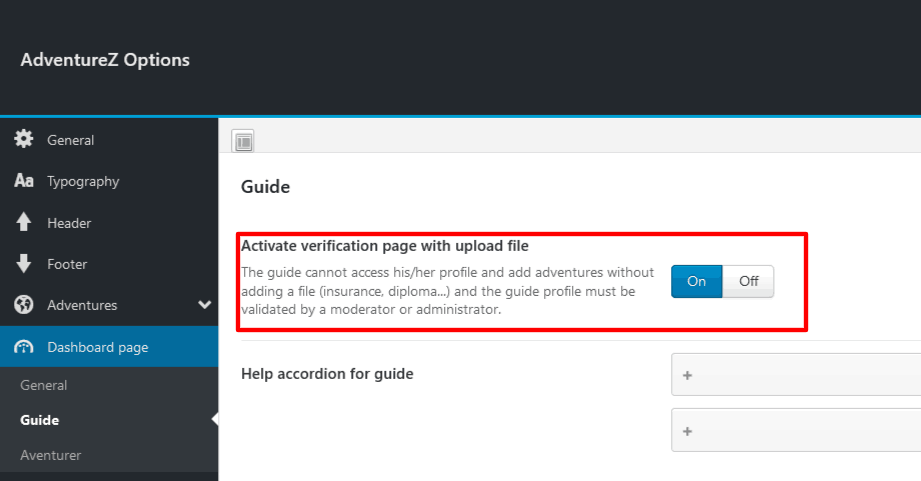
For the first connection after a guide account has been created, and only if the 'Verification with file upload' option is enabled in the theme options, the guide will only have access to a file upload page, the information page and the help page.
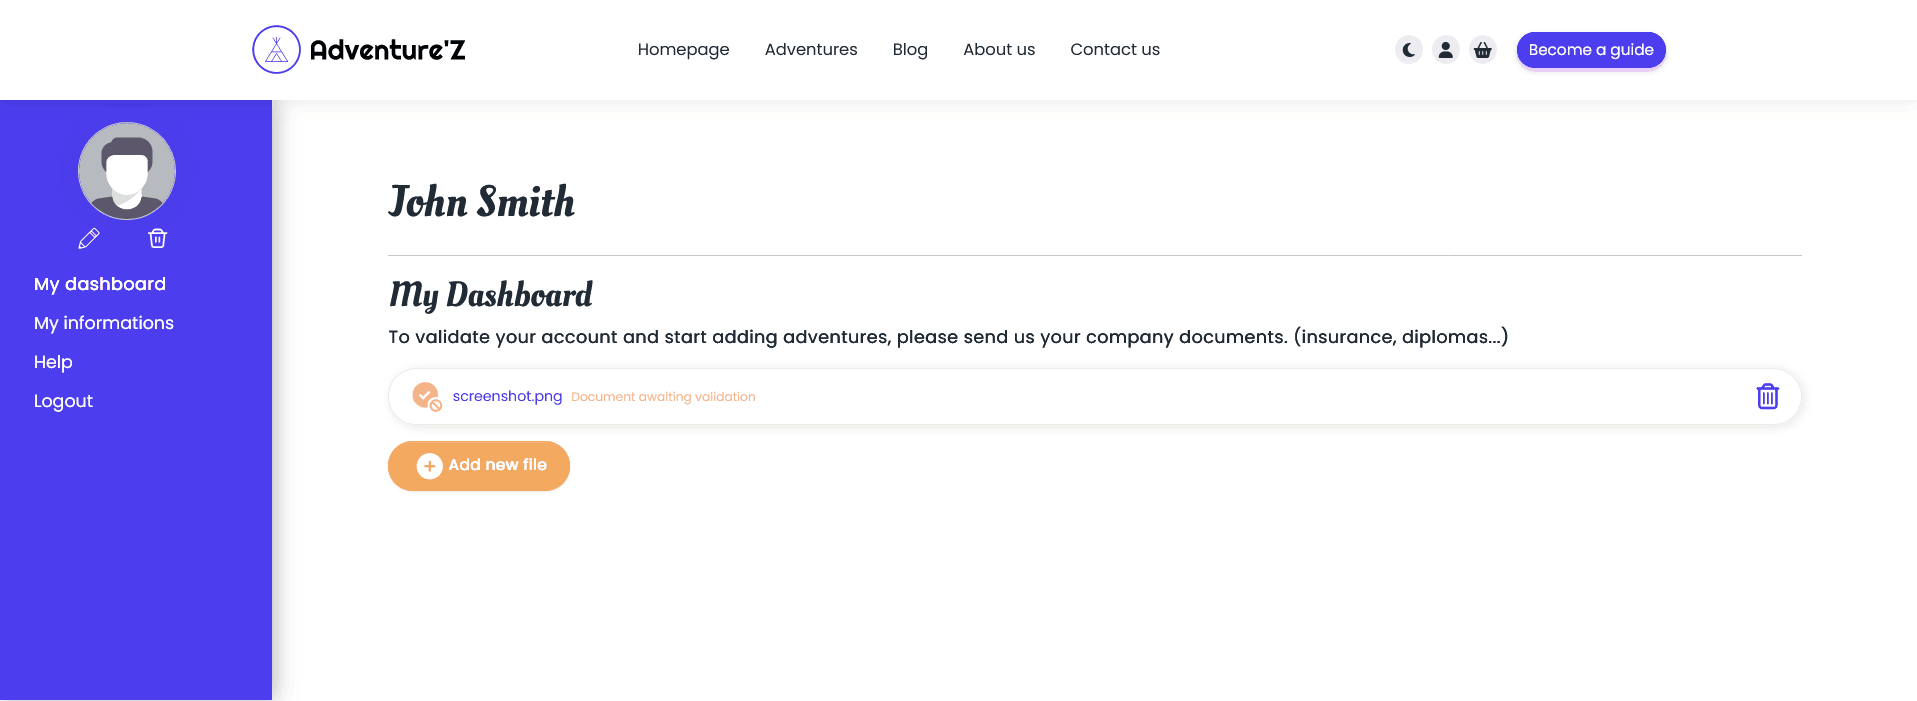
To access all pages, an administrator must approve the guide account.

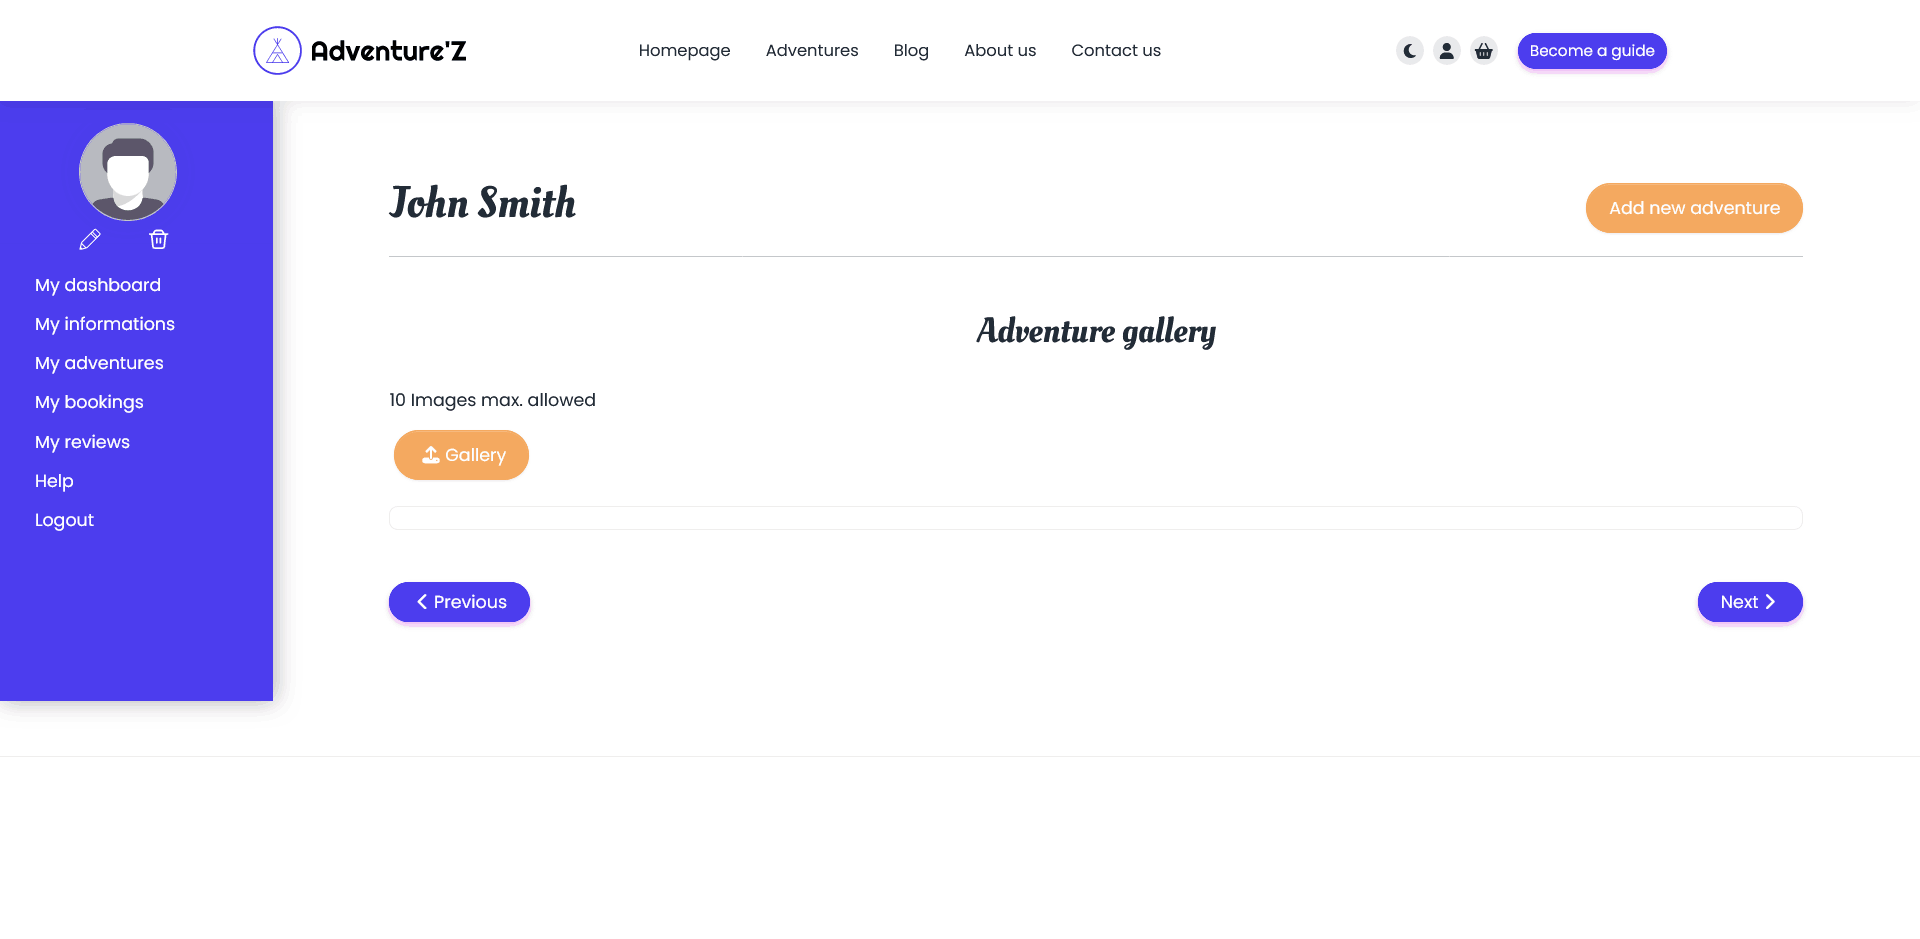
In the dashboard, the guide can find all his own data
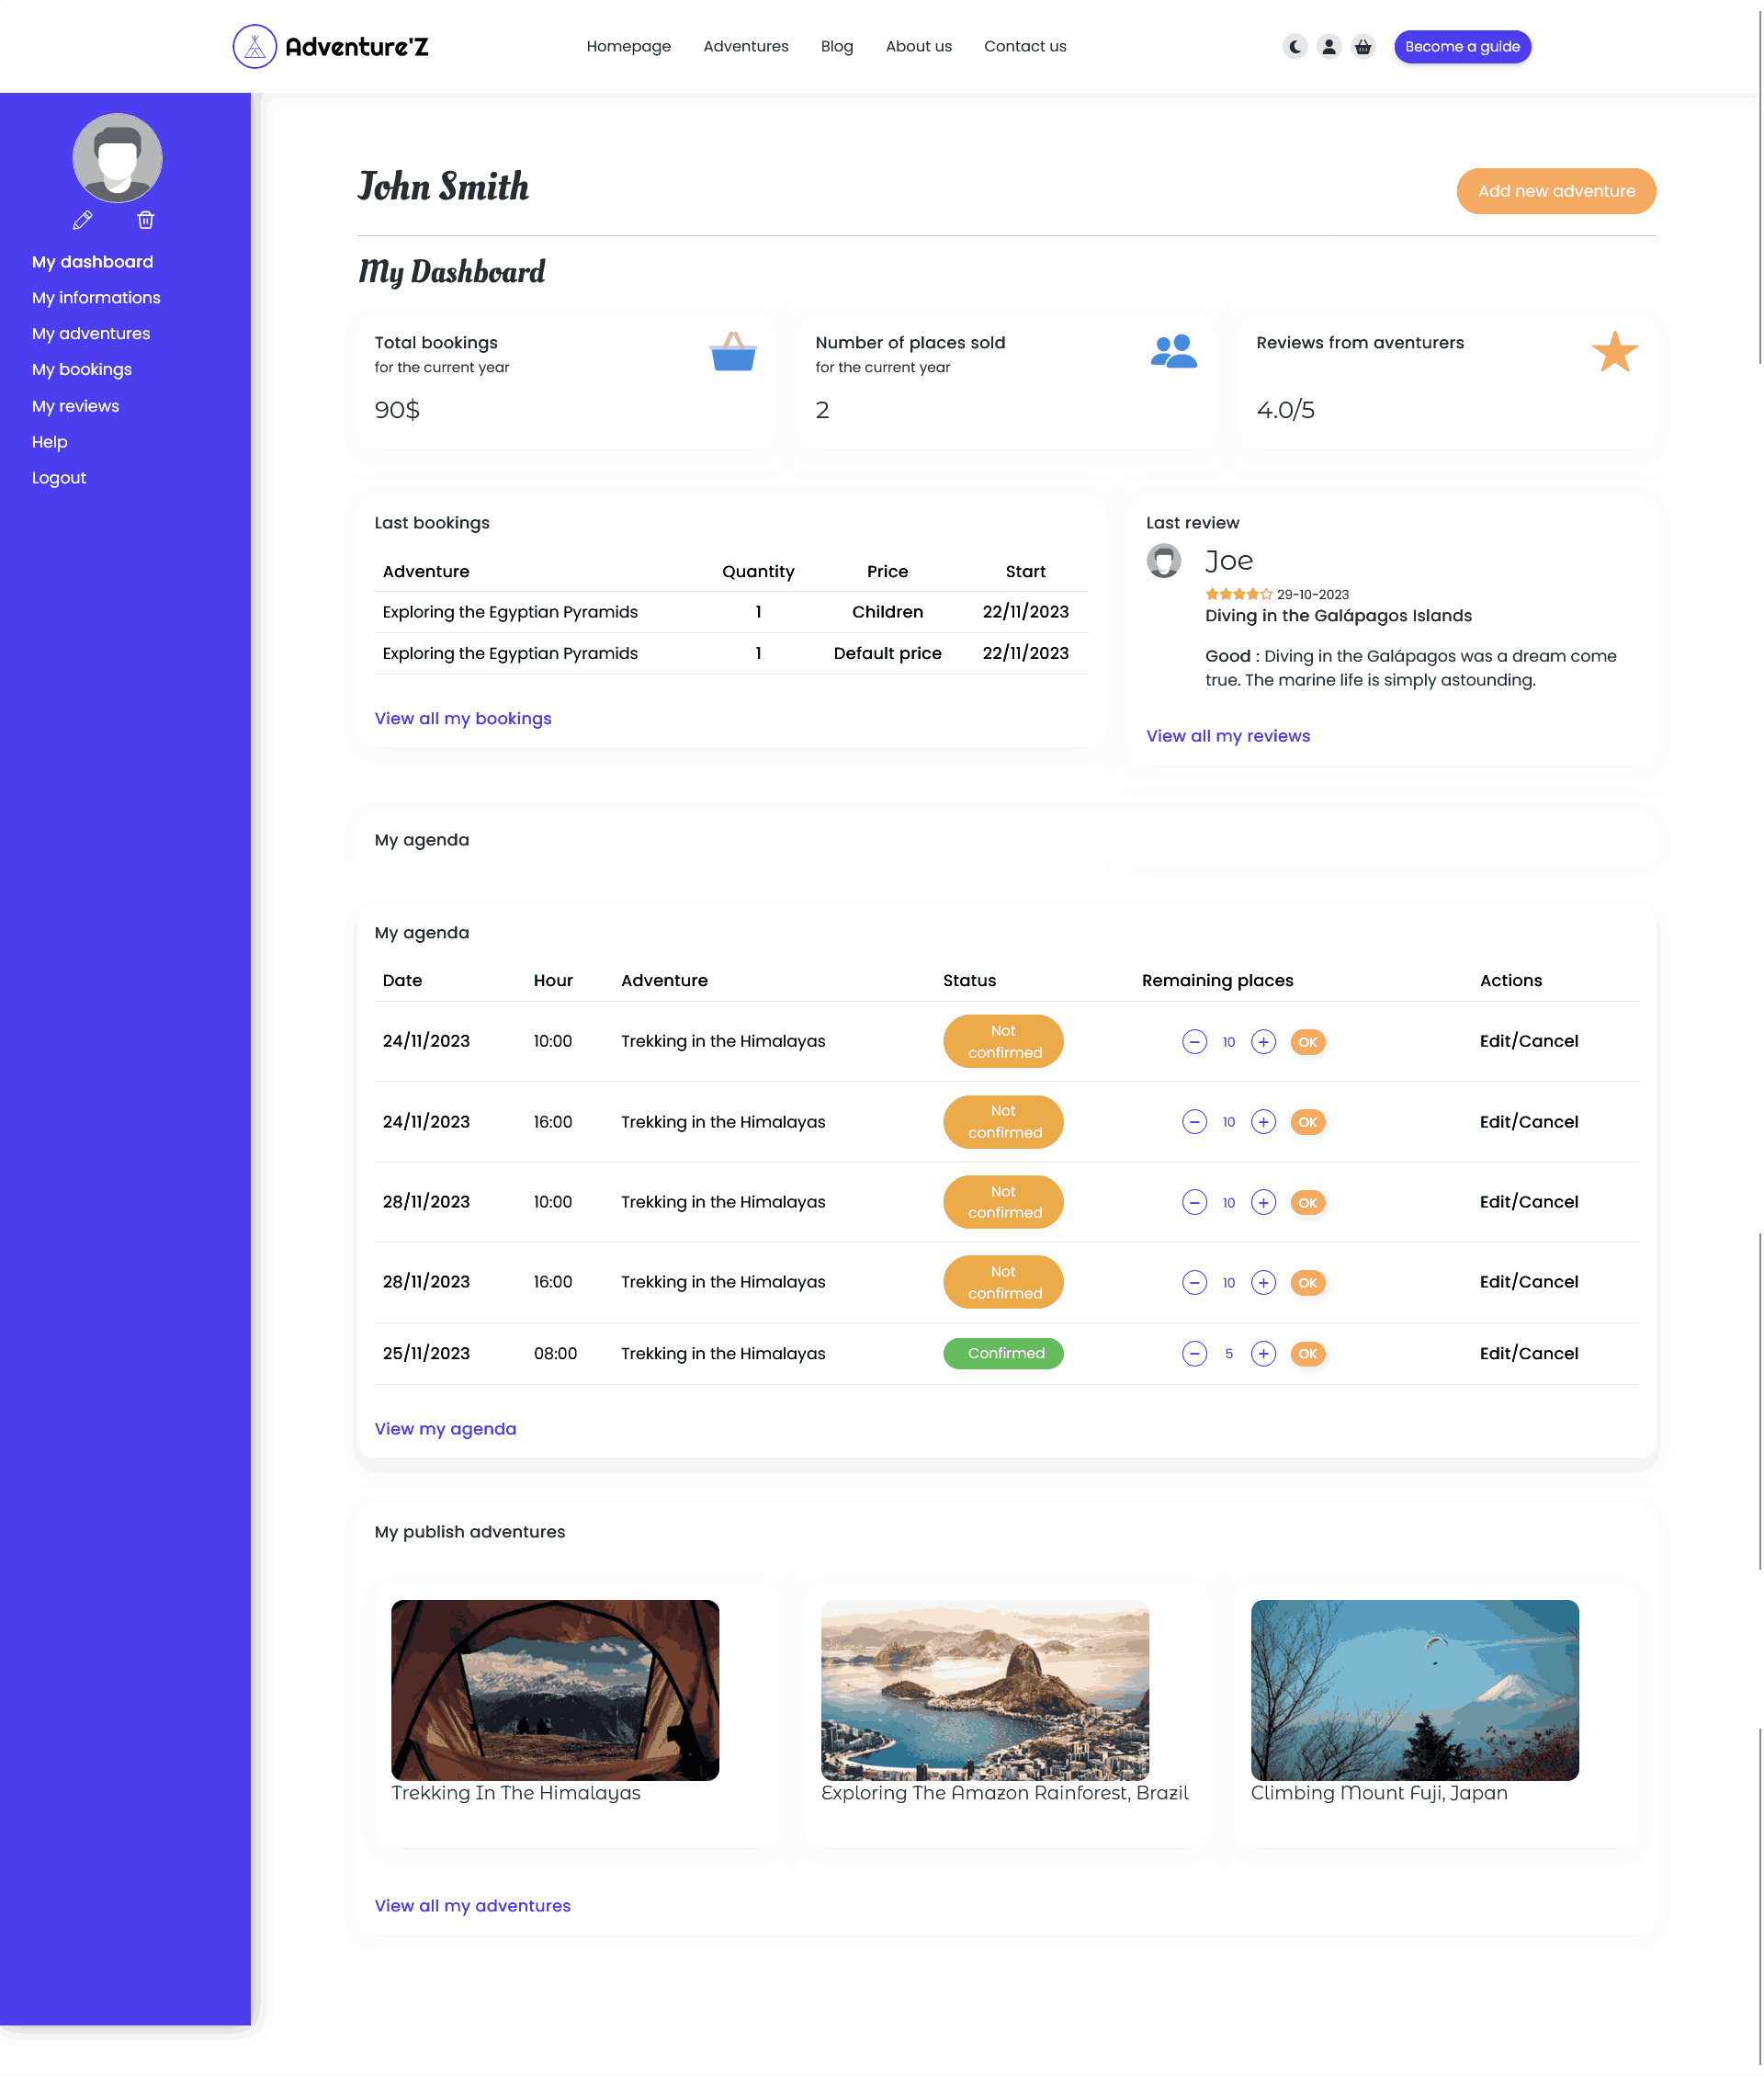
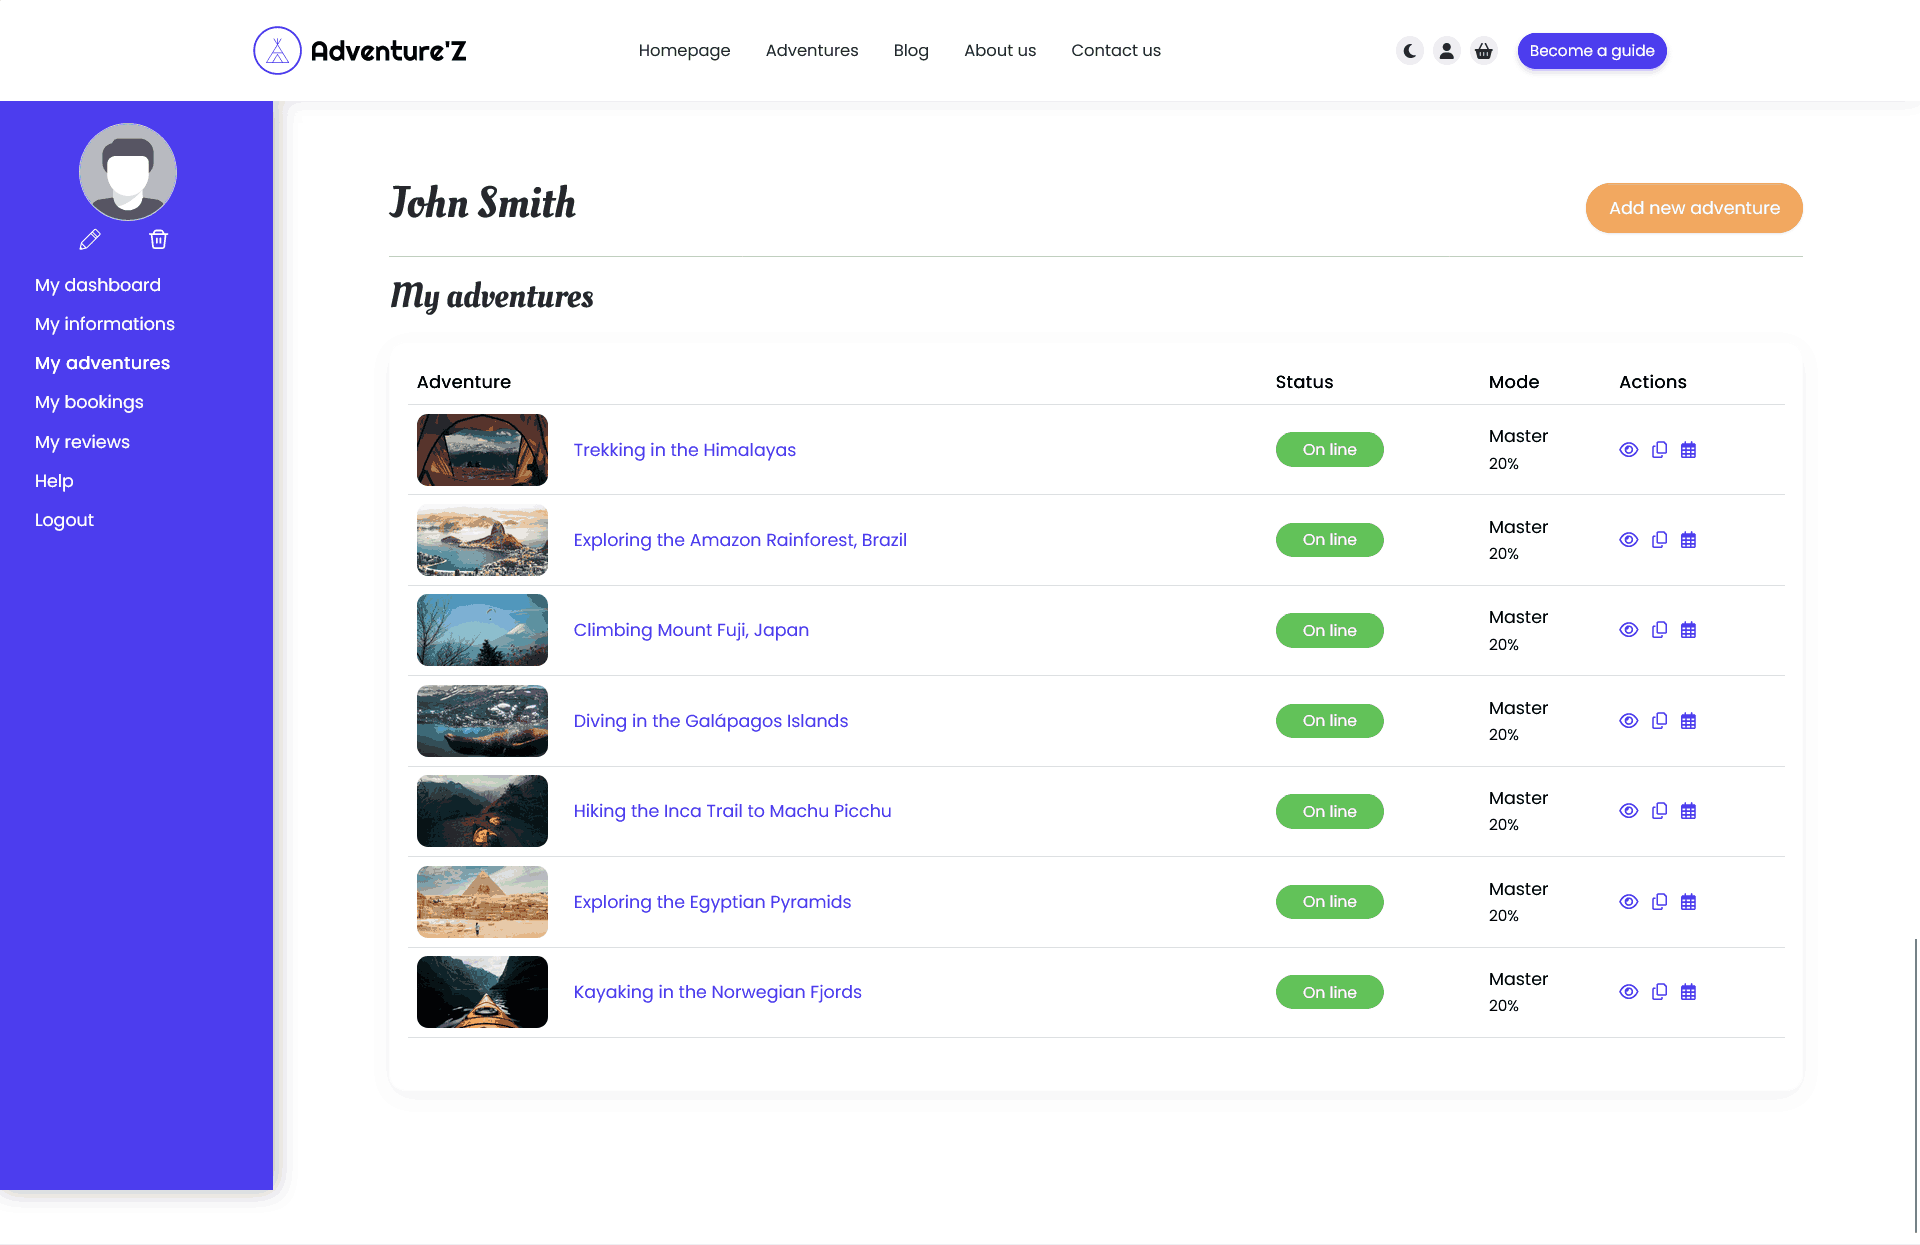
The guide can change his profile photo, modify the places available for each adventure date, view these bookings and add new adventures.
To add a new adventure, the guide must go through several steps:
This step only appears if adventure modes is enabled in the theme options.
You can add several prices using the "Add new" button.
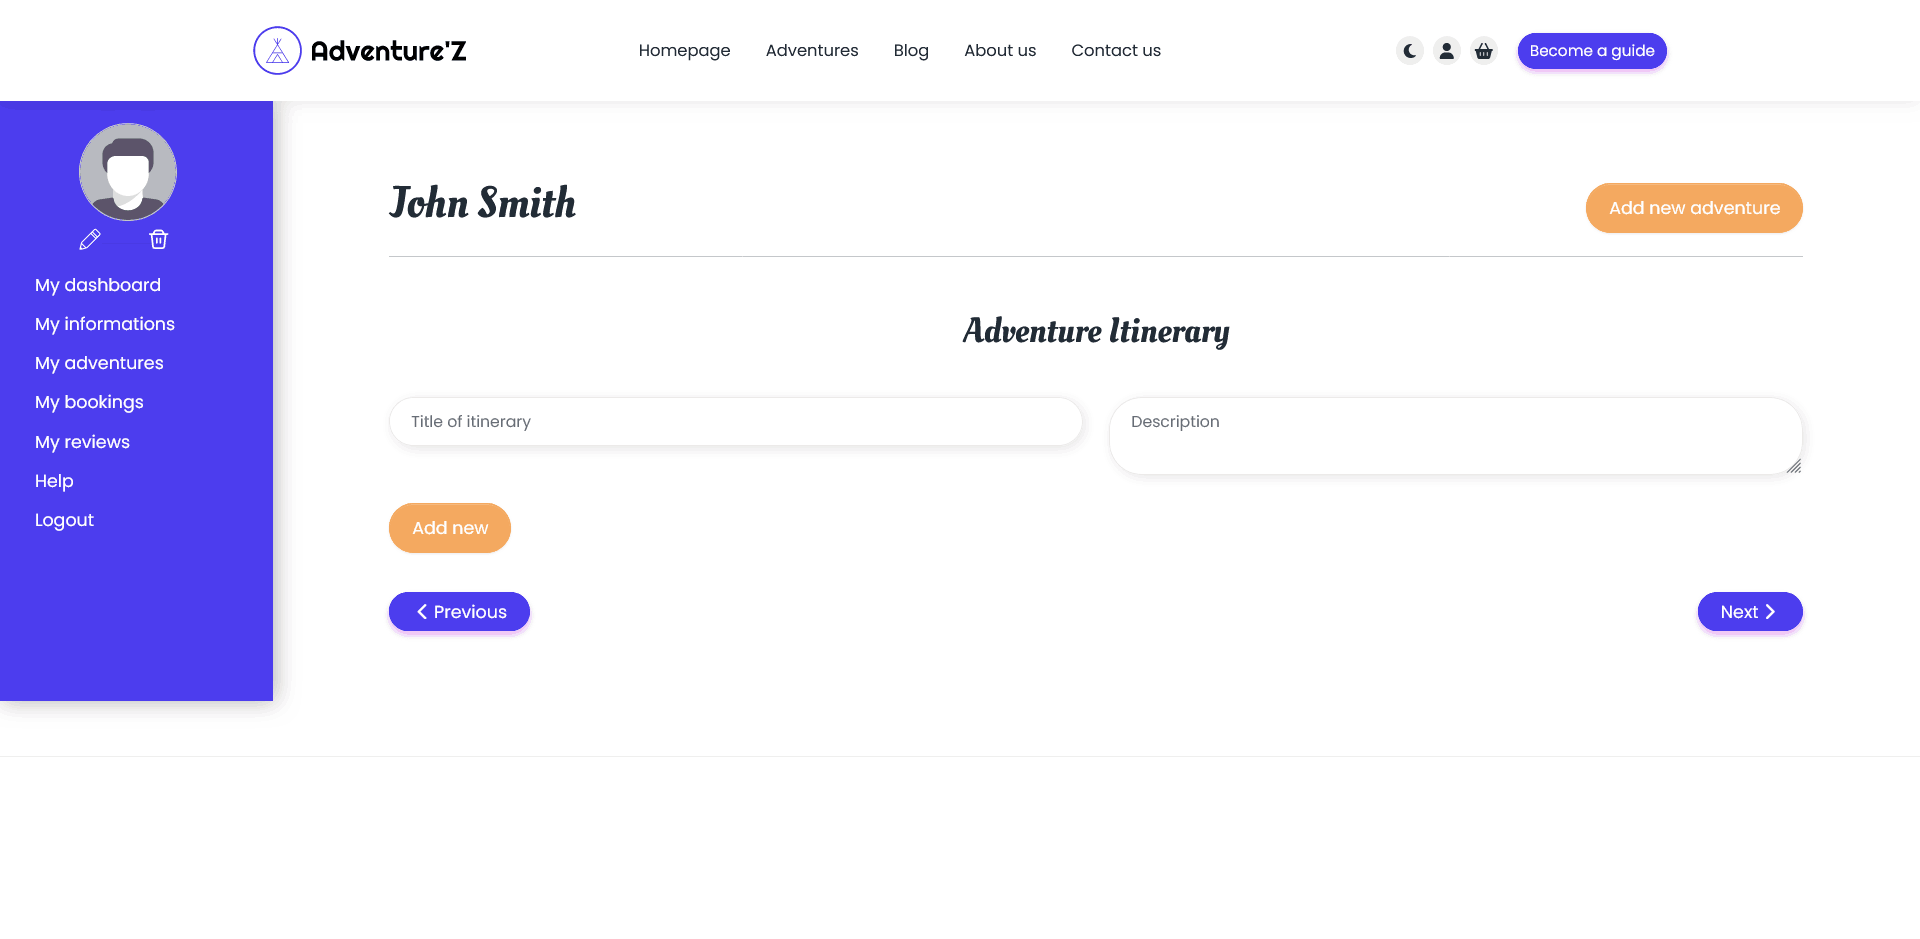
If you want to add an adventure itinerary
If you want to add an adventure FAQ

Add available dates for the adventure, you can use the bulk add feature
Images to upload for the adventure
The itineray and FAQ steps and the video and location fields, as well as the maximum number of images to upload, depend on the adventure mode selected.
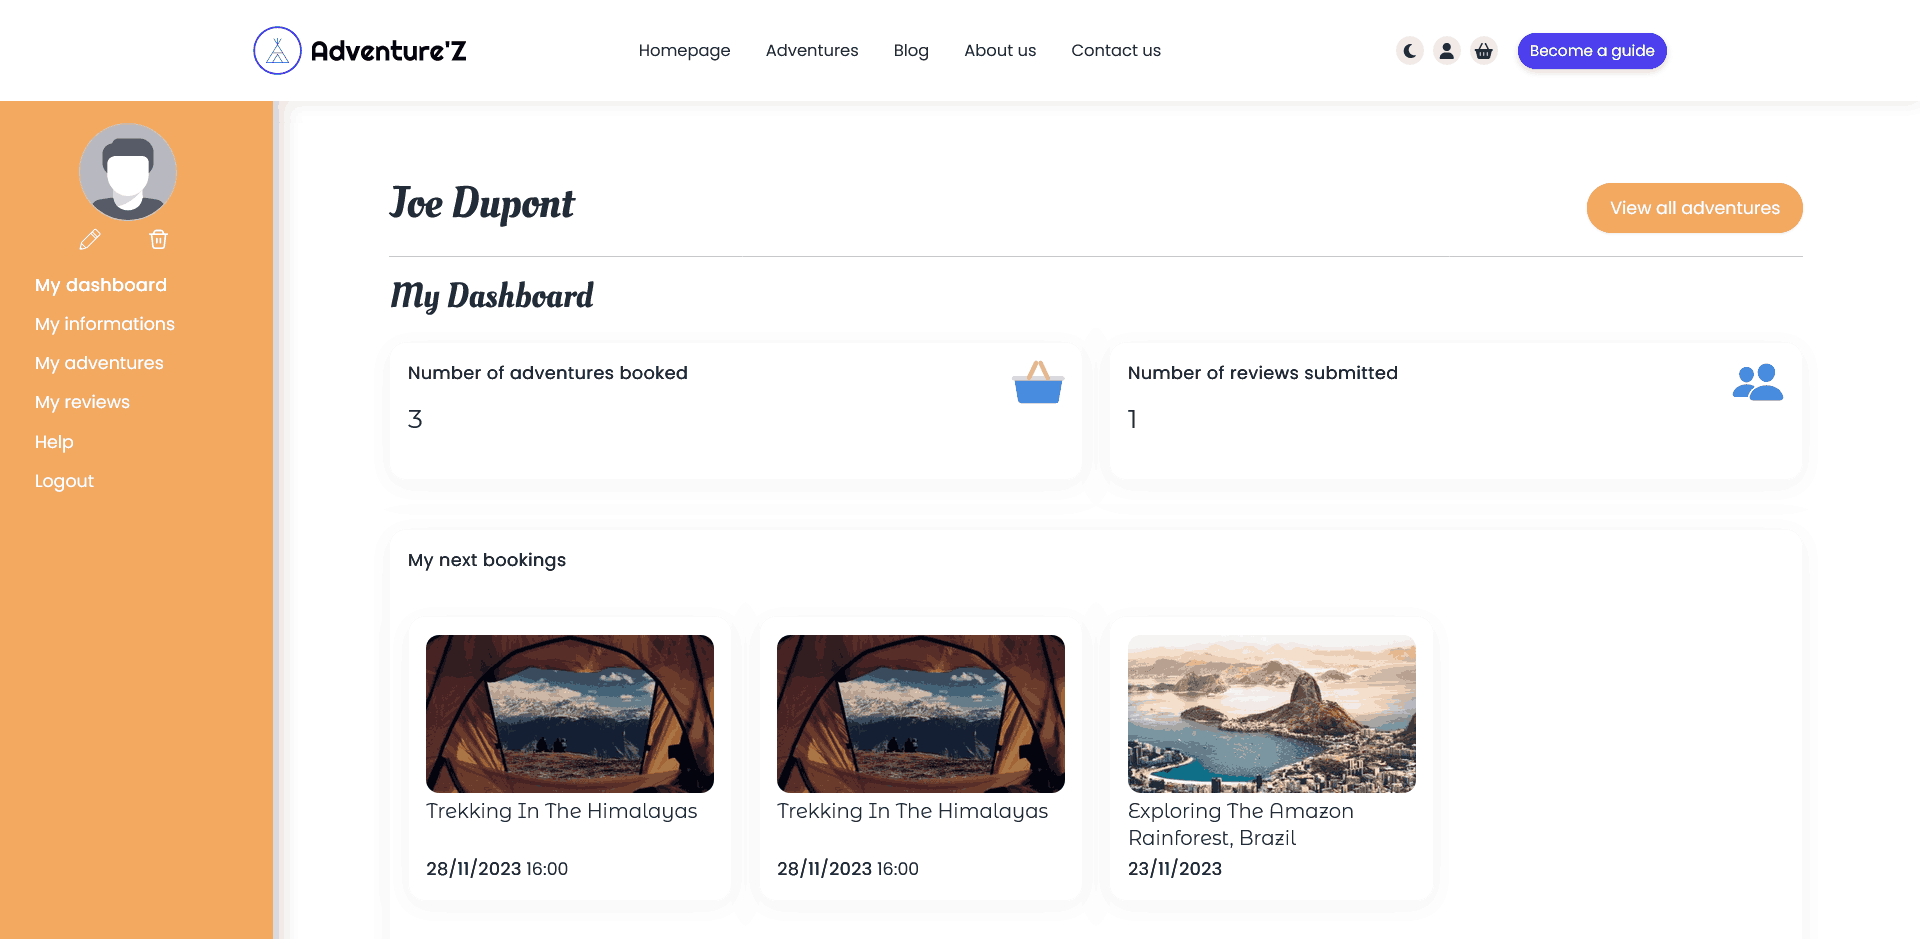
Adventurer can access their dashboard directly once their account has been activated by e-mail
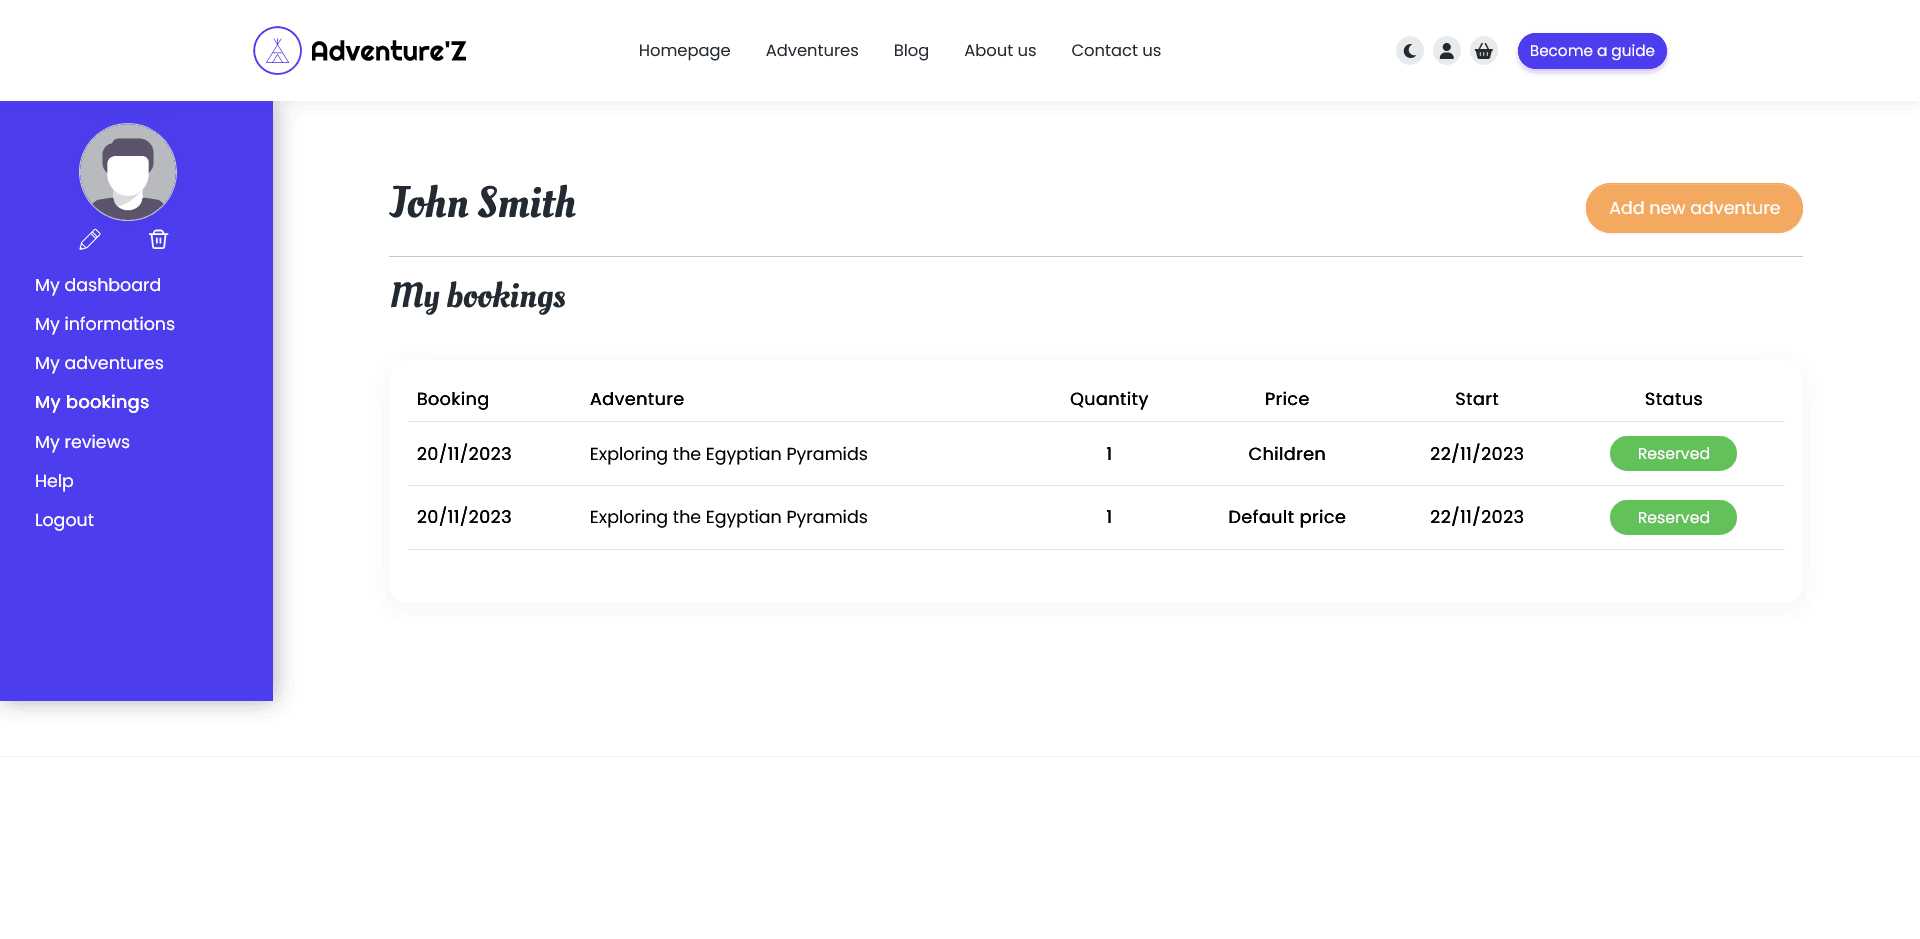
They can view statistics, upcoming bookings and reviews.
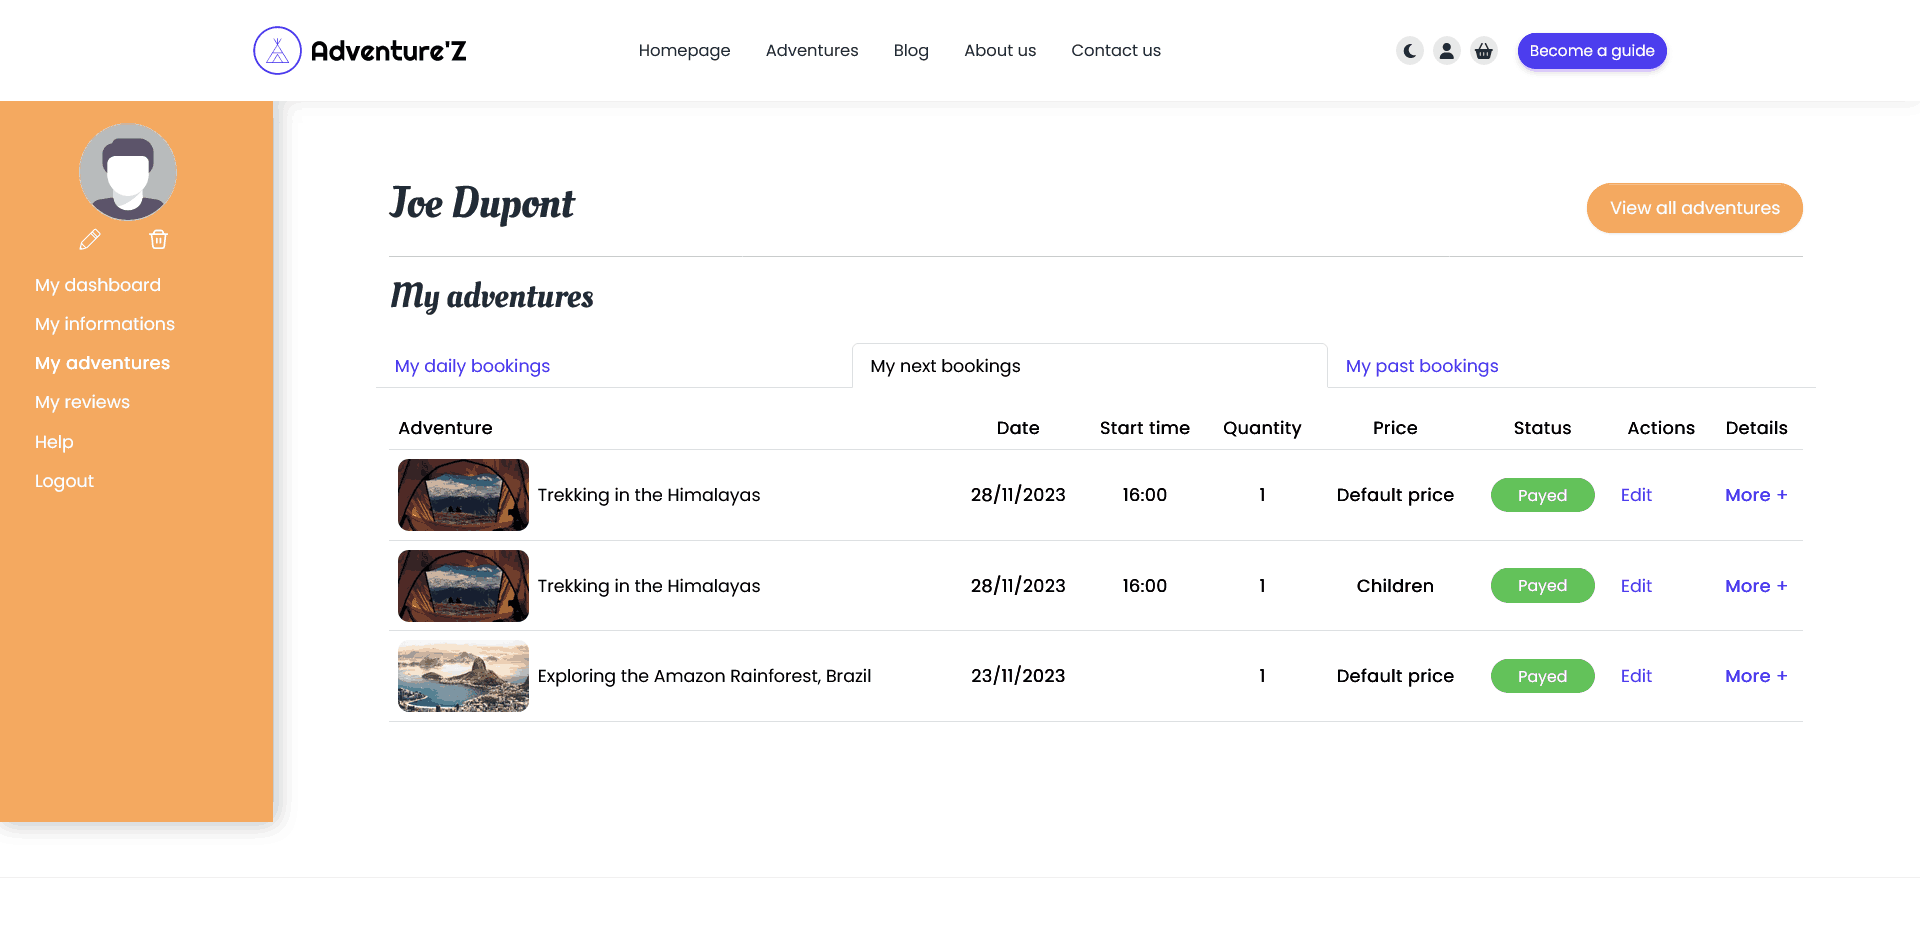
The 'my adventures' section consists of 3 tabs: today's bookings, upcoming bookings and past bookings.
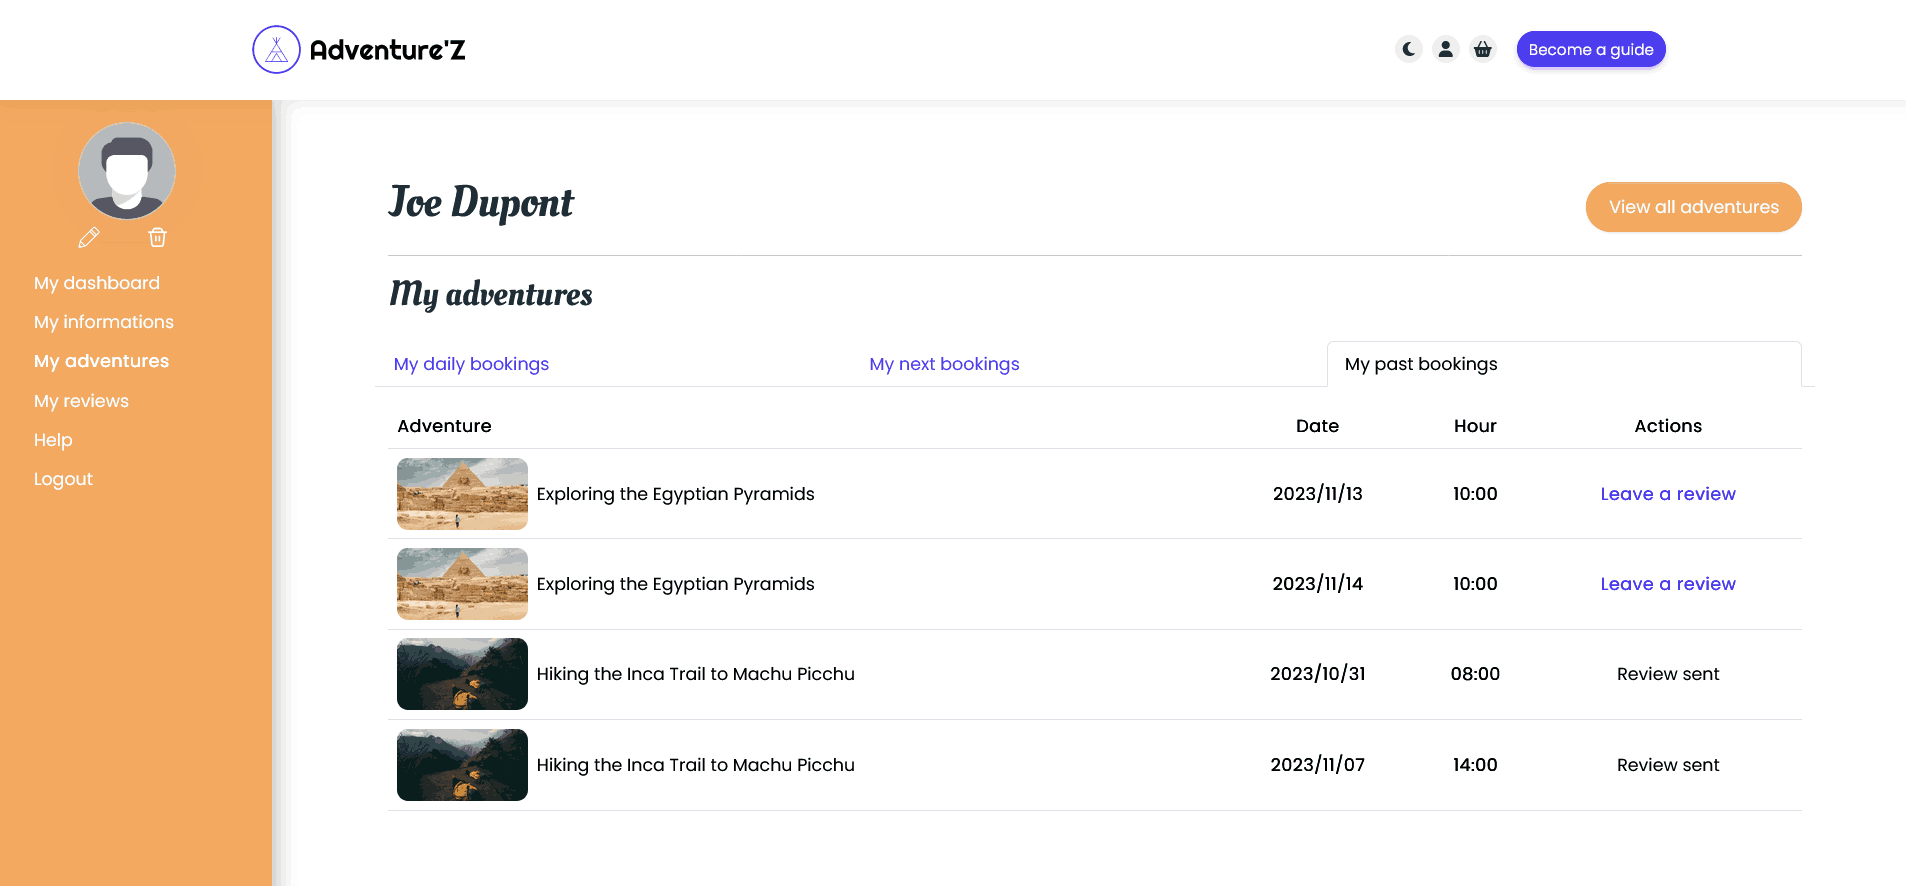
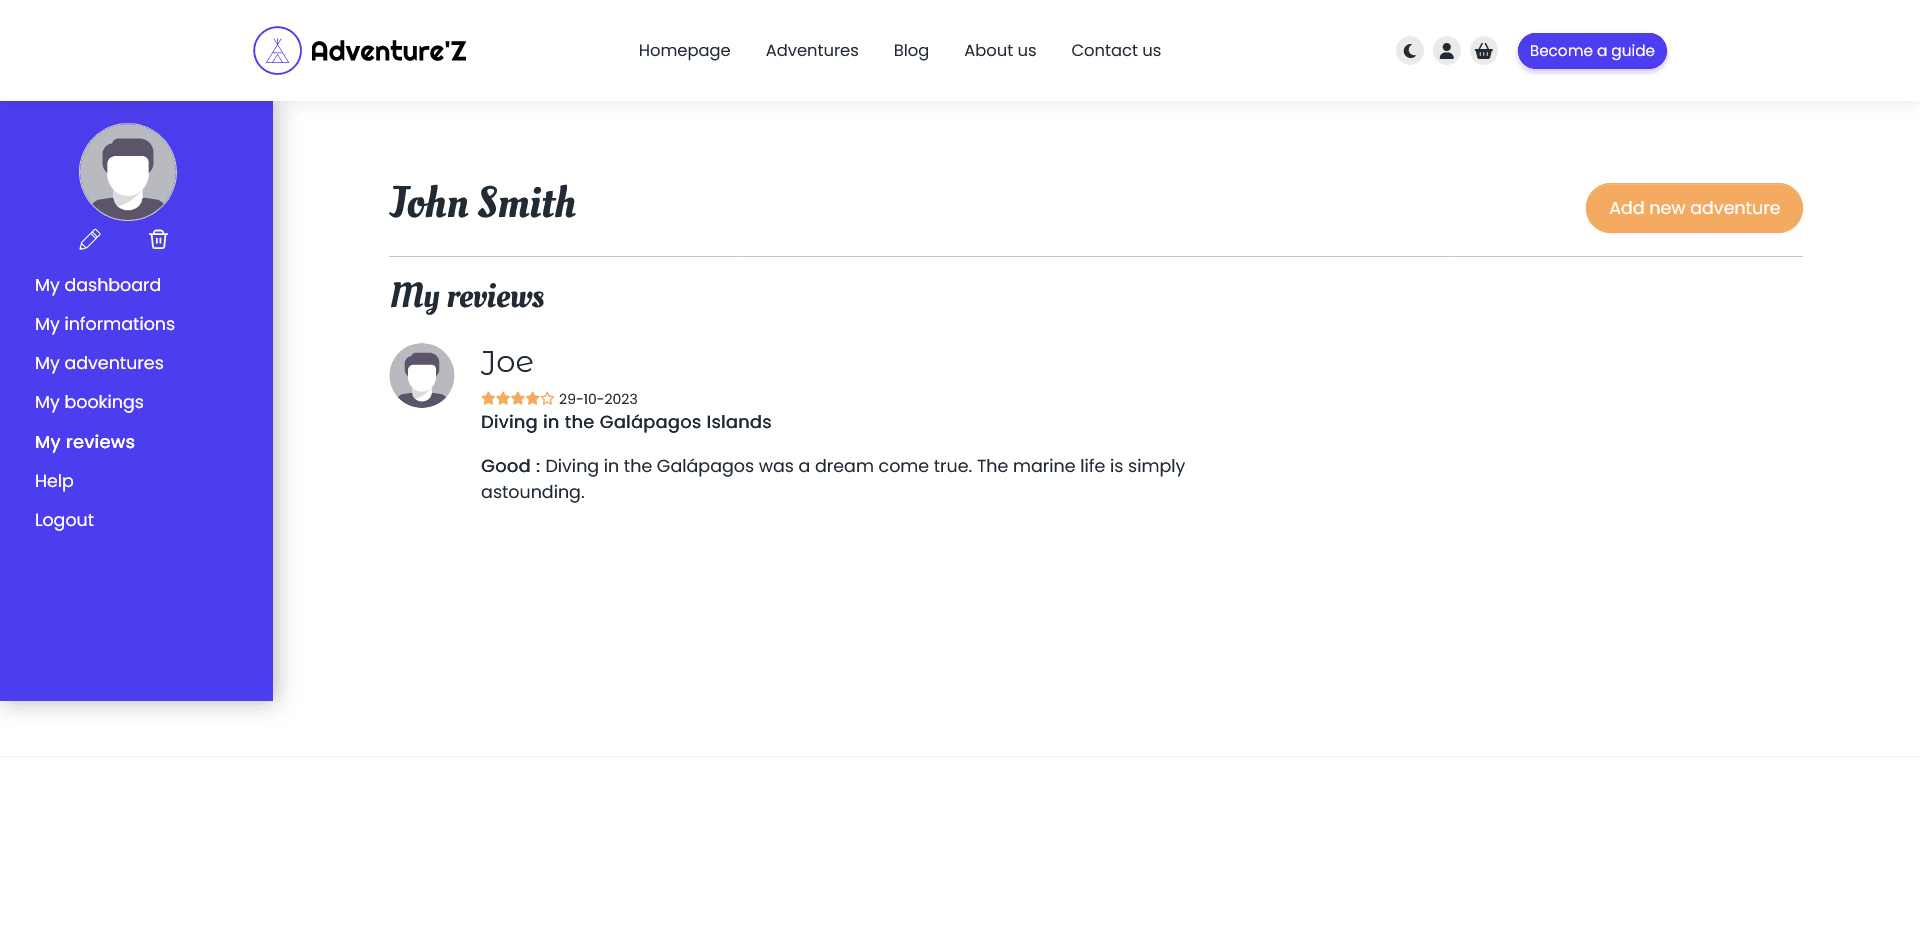
Only on past adventures can the adventurer leave a review

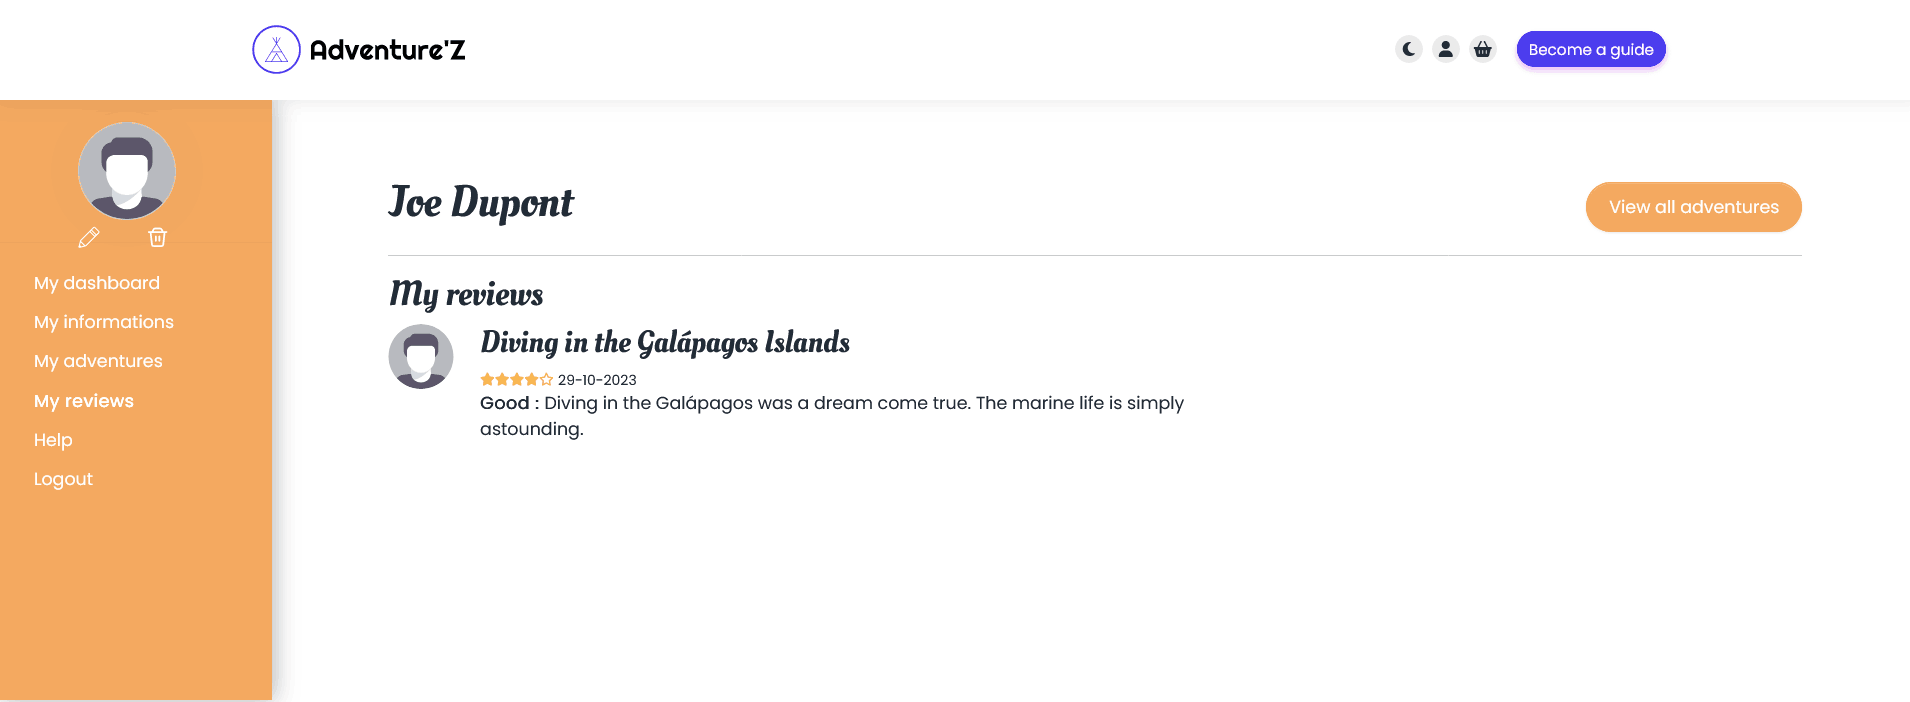
For the 'my reviews' page, the adventurer can see all his reviews on all the adventures.
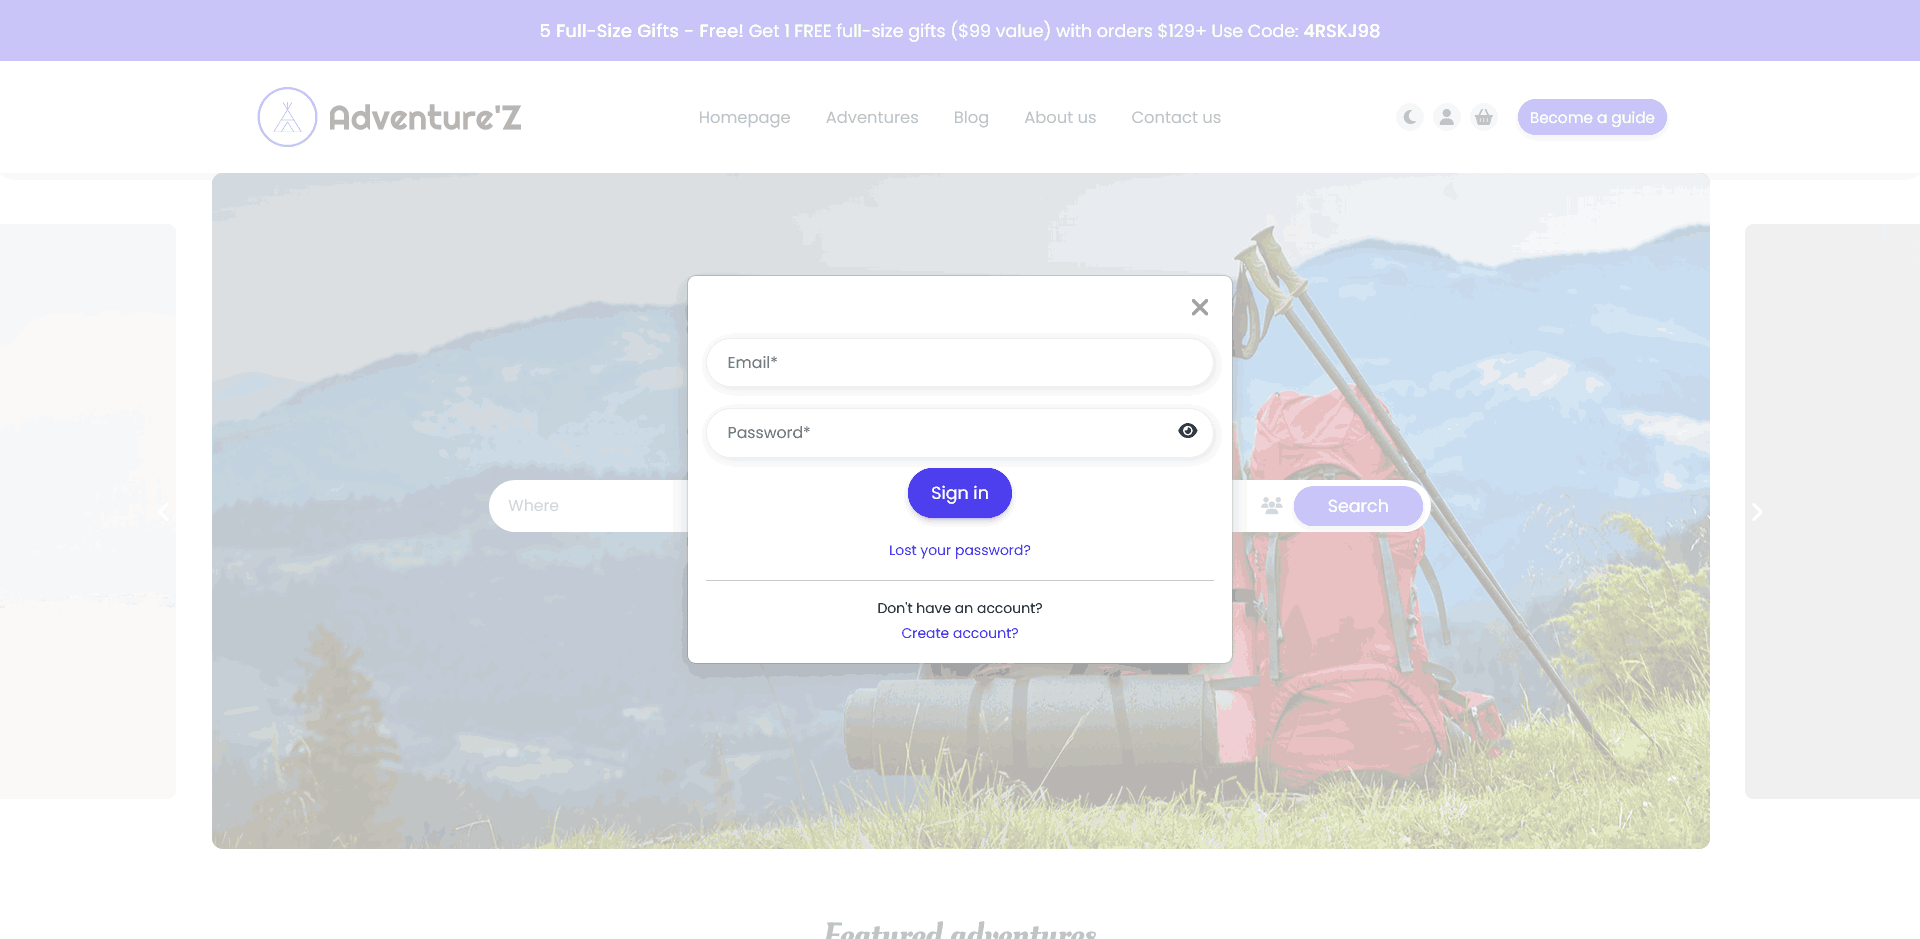
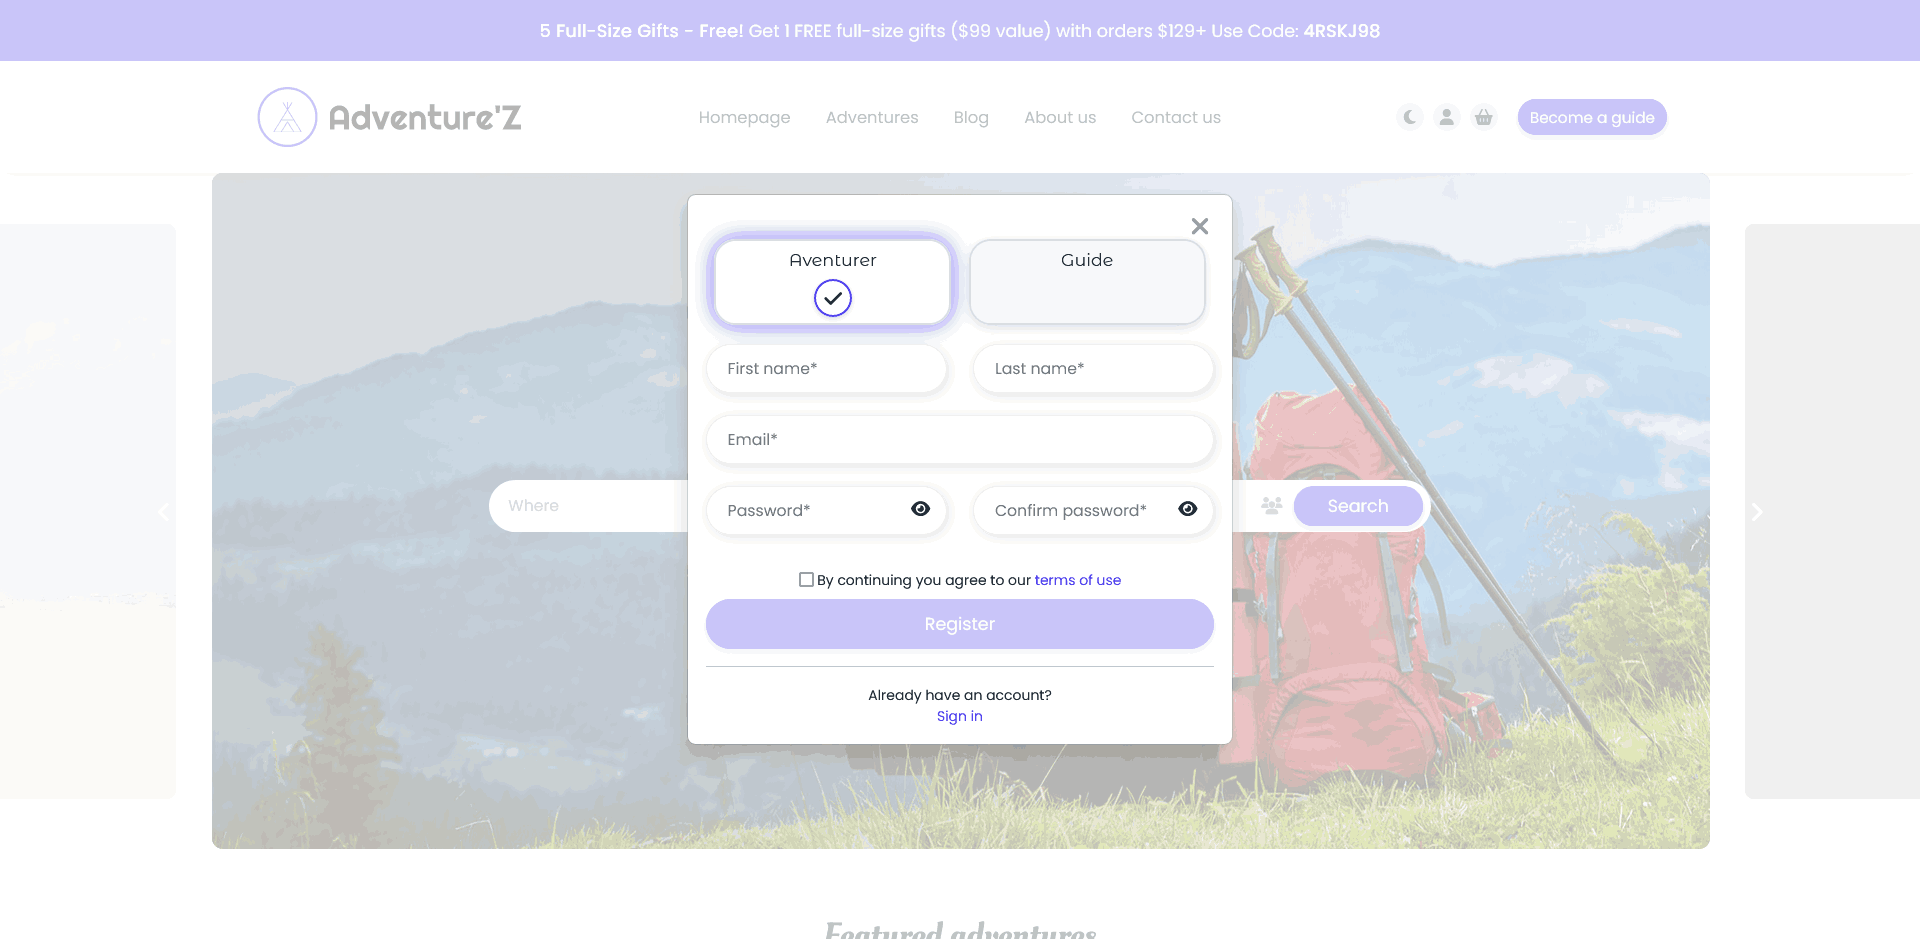
The login and register system is AJAX-based, and includes password reset and password length verification.